Create Custom Themes
Overview
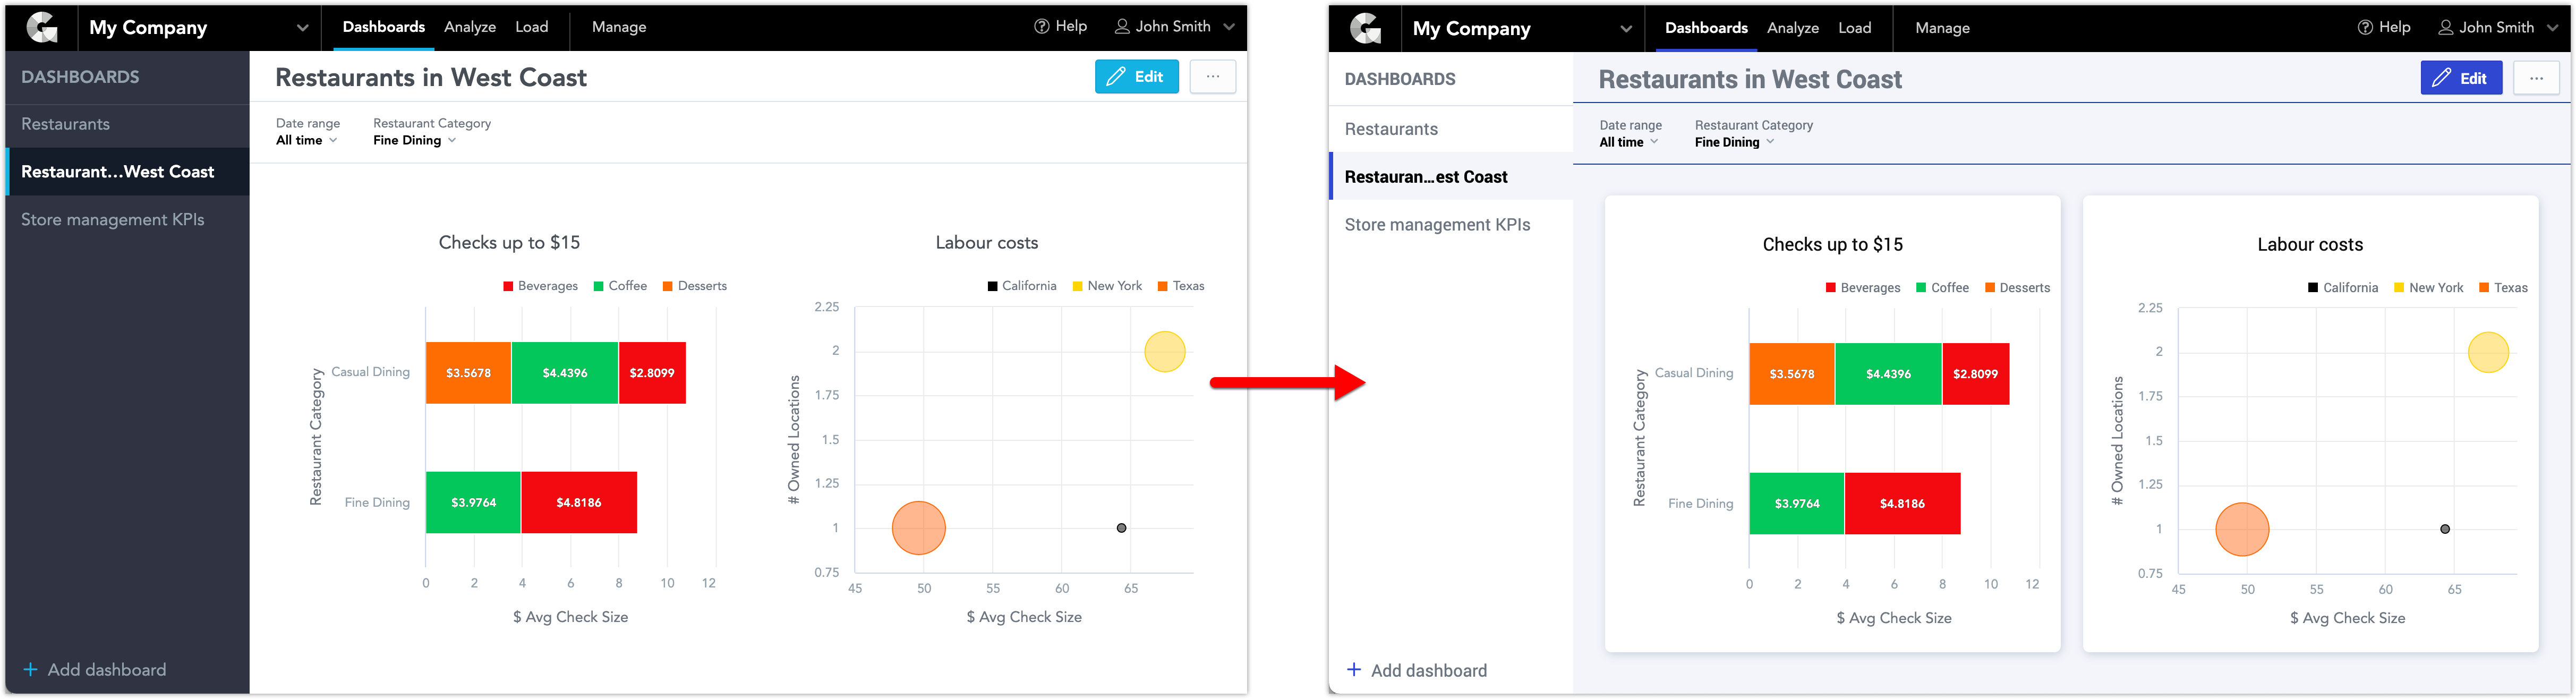
To customize the look of Dashboards and Analytical Designer, you can define a theme for your workspace.
Themes are JSON structures with CSS properties. You can use these properties to customize the visual elements, such as buttons, headings, dashboard content, and navigation.
Customizing your workspace appearance is a four-step process: Create-Upload-Activate-Edit.
You can upload multiple themes and then activate the one theme you want to use.
Apart from the custom themes, you can also define a custom color palette that to use in charts in Analytical Designer. For details, see Importing Custom Color Palettes.
If you manage your workspaces through Life Cycle Management, see Manage Themes with Life Cycle Management.
Step 1: Define custom themes
Based on your requirements, define the properties that you want to update. You can update any number of the properties (only one, or a subset, or all of them). The properties that you do not define in the JSON structure remain intact.
For details about individual properties and the complete JSON theme structure, see Theme Properties.
For ready-to-use examples, see Theme Examples.
Example structure:
{
   "theme" : {
      "content" : {

 CUSTOM THEME DEFINITION

         },
      "meta" : {
         "category" : "theme",
         "deprecated" : "0",
         "isProduction" : 1,
         "summary" : "",
         "tags" : "",
         "title" : "YOUR THEME NAME"
      }
   }
}
If your theme is created, proceed to upload.
Step 2: Upload custom themes
This article assumes that you access your workspaces at https://secure.gooddata.com/.
- If you are a GoodData Growth user, replace
secure.gooddata.comwith the domain from the link that you received in your GoodData confirmation email (for example,yourcompanyname.na.gooddata.com). - If you are a white-labeled customer, replace
secure.gooddata.comwith your white-labeled domain.
In GoodData, terms workspace and project denote the same entity. For example, project ID is exactly the same as workspace ID. See Find the Workspace ID.
To upload a theme to your workspace, follow these steps:
- Go to
https://secure.gooddata.com/gdc/md/{workspace_ID}/objYou can find your workspace ID in the URL. In the following image, the workspace ID ise863ii0azrnng2zt4fuu81ifgqtyeoj21.For additional details about your workspace ID (also called project ID), see Find the Workspace ID.
- Paste your code for the theme in Object definition.
- Click submit. A confirmation page with a link to your theme is displayed.
- Proceed to activation.
Uploading themes with this procedure always creates a new theme. If you want to change an already uploaded theme, see Step 4: Edit custom themes below.
Step 3: Activate custom themes
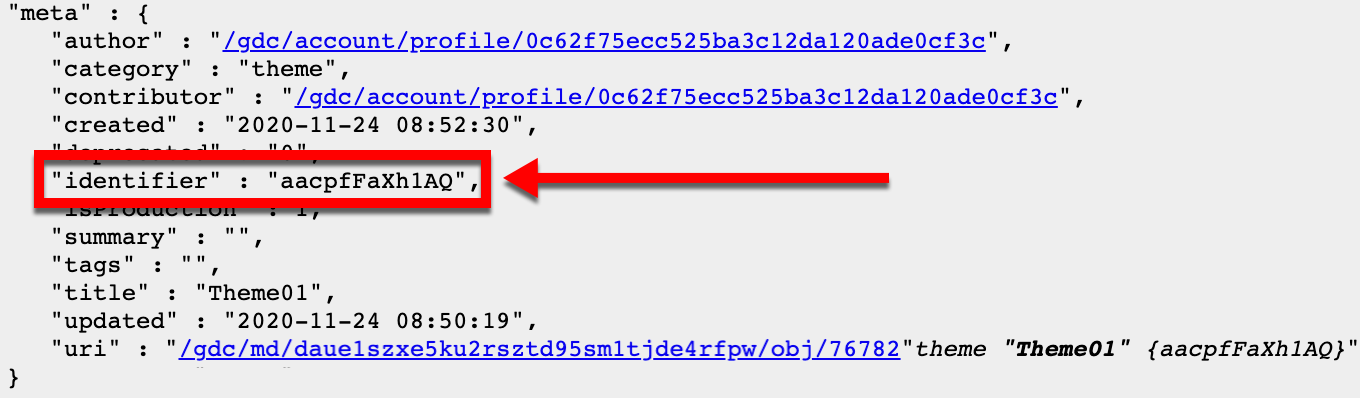
Once you submit a theme, it acquires a unique identifier. Use this identifier to activate the theme.
You can locate the identifier in the meta section of the theme code at https://secure.gooddata.com/gdc/md/{workspace_ID}/query/themes
To activate your custom theme on the GoodData Portal, you must set the selectedUiTheme platform setting to match the identifier of the theme.
Go to
https://secure.gooddata.com/gdc/projects/{workspace_id}/config/.At the bottom of the page in the Key field, type
selectedUiTheme.In the Value field, type the theme identifier.
Click Create/Update config. Now your selected theme is configured and your Dashboards and Analytical Designer use the new settings.
Proceed to edit your theme if necessary.
To revert to the default GoodData theme, save the platform setting with an empty Value field.
Step 4: Edit custom themes
If you need to edit an already uploaded theme, follow these steps:
- Go to
https://secure.gooddata.com/gdc/md/{workspace_id}/query/themes. You can find your workspace ID in the URL. In the following image, the workspace ID ise863ii0azrnng2zt4fuu81ifgqtyeoj21.For additional details about your workspace ID (also called project ID), see Find the Workspace ID. - Click on a theme that you want to edit.
- Add
?mode=editto the theme URL in your browser. The address may look as follows:https://secure.gooddata.com/gdc/md/daue1szxe5ku2rsztd95sm1tjde4rfpw/obj/76785?mode=edit - Edit the theme.
- Click submit.
You can also change the theme identifier in the meta section. The identifier must contain alphanumeric characters.