Integrate a Data Source for a Data Warehouse
This article will explain how to connect the Data Source to your GoodData workspace when you store your source data in a cloud data warehouse.
You can directly connect Data Sources for the following data warehouses:
- Amazon Redshift
- Google BigQuery
- Microsoft Azure SQL Database
- Microsoft Azure Synapse Analytics
- Microsoft SQL Server
- MongoDB Connector for BI
- MySQL
- PostgreSQL
- Snowflake
Each data warehouse has different integration requirements. Before you connect a data warehouse to your workspace, ensure that GoodData can communicate with the Data Source created for your data warehouse.
Prerequisites
Before you start, make sure that you have the following in place:
An active GoodData account that you are logged in to with at least one active workspace
A GoodData workspace If you do not know how to create one, see Create Workspaces.
Access to a supported data warehouse with source data
To better understand how GoodData processes rows and columns, we recommend that you use our sample data for your first integration. For more information, see Import Sample Data to Your Data Source.
Tasks You Will Perform
In this article, you will complete the following tasks:
- Create a Data Source.
- Connect the Data Source with your GoodData workspace.
- Create a logical data model (LDM).
Create a Data Source
A Data Source is a place in your GoodData workspace that stores the information about the connection with your data warehouse.
Select your source data warehouse and learn what details you need to establish a connection between your GoodData workspace and your data warehouse.
Azure SQL Database
Azure Synapse Analytics
BigQuery
Microsoft SQL Server
MongoDB Connector for BI
MySQL
PostgreSQL
Redshift
Snowflake
Steps:
The screenshots in the following steps use the Snowflake Data Source, but the steps are the same for each Data Source.
On the top navigation bar, select Data.
The LDM Modeler opens.
Click Sources.
The Data Source page opens.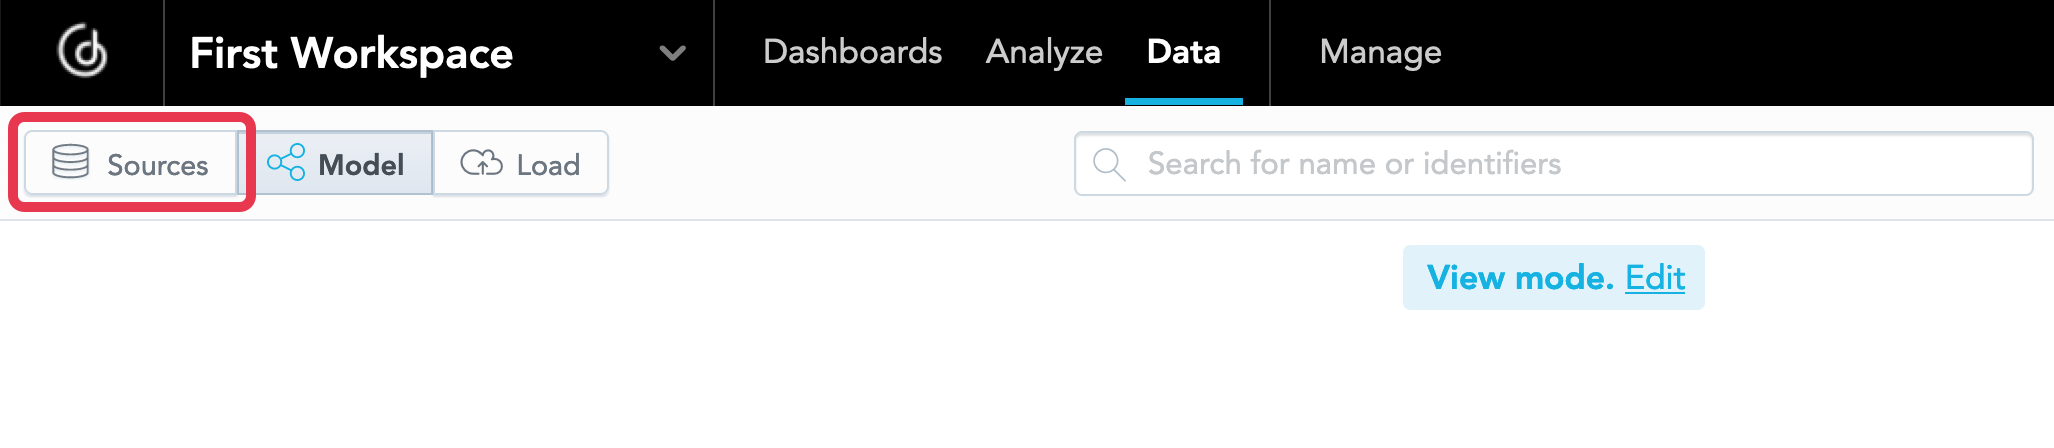
Select the Data Source to connect to your workspace.
Provide the required information.
BigQuery only
- If you have a service account key, click Browse and navigate to the file and upload it.
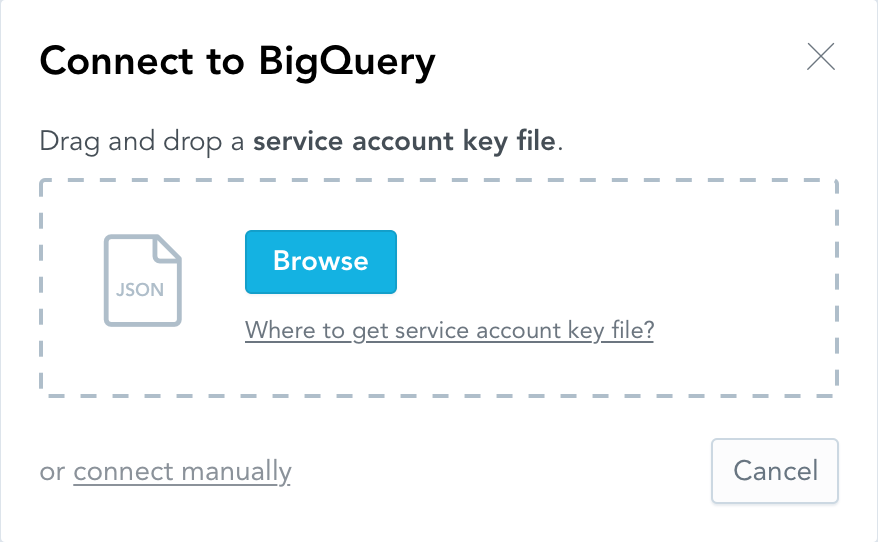
- If you want to enter the details manually, click connect manually and enter the details of your connection to the BigQuery project.
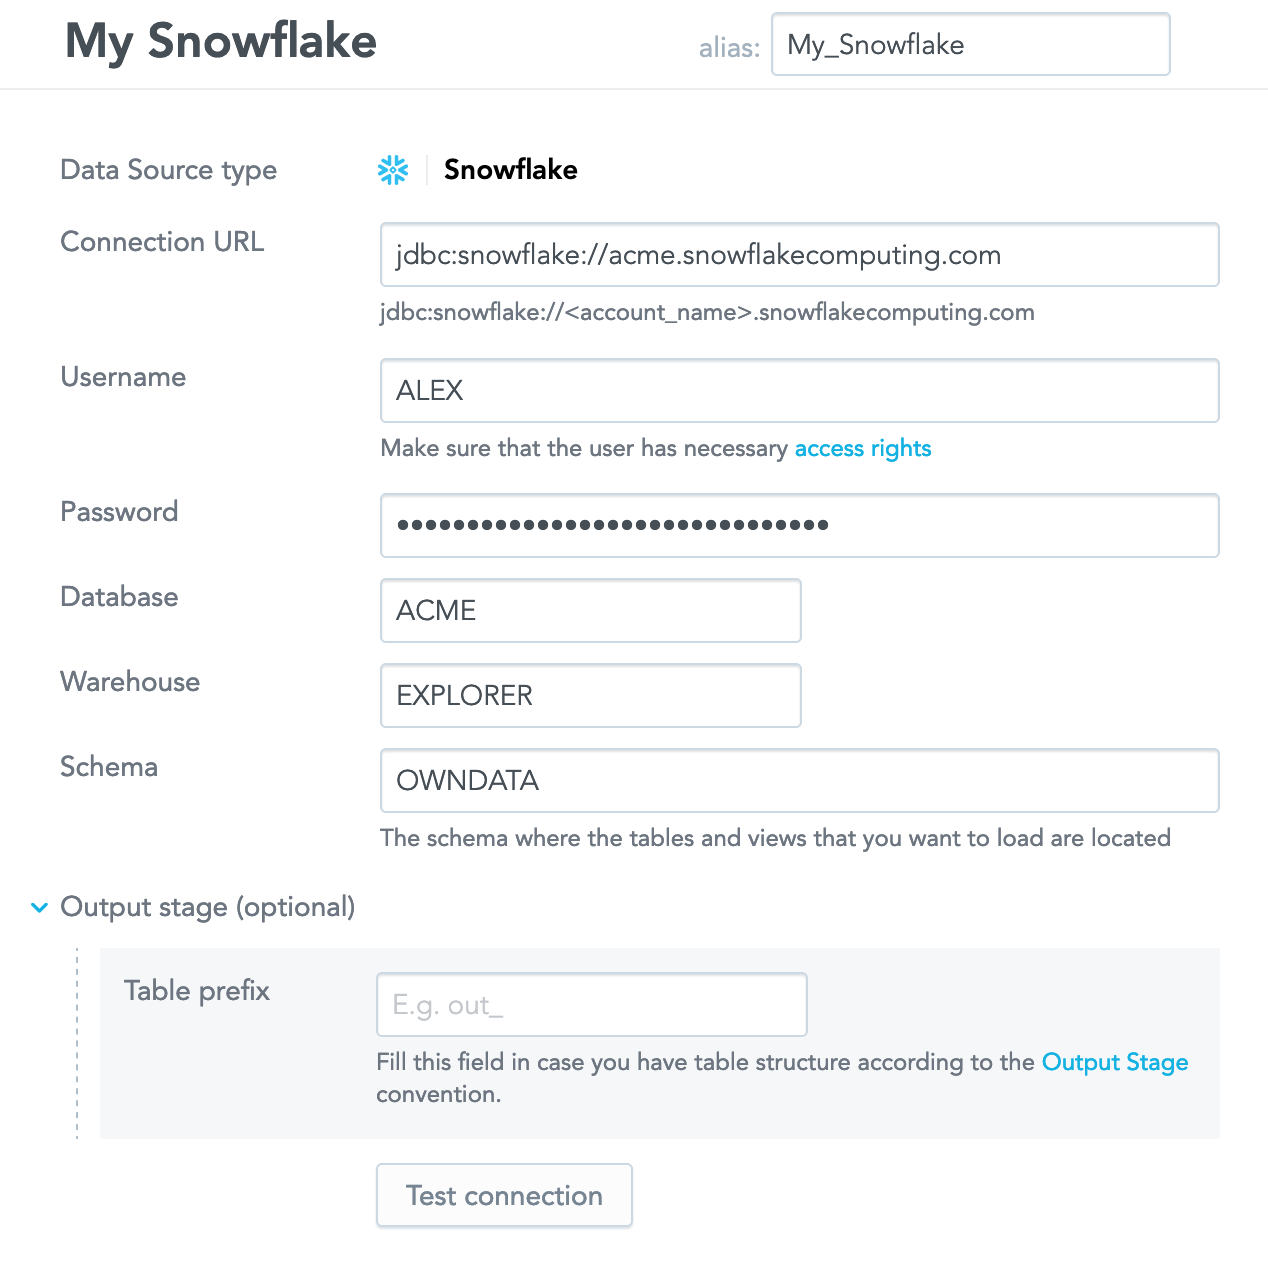
Click Test connection. The GoodData platform verifies whether it can connect to the data warehouse using the provided information. If the connection succeeds, the confirmation message appears. No data is loaded from the data warehouse at this point.
(Optional) Provide the prefix for the tables in the Output Stage.
Use the Output Stage if you cannot or do not want to download the data directly from the production tables in your data warehouse. For more information, see Direct Data Distribution from Data Warehouses and Object Storage Services.Click Save. The Data Source is created. The screen with the connection details opens.
For detailed information about creating Data Sources, see Create a Data Source.
Connect the Data Source with Your GoodData Workspace
Once you verified that the connection between the Data Source and your workspace works, connect it to the LDM Modeler in your workspace.
Steps:
On the Data Source details page, click Connect.
The LDM Modeler opens. The Data Source is connected to the LDM Modeler, and the tables and views from the data warehouse are listed in the left panel.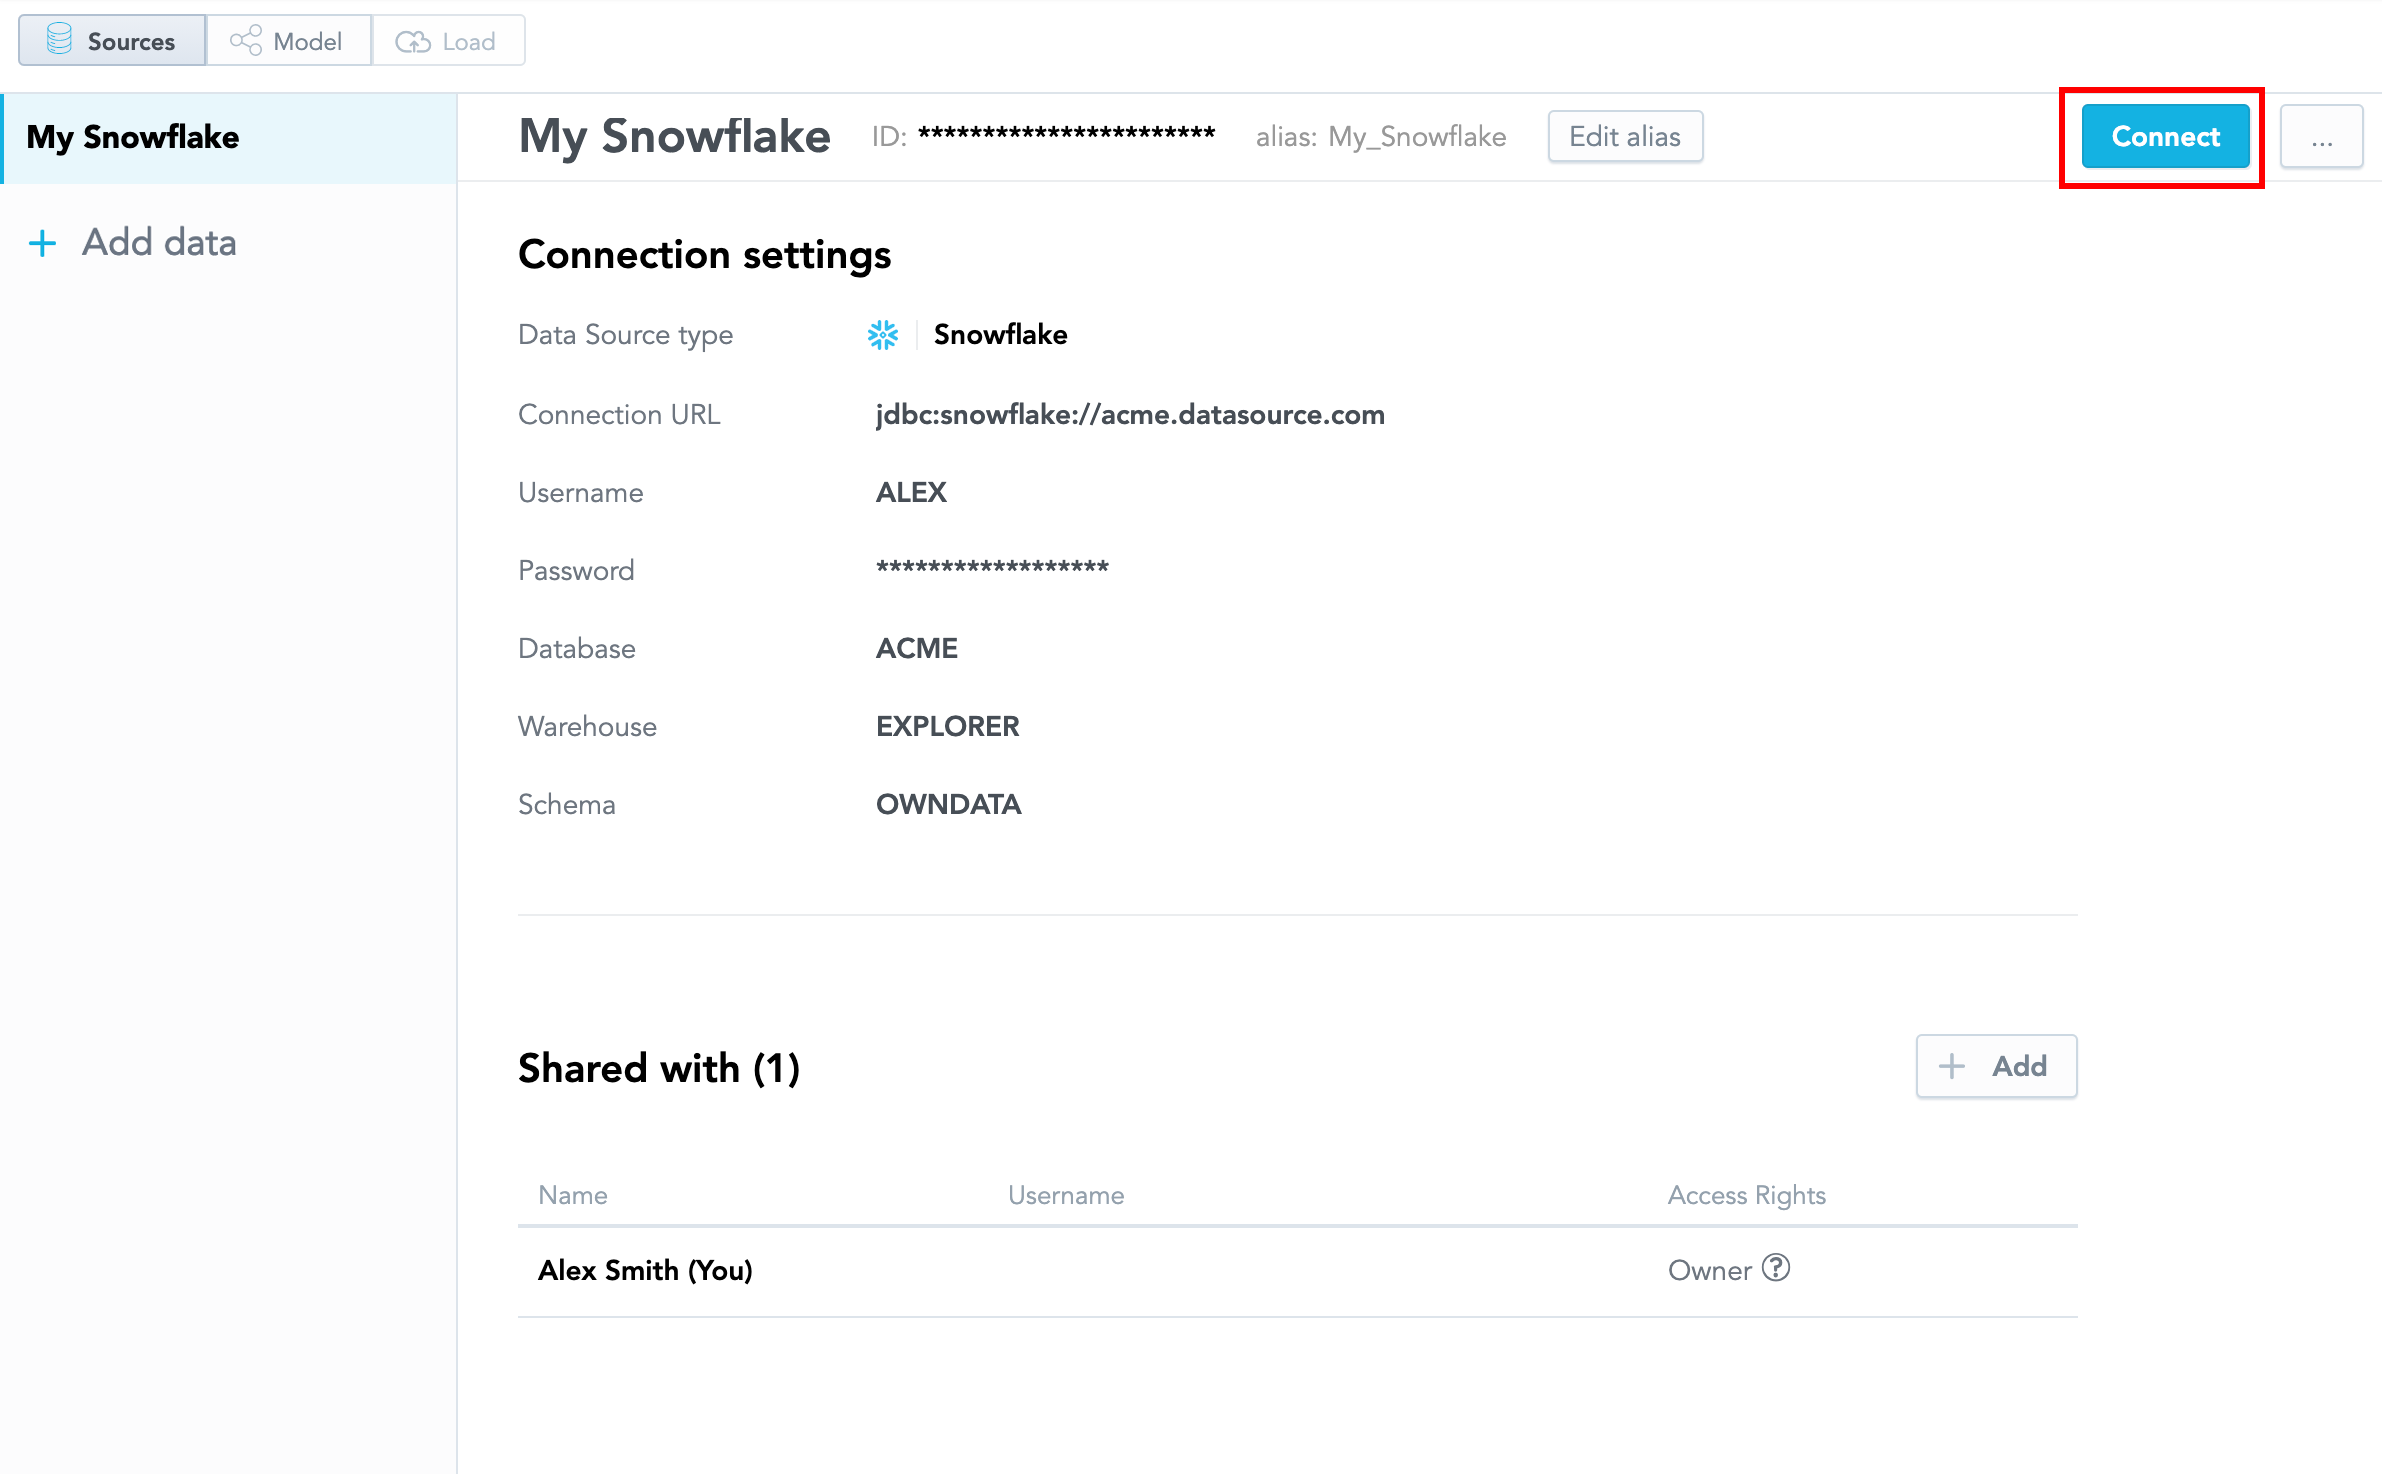
To add a dataset, drag a table/view from the left panel and drop it in the blank canvas area.
A preview of the data similar to the following opens:
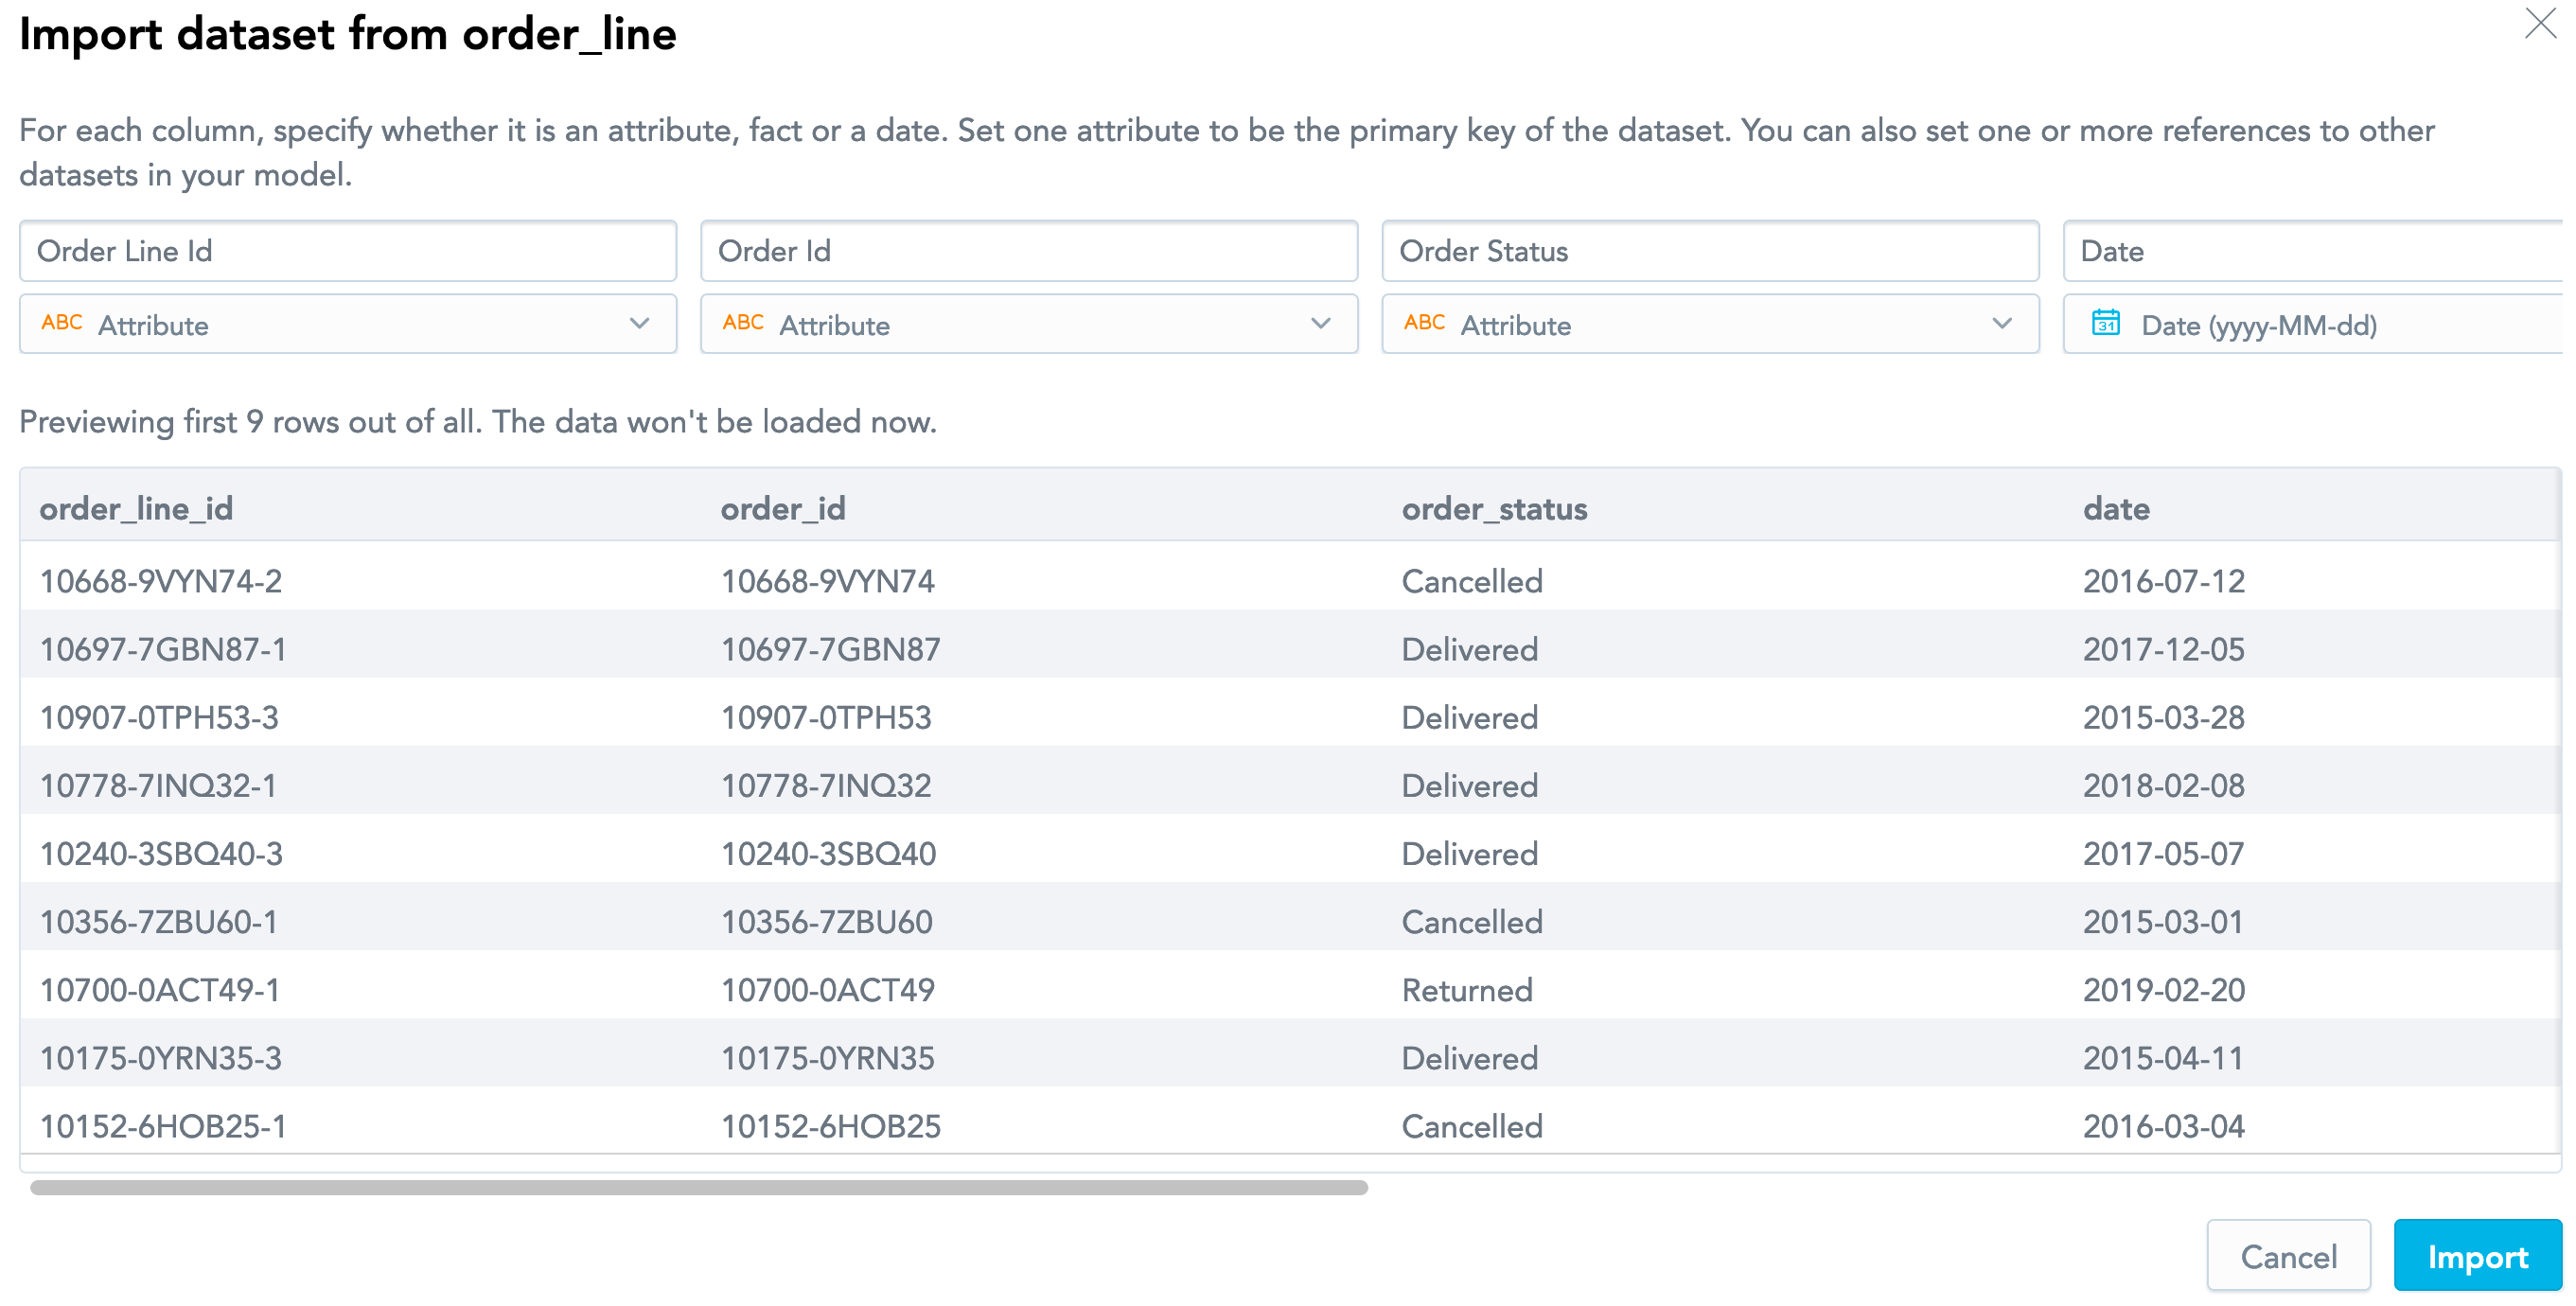
Notice what the columns are set to:
- The
order_line_id,order_id, andorder_statuscolumns are correctly detected as attributes. - The
datecolumn is correctly detected as dates in theyyyy-MM-ddformat and will be converted to a separate Date dataset. - The
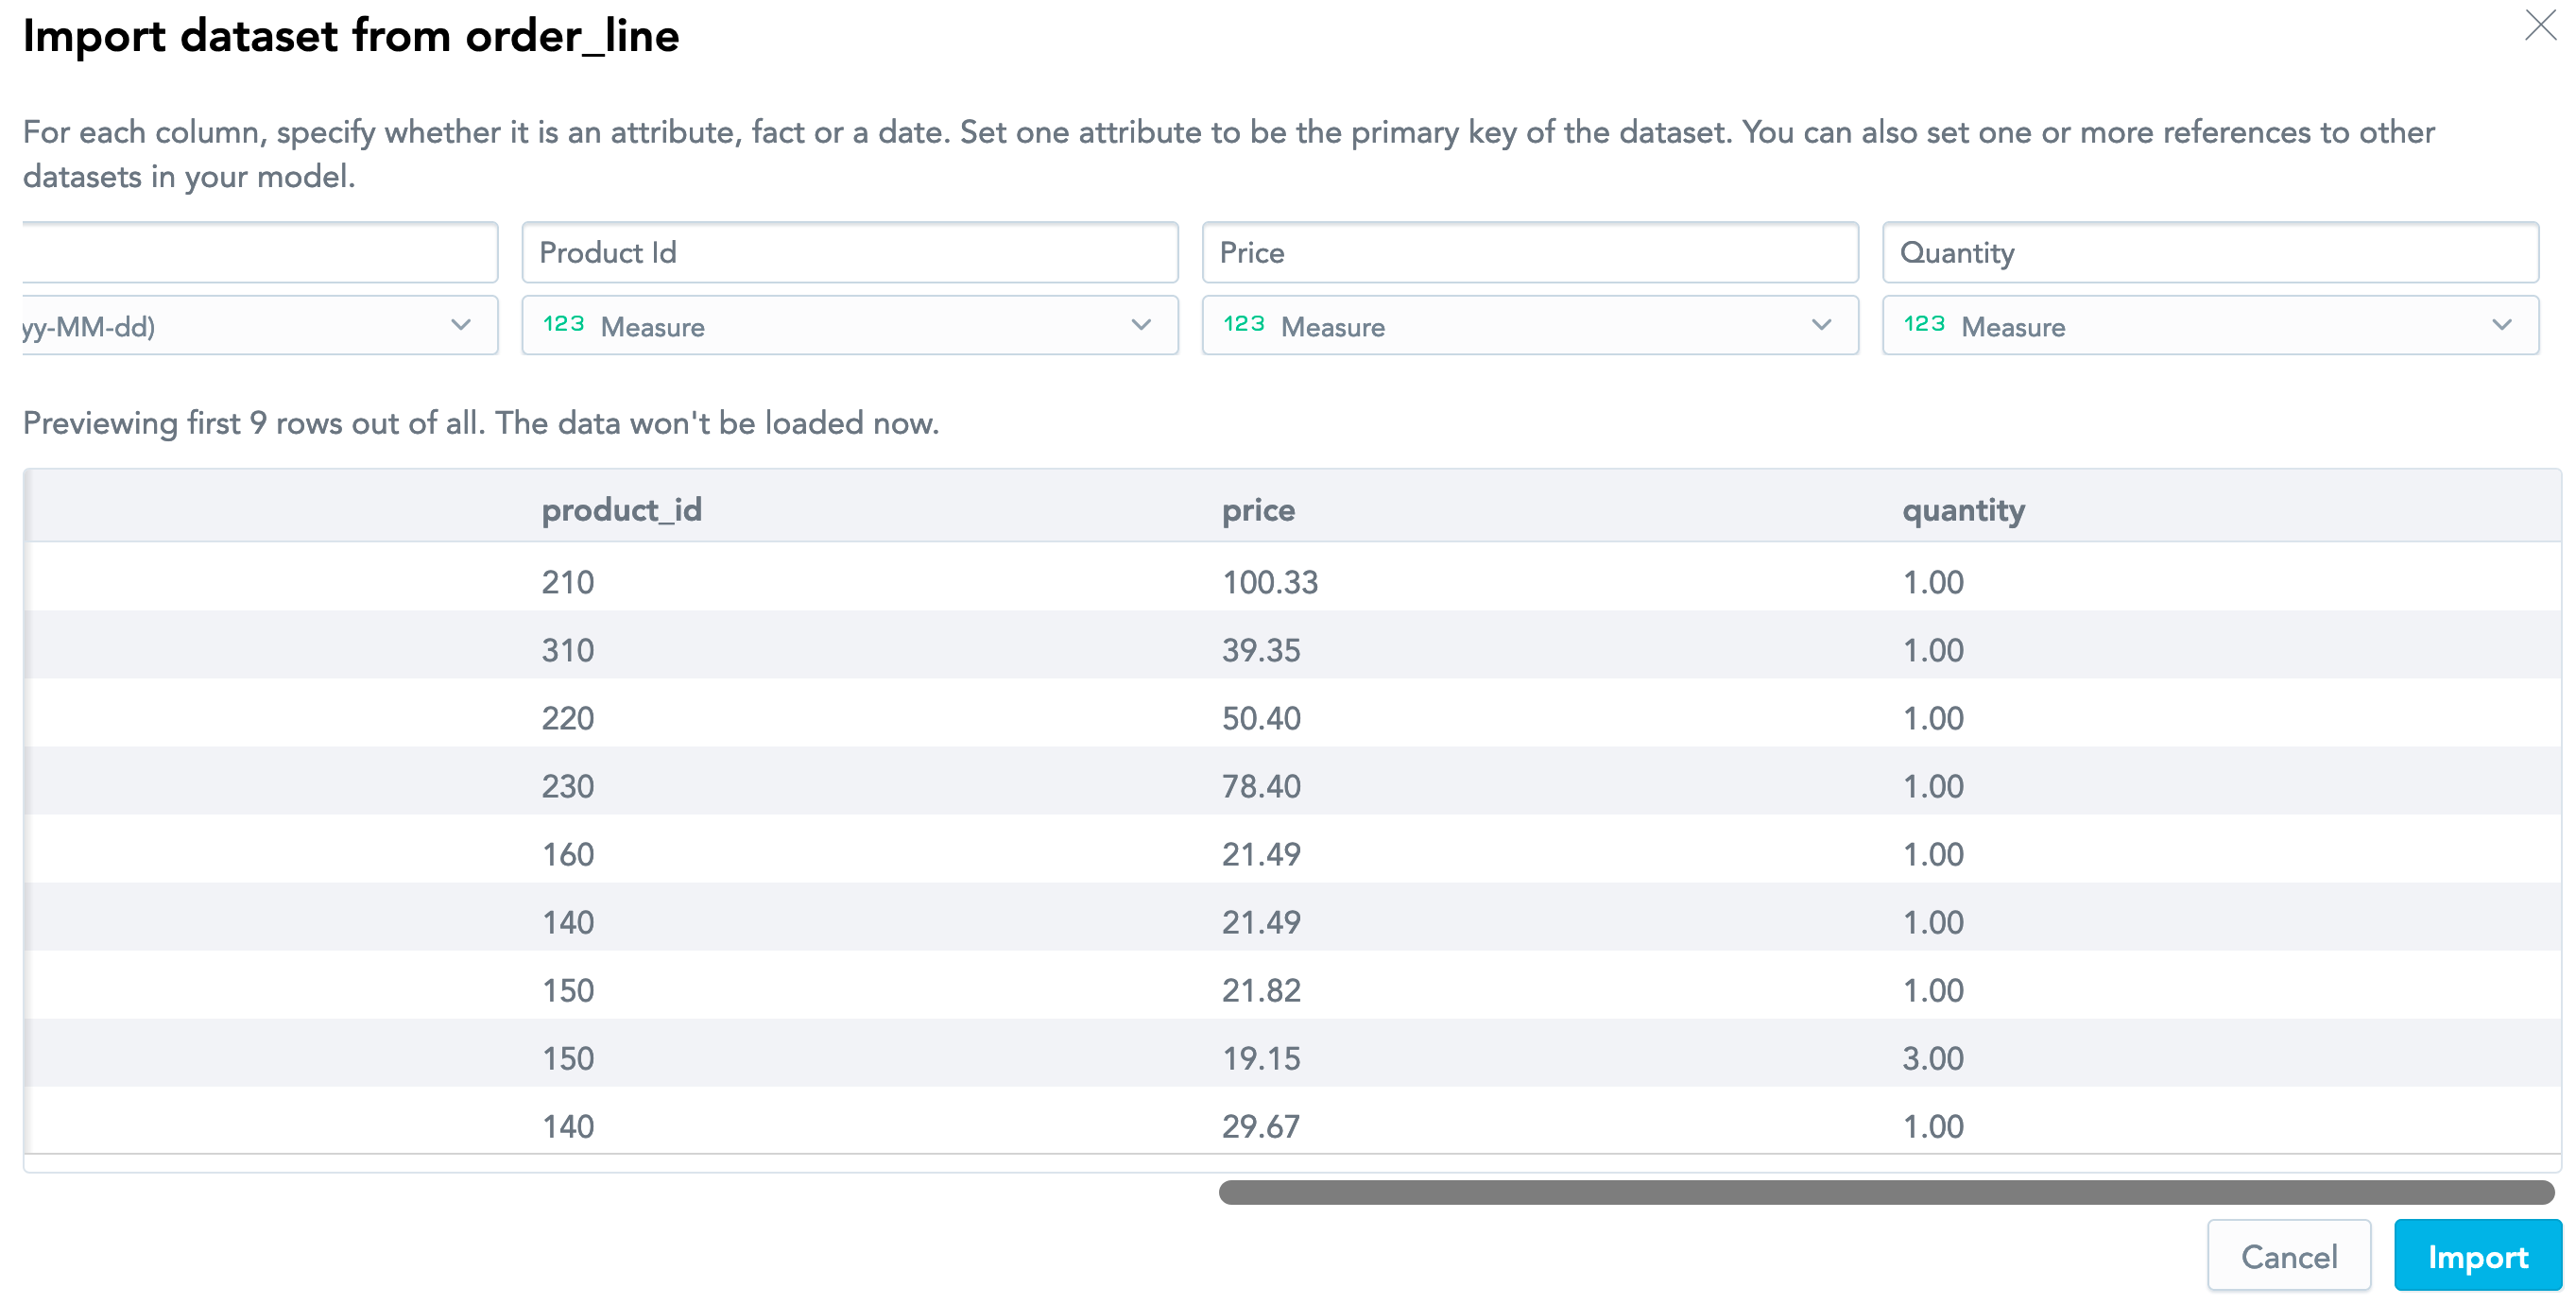
priceandquantitycolumns are correctly detected as facts.
- The
If the preview shows a column with numerical values that cannot be used as a numerical constant in an equation (for example, product identifiers) but are detected as facts, set this column to be an attribute. In the example above,
Product IDis autodetected as a fact but it should be changed to an attribute.For more information about the data types and how to set them correctly, see Create a Logical Data Model from CSV Files.Verify that the information in the preview is correct, and click Import. A dataset is added. The LDM Modeler displays the structure of the dataset.
If the table/view that you have imported contains dates, those dates will be imported as a separate Date dataset. These two datasets will be automatically connected with a relationship.To create each additional dataset, repeat Steps 2 through 5.
(Optional) Create a relationship between the datasets (see Create a Relationship between Datasets).
Publish the LDM (see Publish your Logical Data Model).
When the publishing is done, you can continue to scheduling a task for loading the data to your workspace (see Load Data from a Data Source to a GoodData Workspace).
For detailed information about creating an LDM based on a data warehouse, see Create a Logical Data Model from Your Cloud Data Warehouse.