Update a Logical Data Model
For workspace administrators only
In a typical workflow, you may need to update the logical data model (LDM) in your workspace from time to time using the LDM Modeler. For example, when you add a table to your source data, you have to add a dataset to your LDM to keep the source data and the LDM synchronized. You may need to establish new relationships between datasets or update properties of facts or attributes.
Updating the data model may include the following tasks:
- Add or delete datasets
- Add or delete relationships between datasets
- Add, delete, or move attributes and facts
- Edit attributes, attribute labels, and facts in a dataset and manage mapping between dataset fields and source columns
- Set a primary key in a dataset
Every time you update the LDM, you have to publish it to the workspace.
Open the Logical Data Model in the LDM Modeler
Steps:
- On the top navigation bar, select Data. The LDM Modeler opens in view mode.
- Click Edit. The LDM Modeler is switched to edit mode.
Update the LDM
Perform one or more updates as you need.
When you are working on your LDM:
- The changes are automatically saved as a draft as you are making them. The draft is saved under your GoodData user, on the machine and in the browser it was created, and you can continue editing it whenever you are ready. When the LDM Modeler saves your draft, it displays a message and the time the draft was last saved. The draft is kept until you either publish the changes to the workspace or manually discard the draft (in this case, the last published version of the LDM is loaded in the LDM Modeler).
- The LDM is validated as you are making changes. You are warned you if there is an issue (for example, an empty dataset or a dataset with a missing title).
Add a dataset manually
Steps:
- Drag Empty dataset from the left panel and drop it in the blank canvas area.
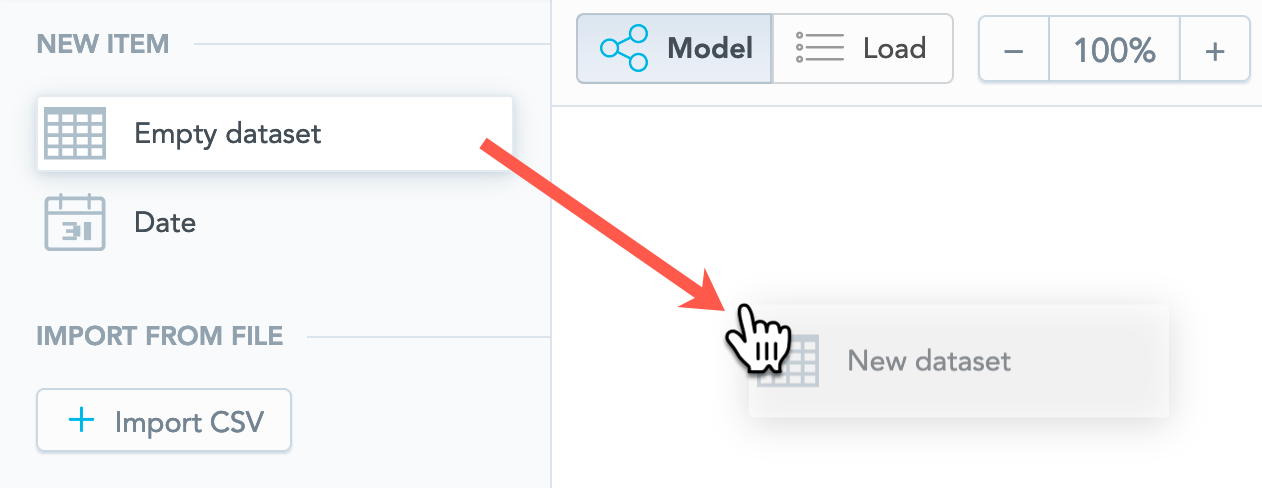
- Name the dataset.
Add a dataset from a CSV file
If you have a CSV file with data, you can use it to create a dataset. For more information, see Create a Logical Data Model from CSV Files.
Add a dataset from your data warehouse
You can use tables and views in your data warehouse (for example, Snowflake or Redshift) to create datasets. For more information, see Create a Logical Data Model from Your Cloud Data Warehouse.
Add a dataset from your cloud object storage service
You can use tables and views in your data warehouse (for example, S3 or Azure Blob Storage) to create datasets. For more information, see Create a Logical Data Model from Your Cloud Object Storage Service.
Update a dataset from a CSV file
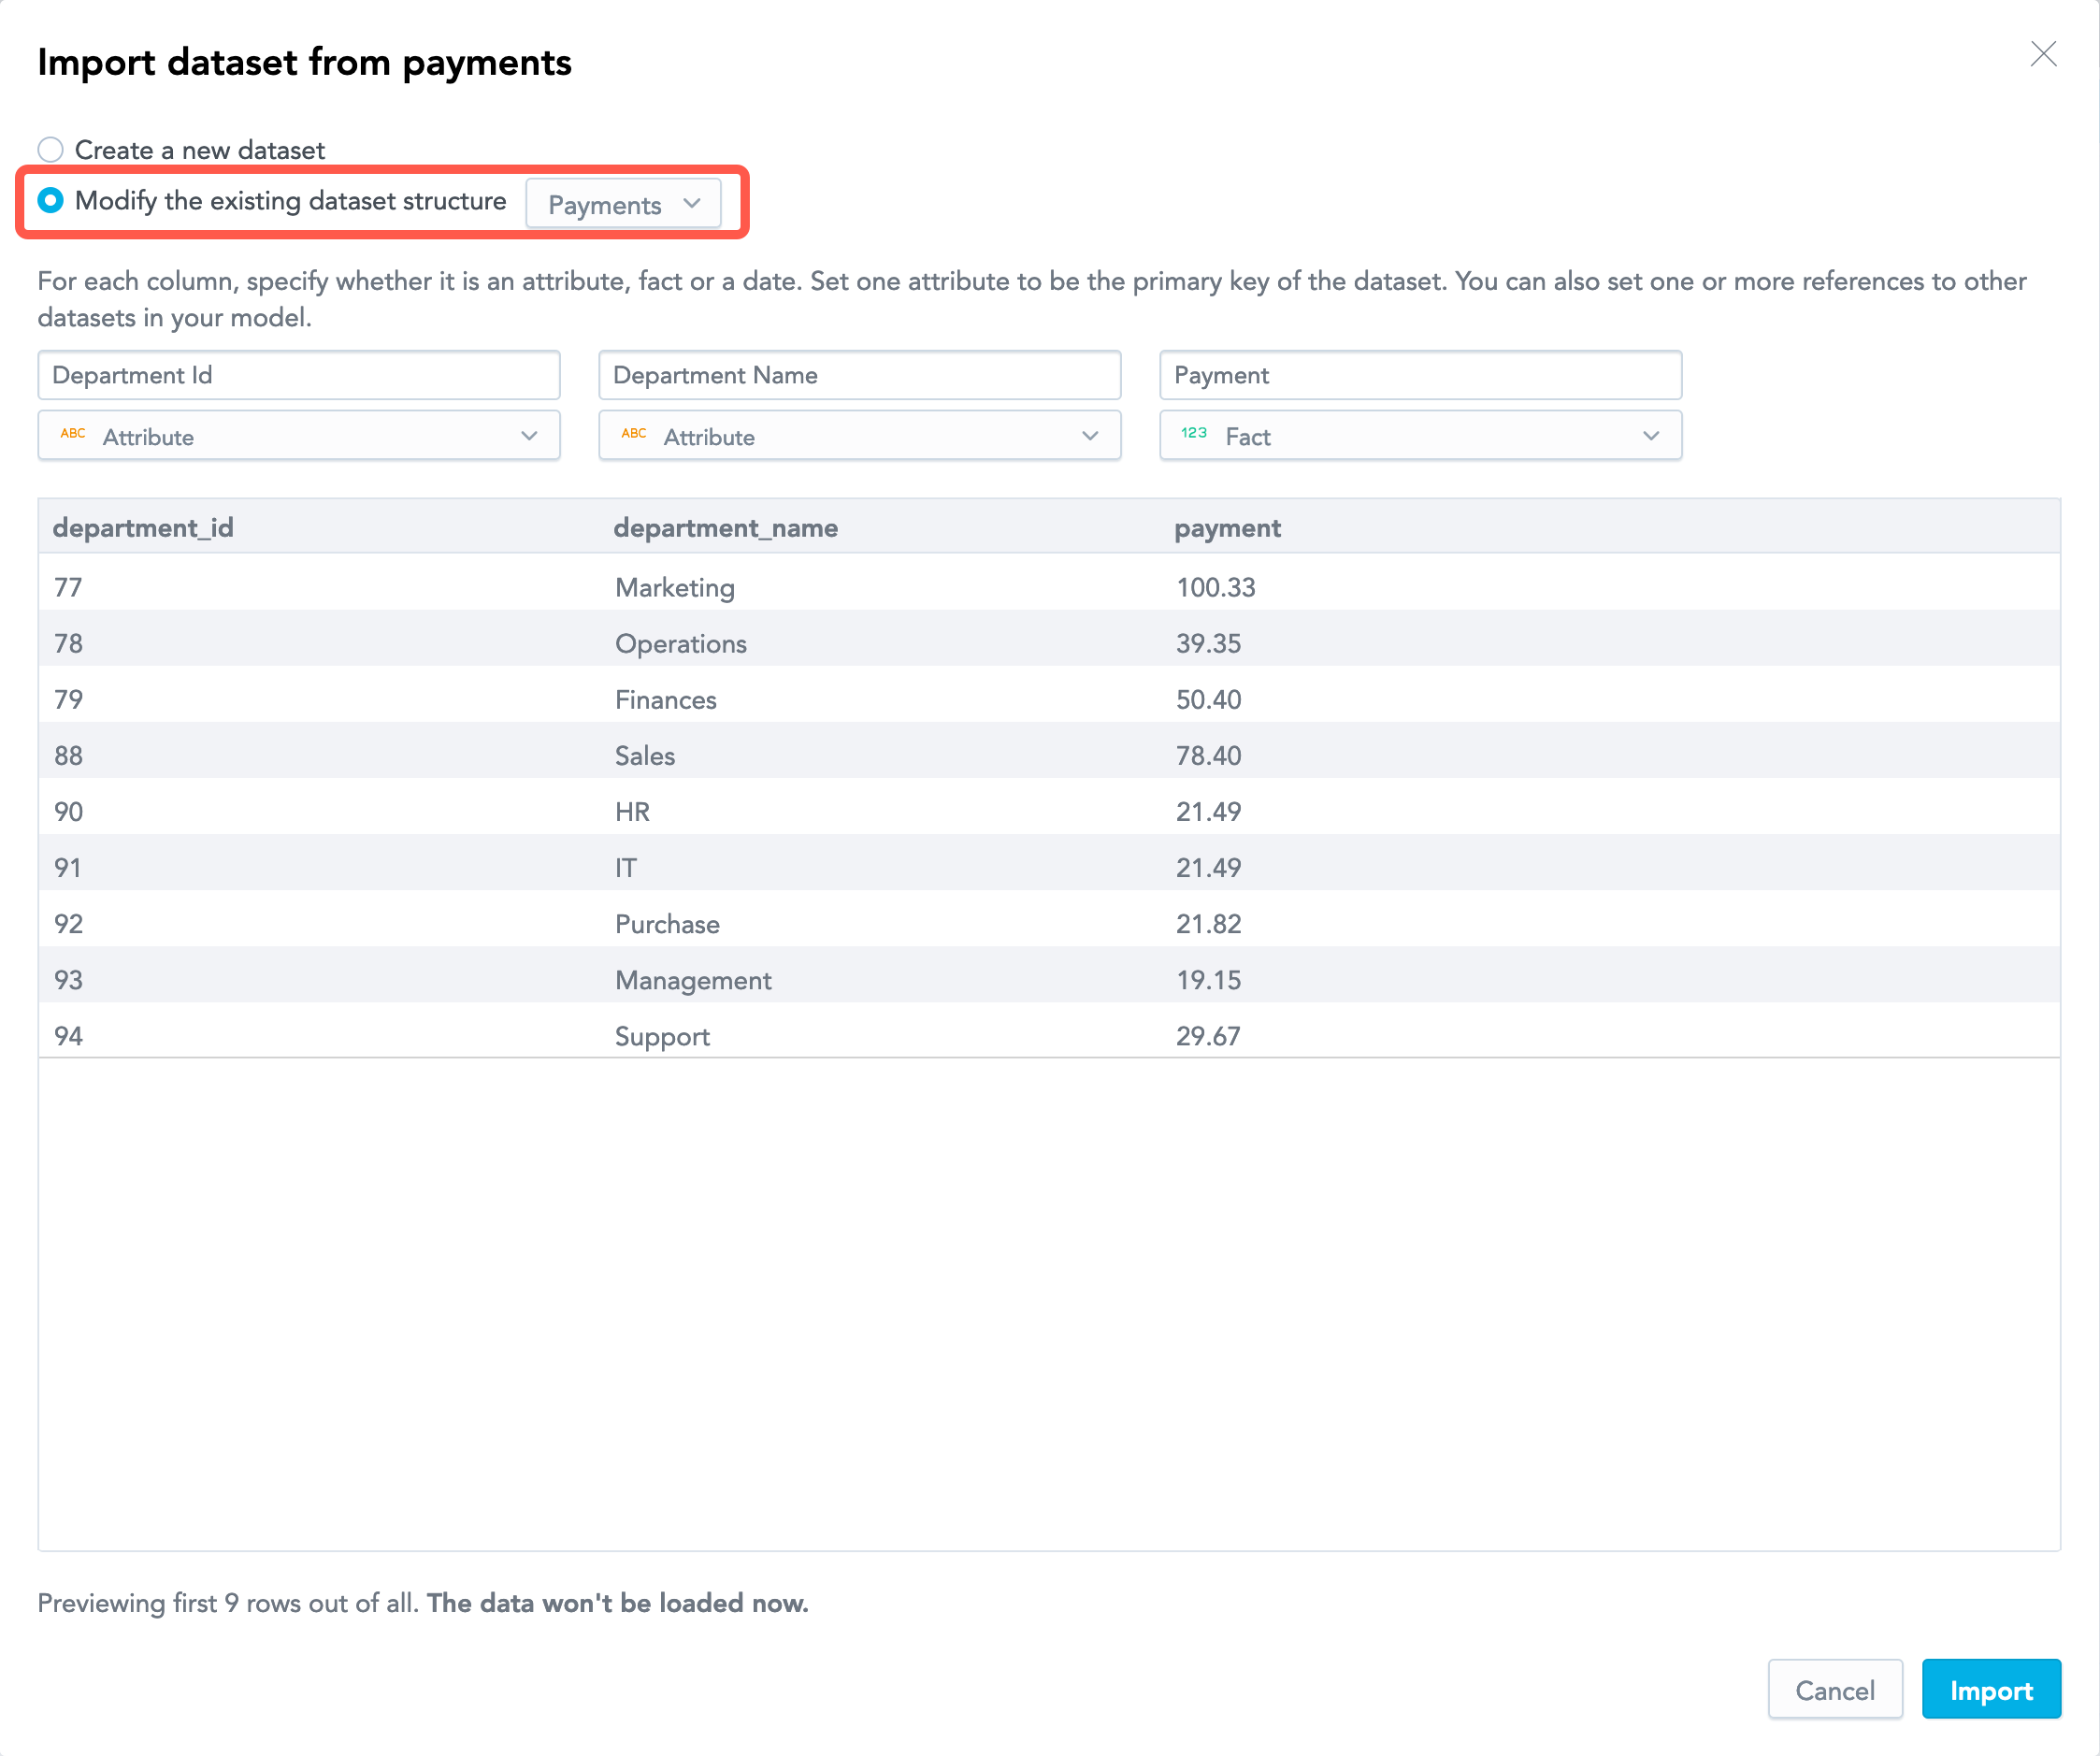
If you have a CSV file with data, you can use it to update the structure of an existing dataset by replacing it with the content of the CSV file. The process is similar to adding a dataset from a CSV file (see Create a Logical Data Model from CSV Files) except when you are reviewing the file preview, you should choose the option of modifying the existing dataset structure and then select the dataset from the dropdown.
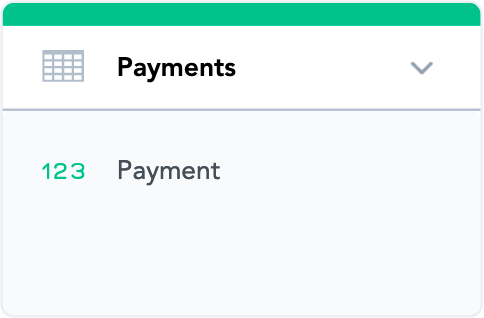
Add a fact to a dataset
For more information about facts, see Facts in Logical Data Models.
Steps:
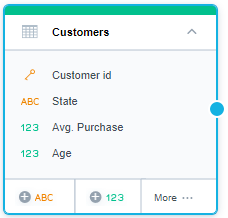
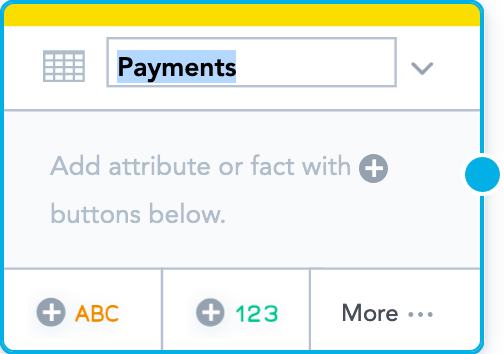
- In the dataset, click the 123 button.
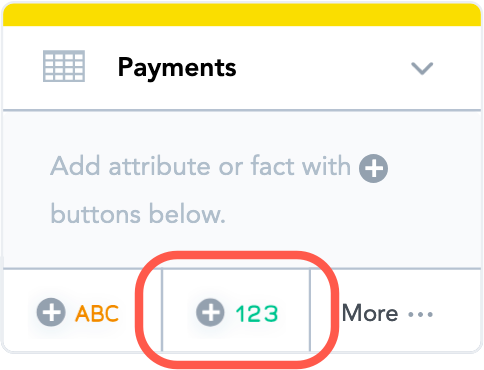
- Name the fact.
You can also add a fact to a dataset from the dataset details dialog.
Add an attribute to a dataset
For more information about attributes, see Attributes in Logical Data Models.
Steps:
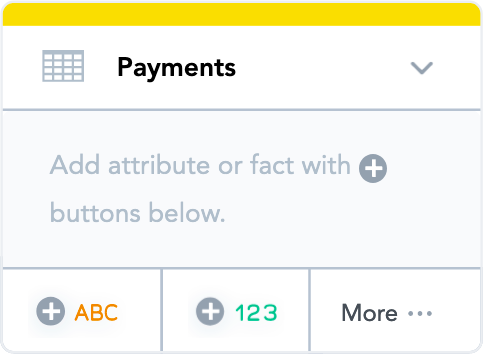
- In the dataset, click the ABC button.
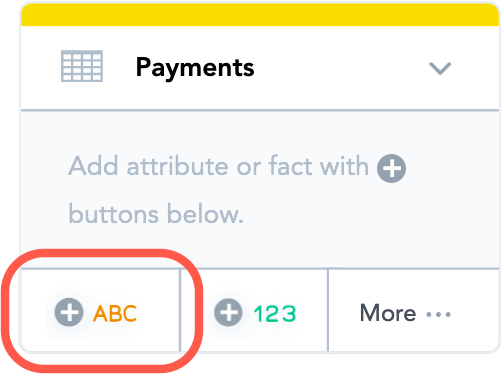
- Name the attribute.
You can also add an attribute to a dataset from the dataset details dialog.
Convert between facts and attributes
You can change a fact into an attribute or an attribute into a fact at any time.
When you publish the LDM, any metrics, insights, or dashboards that use the converted dataset object will be removed. Converting the objects back to their original state and publishing the LDM will not restore the affected metrics, insights, or dashboards.
Steps:
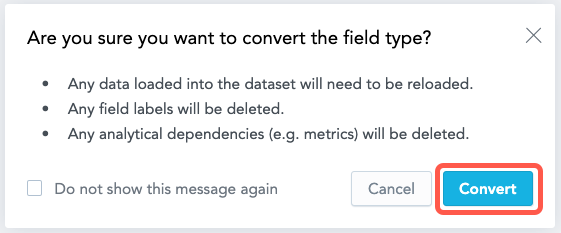
- In the dataset, click the fact or attribute that you want to convert, click the menu button, and select the “Convert to…” option. A warning appears about the consequences of the change.
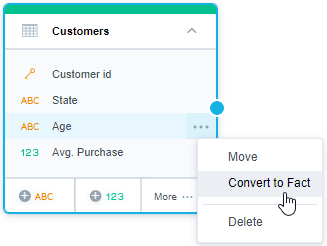
- Select convert. The field type converts.
- Remap the dataset objects to the appropriate source columns in your database.
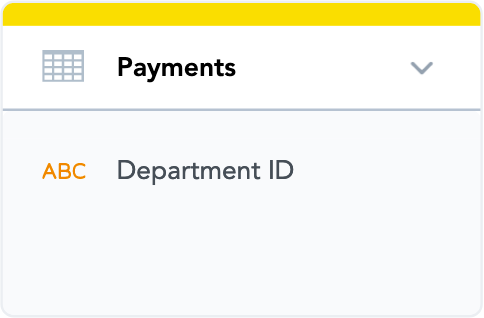
Move a fact or an attribute between datasets
When you move a fact or an attribute from one dataset to another, the identifier of the moved object does not change. This preserves the metrics, reports, and dashboards where the moved object is referenced by its identifier.
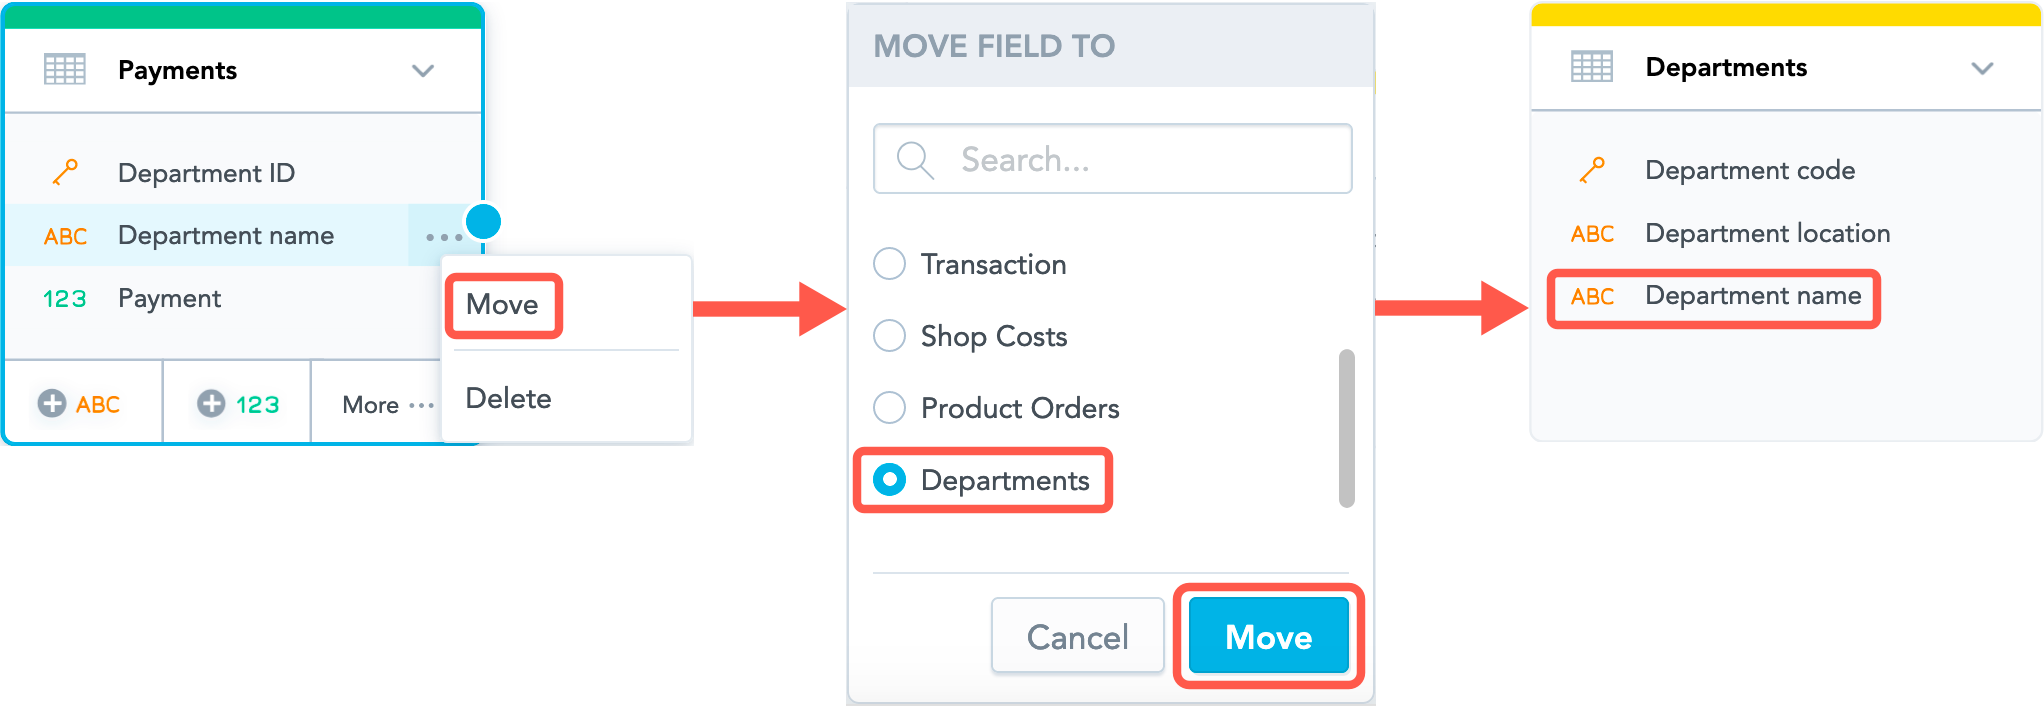
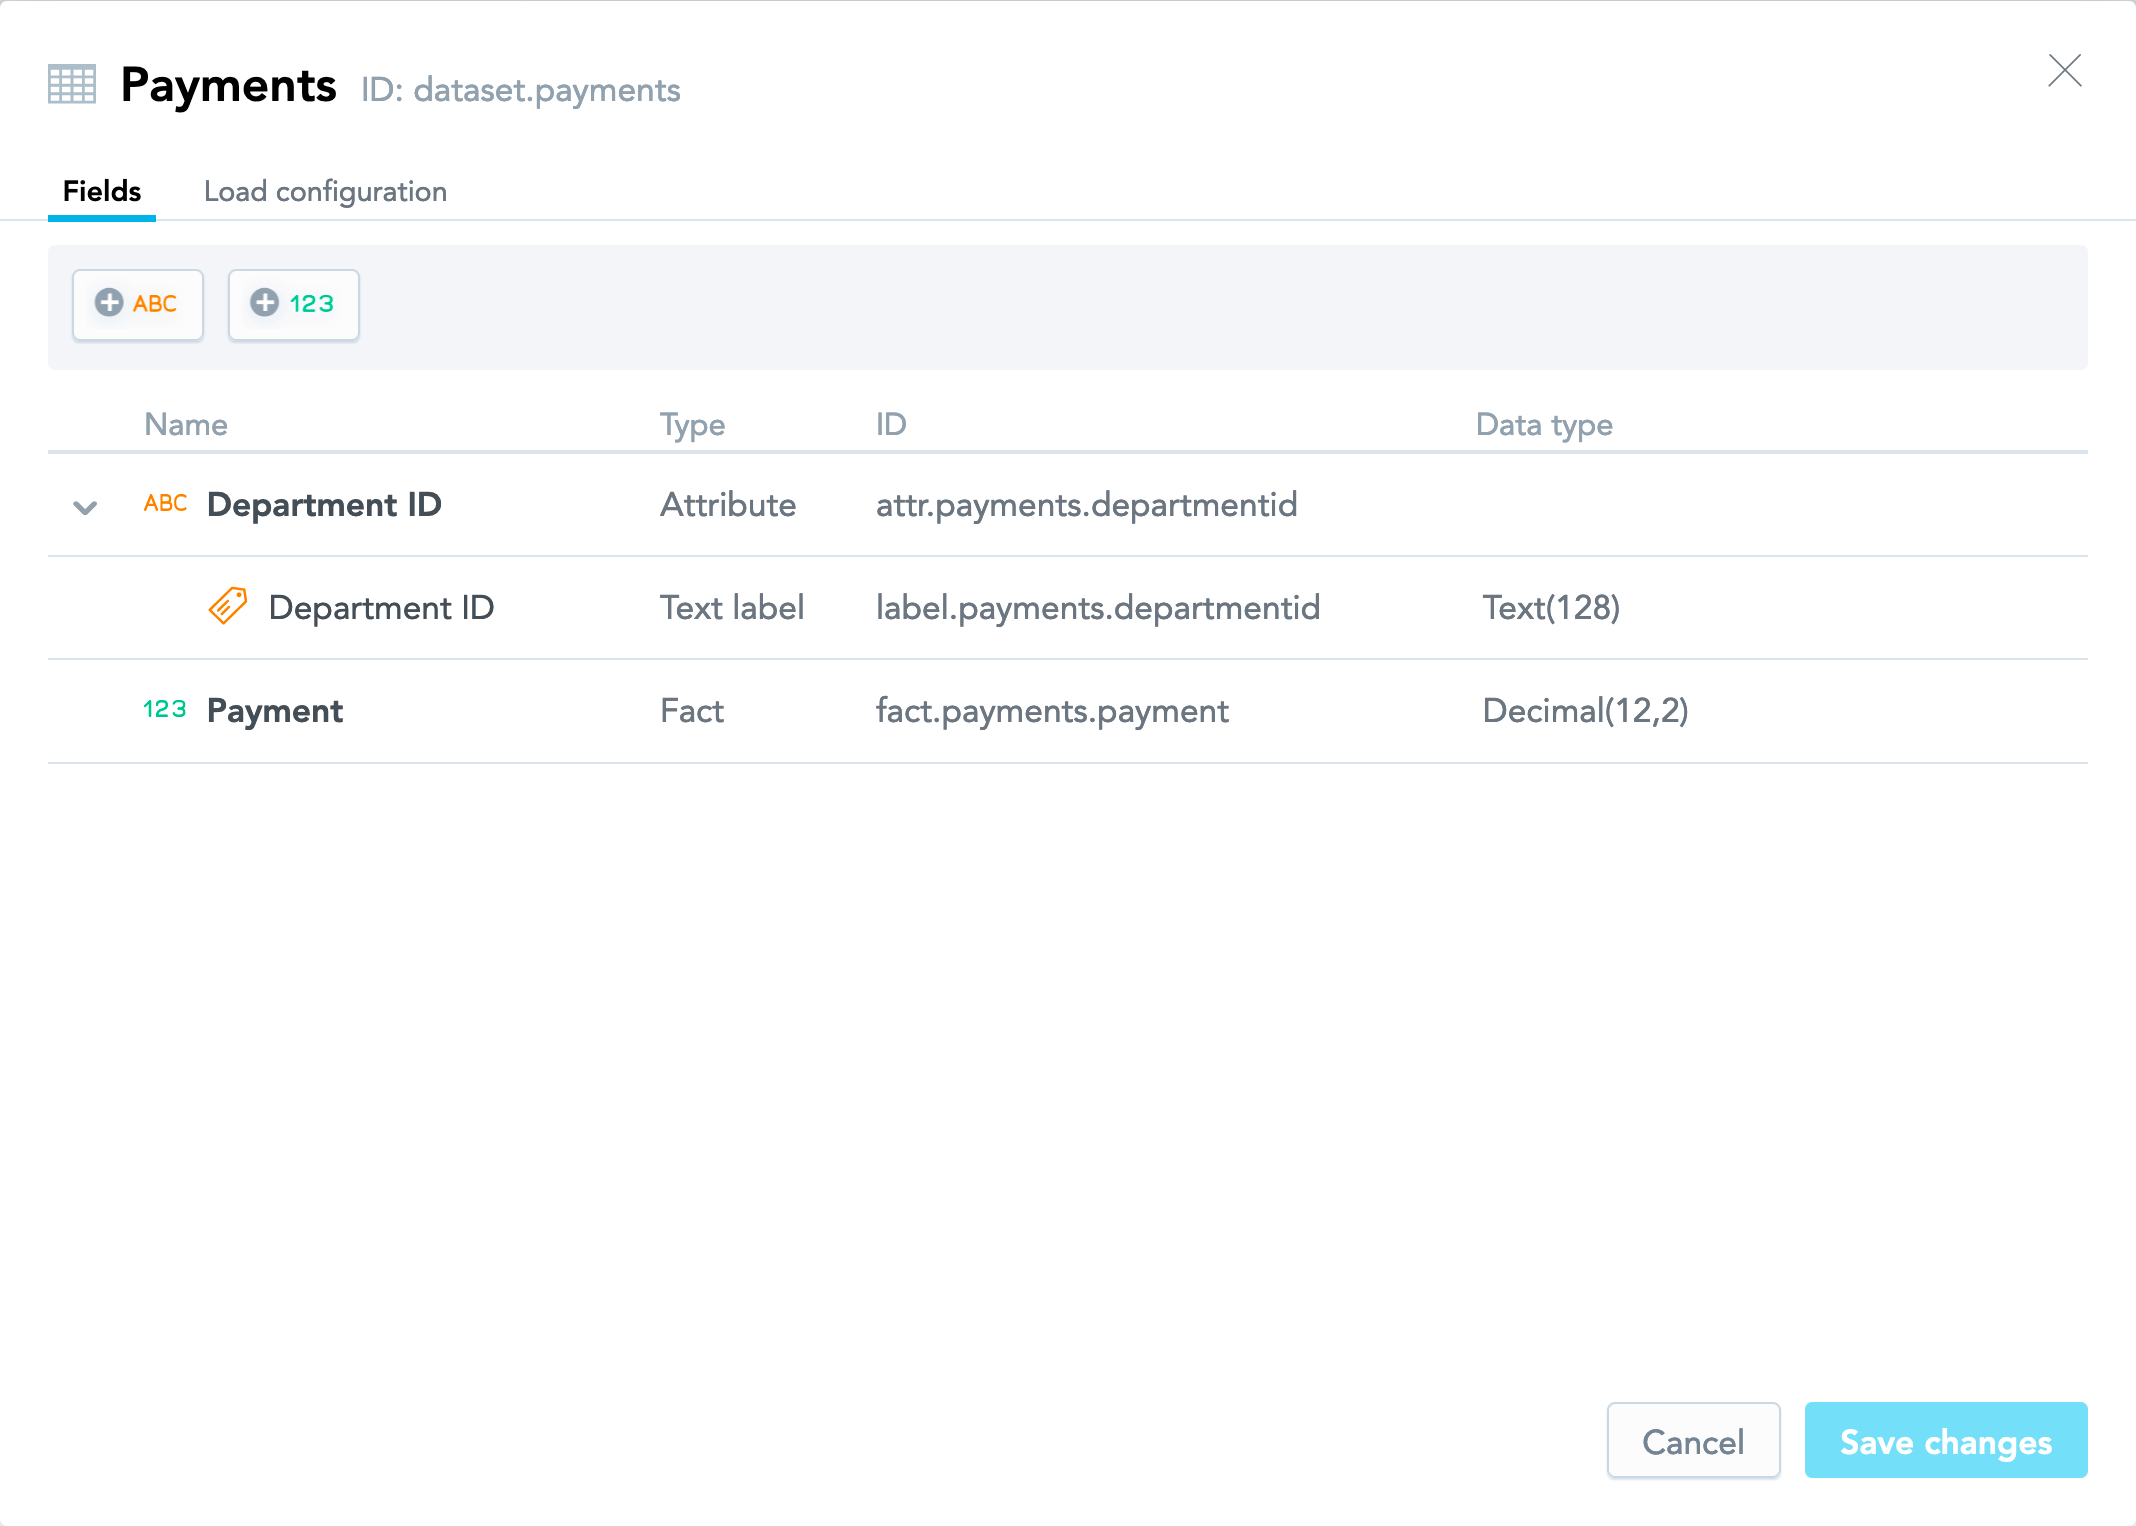
For example, if you are moving the Department ID attribute from the Payments dataset to the Departments dataset, the initial attribute identifier (attr.payments.departmentid) will remain the same.
You cannot move the attributes that are used in the dataset’s primary key.
When an attribute is moved, all its labels are moved together with it, and their identifiers do not change.
Steps:
- In the dataset, click the fact or the attribute that you want to move, click the menu button, and click Move.
- Select the dataset to move the fact or the attribute to, and click Move.
You can also move a fact or an attribute to another dataset from the dataset details dialog.
Delete a fact or an attribute from a dataset
You cannot delete the attributes that are used in the dataset’s primary key.
Steps:
- In the dataset, click the fact or the attribute that you want to delete, click the menu button, and click Delete.
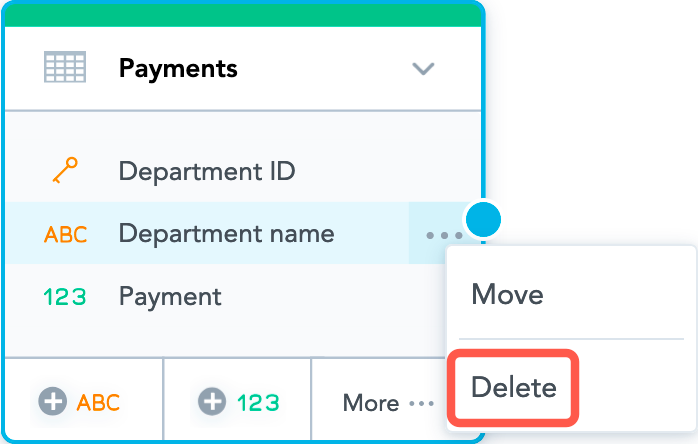
- Confirm the deletion.
You can also delete a fact or an attribute from the dataset details dialog.
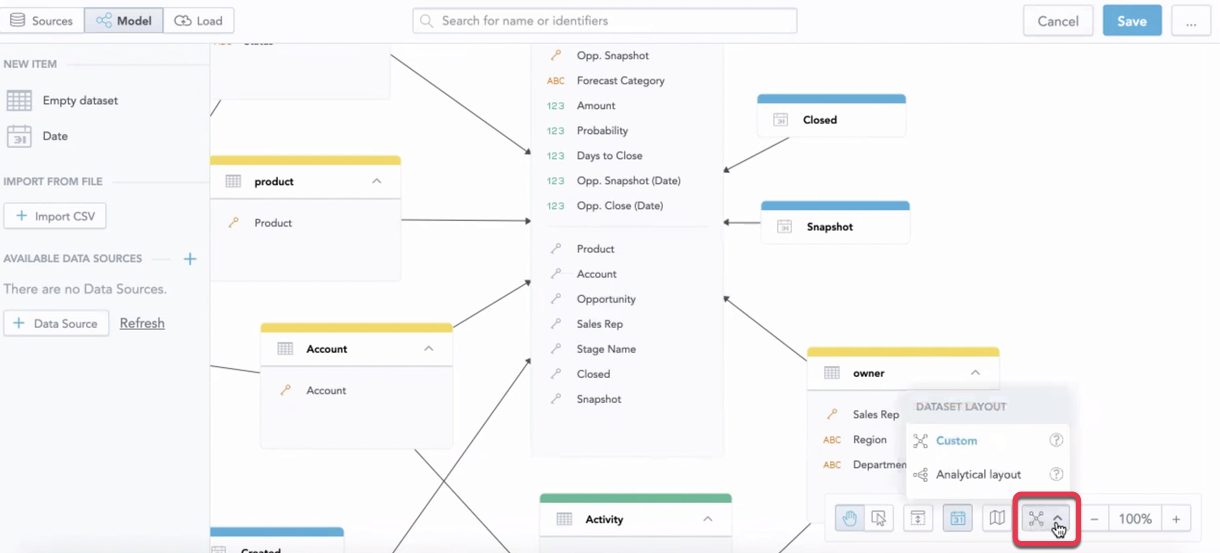
Change the model layout
By default in your logical data model, all dimension datasets are on the left side and the fact datasets are on right side.
To change the layout any time:
- Open the logical data model for editing.
- Drag any dataset to a new place.
- Save the model.
To switch between your custom layout and the default Analytical layout, click the layout icon at the bottom and select the layout to display.
Manage facts, attributes, and attribute labels in a dataset
Select the dataset, click More… -> View details.
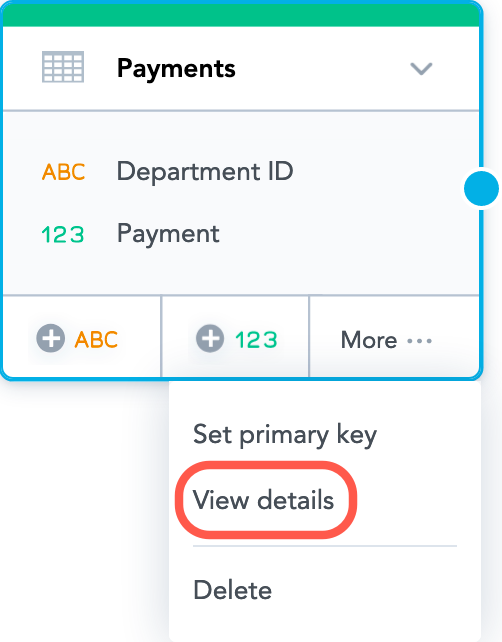
The dataset details dialog opens that lists all the dataset facts, attributes, and attribute labels.
This dialog allows you to manage the facts, attributes, and attribute labels in the dataset and to edit their properties.
When you are done with updating, click Save changes.
Add a fact
Click the 123 button, and name the fact.

You can also add a fact from outside of the dataset.
For more information about facts, see Facts in Logical Data Models.
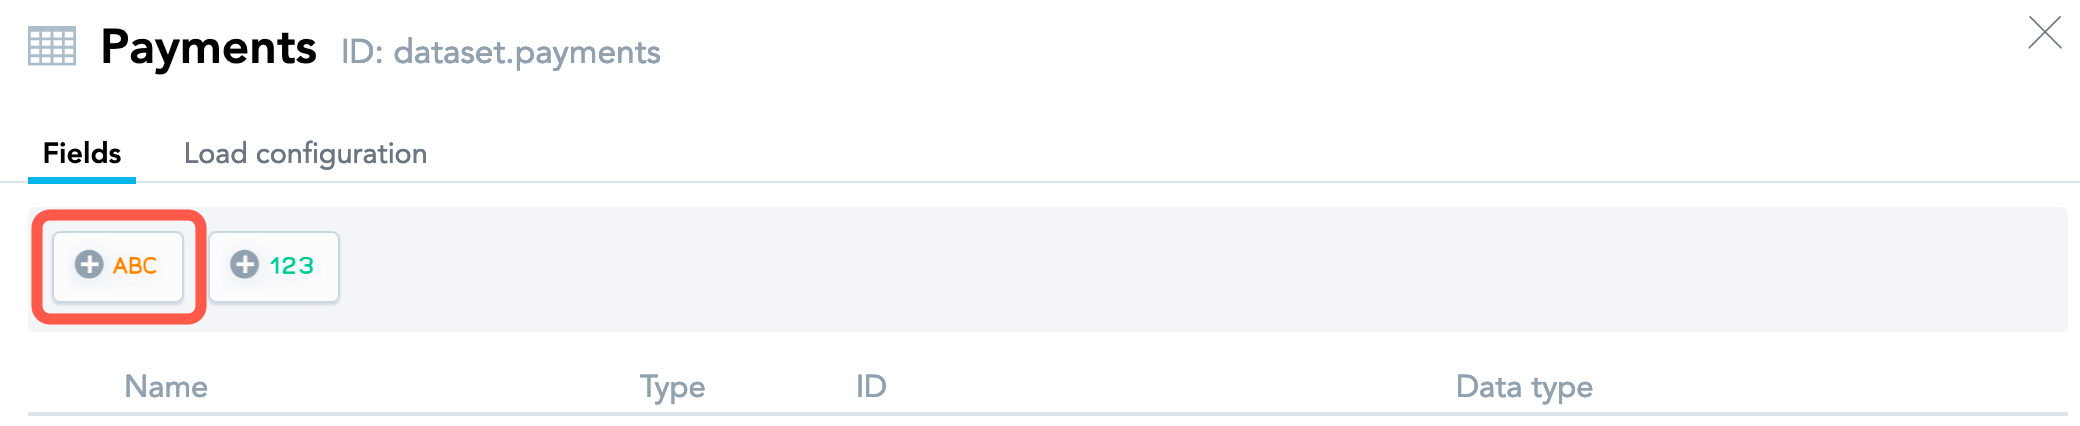
Add an attribute
Click the ABC button, and name the attribute.
You can also add an attribute from outside of the dataset. For more information about attributes and labels, see Attributes in Logical Data Models.
When you add an attribute, it is added with a single label, which has the same name as the attribute itself and the identifier defined as label.{dataset_name}.{attribute_name} . This label becomes the default label for the attribute (the label that is selected for use if the attribute has multiple labels) and also the loading label (the label that is used when data is loaded to the attribute).
- You can later set a different label to be default.
- You cannot use a different label to be the loading label via the LDM Modeler, therefore you cannot delete this original label or change its type (it is set to be text). To be able to set a different label to be the loading label, use the API for updating the LDM to adjust the label identifiers.
Add a label to an attribute
For more information about attributes and labels, see Attributes in Logical Data Models.
Steps:
- Hover over the attribute, click Add label.

- Select the type of the label. For more information about label types, see Attributes in Logical Data Models.
- Name the label.
By default, an attribute label is added with a limit of 128 characters. For hyperlink labels, this may not be enough to store a full URL. Consider expanding this limit by changing the label’s datatype.
Change the type of an attribute label
Click the current type of the label, and select a different type from the dropdown.
For more information about the supported types of attribute labels, see Attributes in Logical Data Models.
You cannot change the type of the loading label of an attribute. It is set to be text.
If you are changing the type of an attribute label to a hyperlink, check the data type for this label. By default, an attribute label has a limit of 128 characters. For hyperlink labels, this may not be enough to store a full URL. Consider expanding this limit by changing the label’s datatype.
Make an attribute label the default label
If an attribute has multiple labels, the attribute values belonging to the default label are used when the attribute is used in a report or an insight.
Hover over the label that you want to make the default label, click the menu button, and click Set as default label.
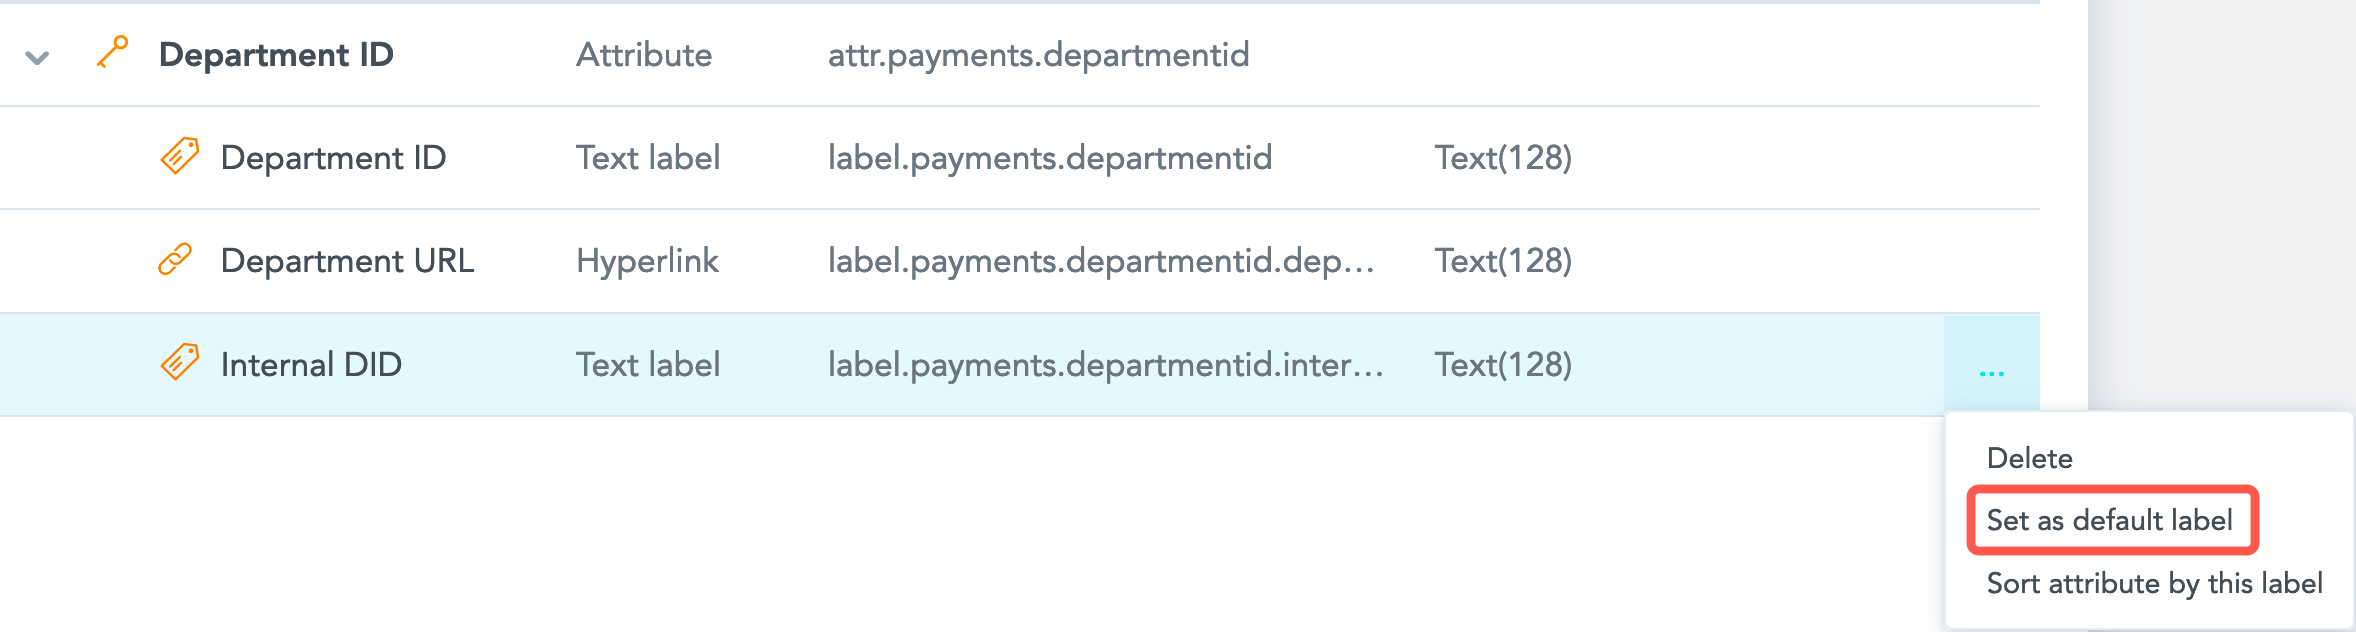
The label name is appended with (default).
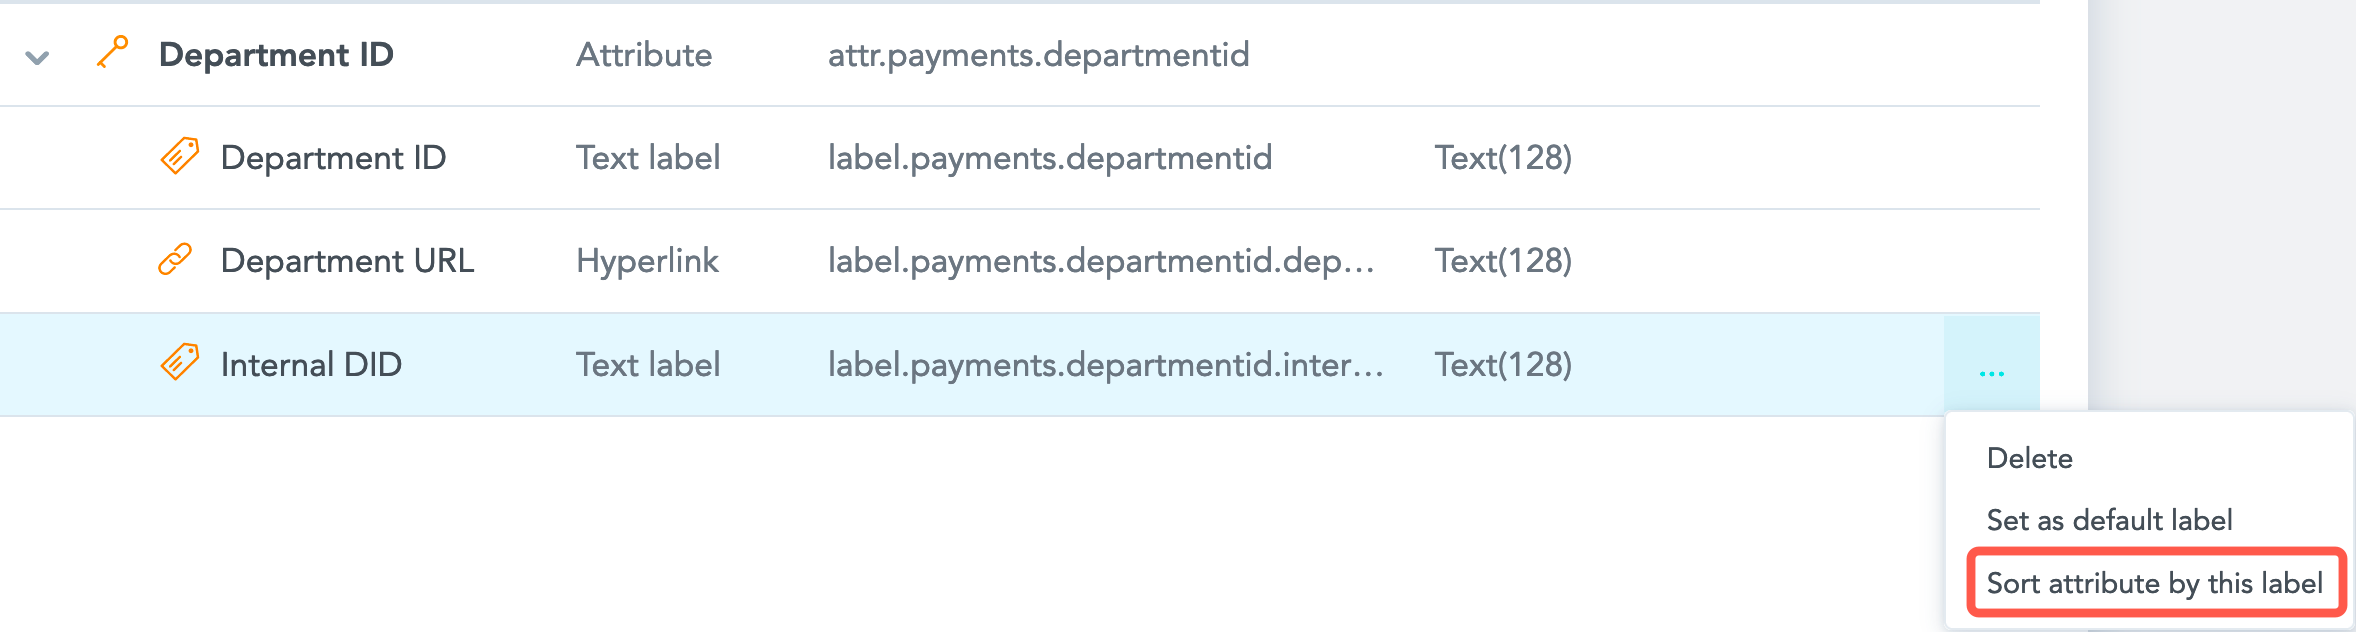
Sort an attribute by a label
When an attribute is sorted by its label, the attribute values used in a report or an insight get sorted in the order that the values belonging to this label are sorted in (by default, in ascending order). The label itself may or may not be used in the report or the insight.
For example, you have the Employee attribute with two labels, Employee Name and Employee ID. If you use the Employee Name label to be displayed in an insight (the employees' names will be used), you may want to sort them by their ID, which is the Employee ID label. The actual IDs will not be visible in the insight, but the employees will be sorted by their IDs rather than by their names alphabetically.
Steps:
- Hover over the label that you want to use to sort the attribute, click the menu button, and click Sort attribute by this label. The label is marked with a sorting icon. By default, the values are sorted in ascending order.
- To change the sort order:
- Click the menu icon again, and click Change sort order.
- Select Descending (DESC), and click Apply. The sorting icon changes to depict the direction of sorting.
Rename a fact, an attribute, or an attribute label
Click the name of the fact, the attribute, or the attribute label, and enter a new name.
Move a fact or an attribute to another dataset
For all the details about moving a fact or an attribute, see Move a fact or an attribute between datasets.
Steps:
- Hover over the fact or the attribute that you want to move, click the menu button, and click Move.
- Select the dataset to move the fact or the attribute to, and click Move.
Change the data type of a fact or an attribute label
Click the current data type and select a different one from the dropdown.
For the data types that can hold a various number of characters (such as text or a decimal), you can change this number by manually editing it in the dropdown:

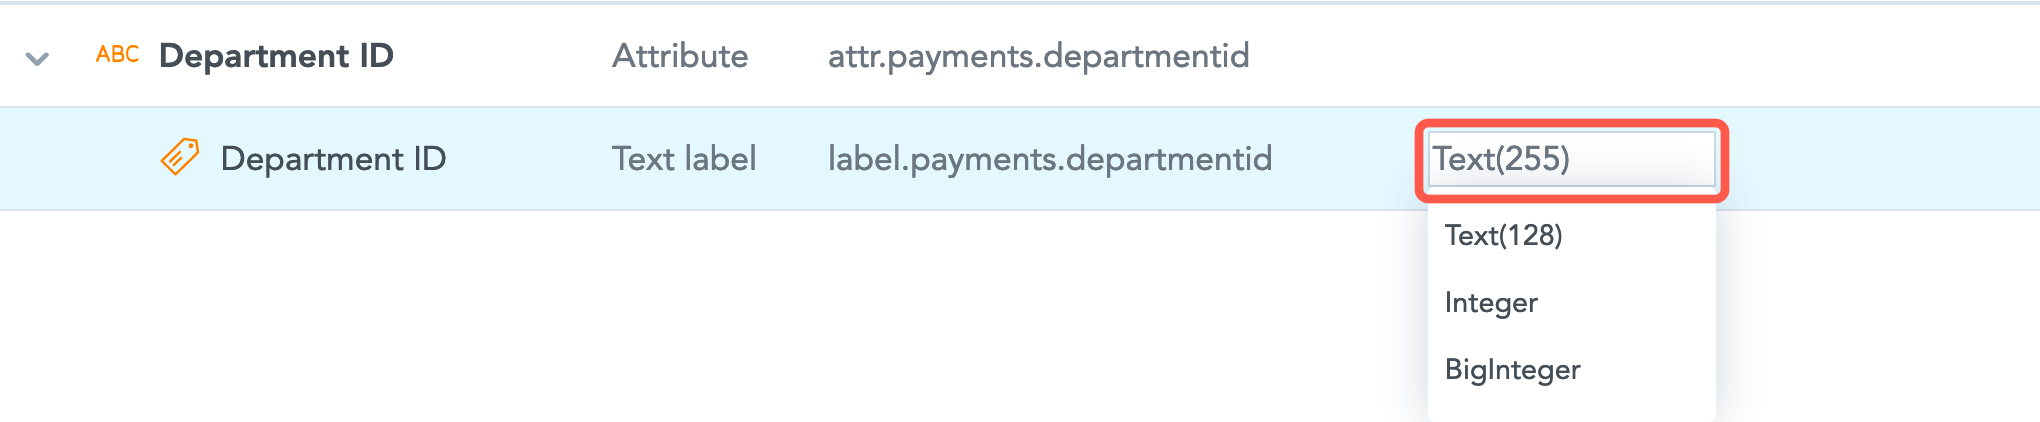
For more information about the supported data types, see Facts in Logical Data Models and Attributes in Logical Data Models.
Delete a fact, an attribute, or an attribute label
Hover over the fact, the attribute, or the label, click the menu button, and click Delete.
You cannot delete:
- The attributes that are used in the dataset’s primary key (see Connection Points in Logical Data Models)
- The loading label of an attribute
You can also delete a fact or an attribute from outside of the dataset.
Manage field mapping in a dataset
Any dataset in your LDM must have each field (a fact or an attribute) unambiguously mapped to a column in a source table (represented by a table in your data warehouse or a CSV file). The dataset itself must be mapped to this source table.
During data load, the data from the columns in the source table will be loaded to the corresponding facts or attributes in the dataset.
Steps:
- Select the dataset, click More… -> View details. The dataset details dialog opens that lists all the dataset facts, attributes, and attribute labels.
- Click the Load configuration tab.
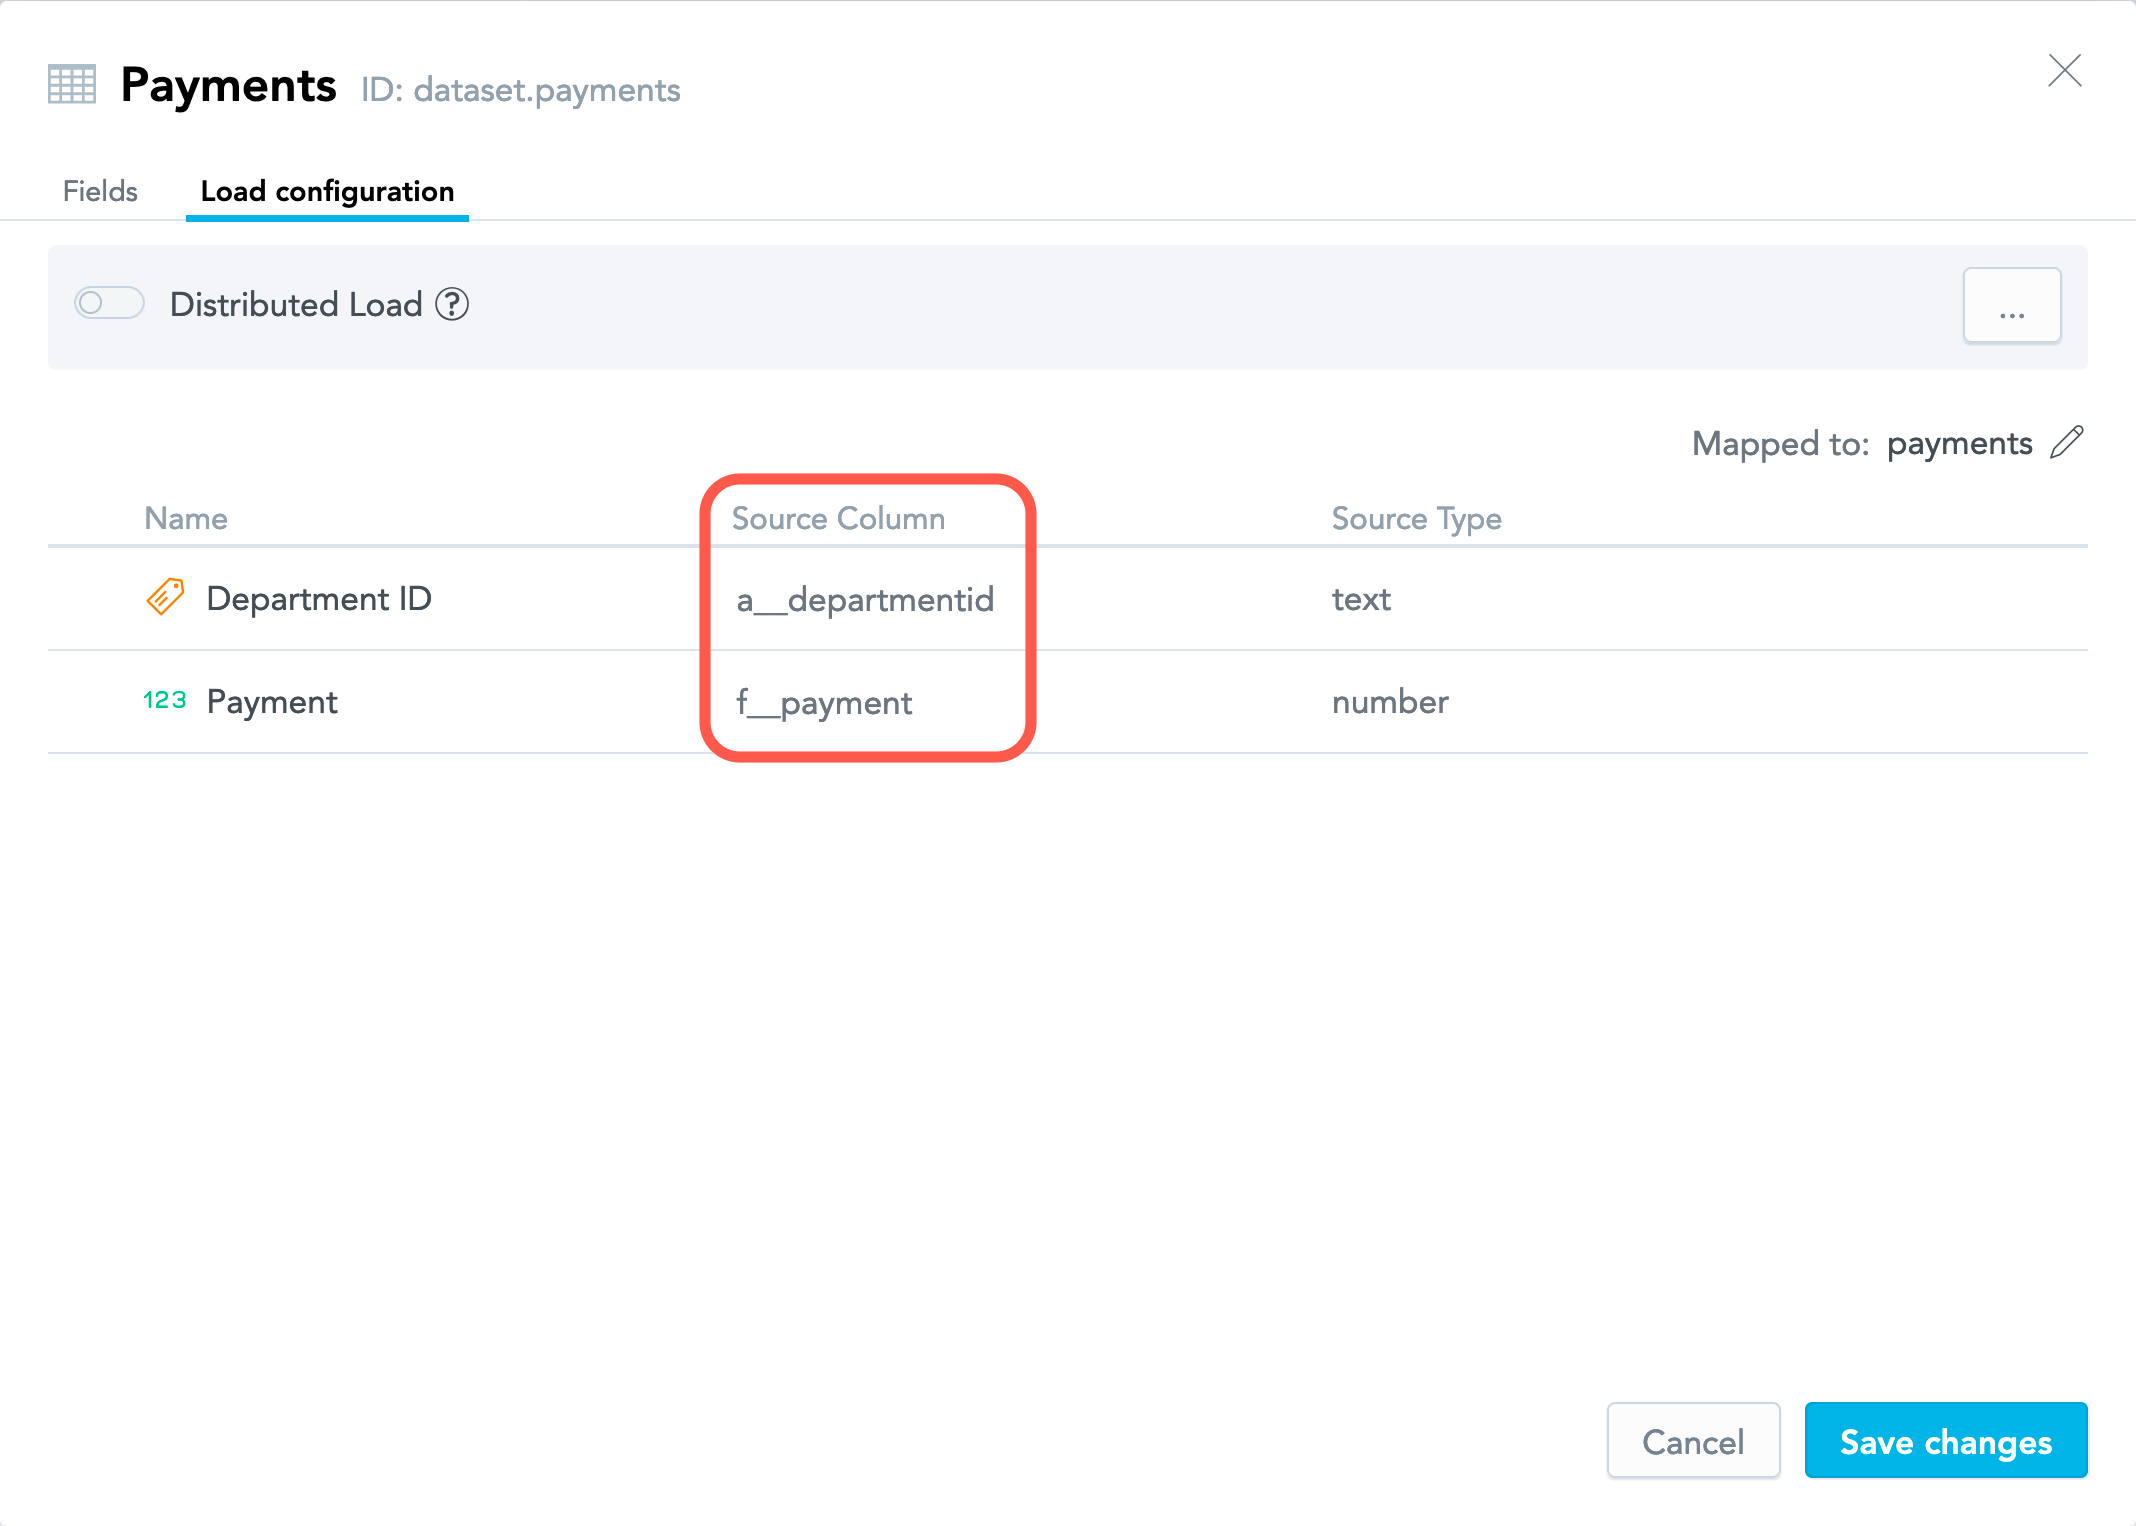
- Review the current mapping and update it, if needed. For more information, see Mapping between a Logical Data Model and the Data Source.
- When you are done with updating, click Save changes.
Rename a dataset
Double-click the dataset name, and enter a new name.
Set or update the primary key in a dataset
For more information about primary keys, see Connection Points in Logical Data Models.
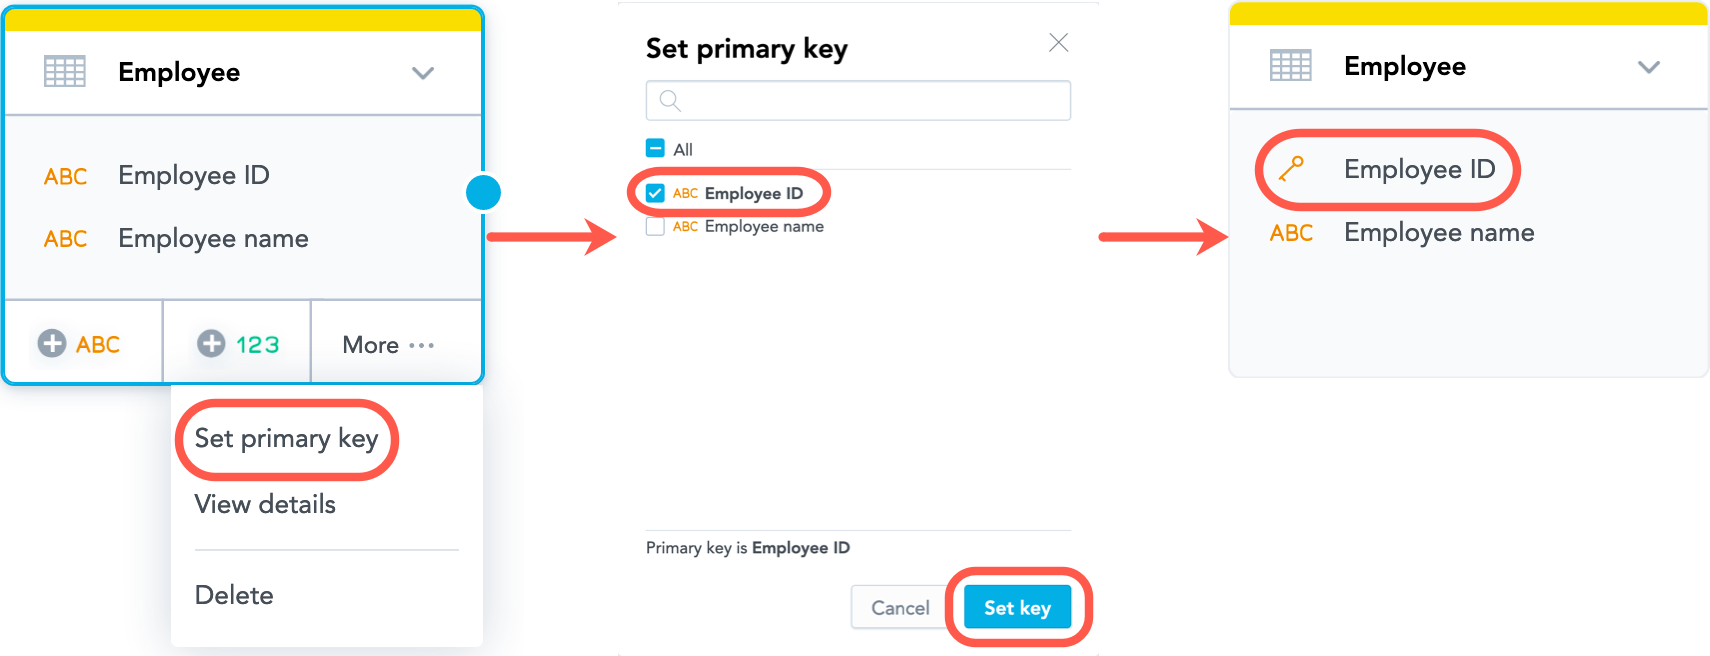
Steps:
- Select the dataset, and click More… -> Set primary key.
- Select the attribute that should become the primary key, and click Set key.
To remove the primary key from the dataset, de-select all the attributes, and click Set key.
You cannot remove the primary key from the dataset that has a relationship to another dataset. To remove the primary key, delete the relationship first.
Add a Date dataset
For more information about dates, see Dates in Logical Data Models.
Steps:
- Drag Date from the left panel and drop it in the blank canvas area.
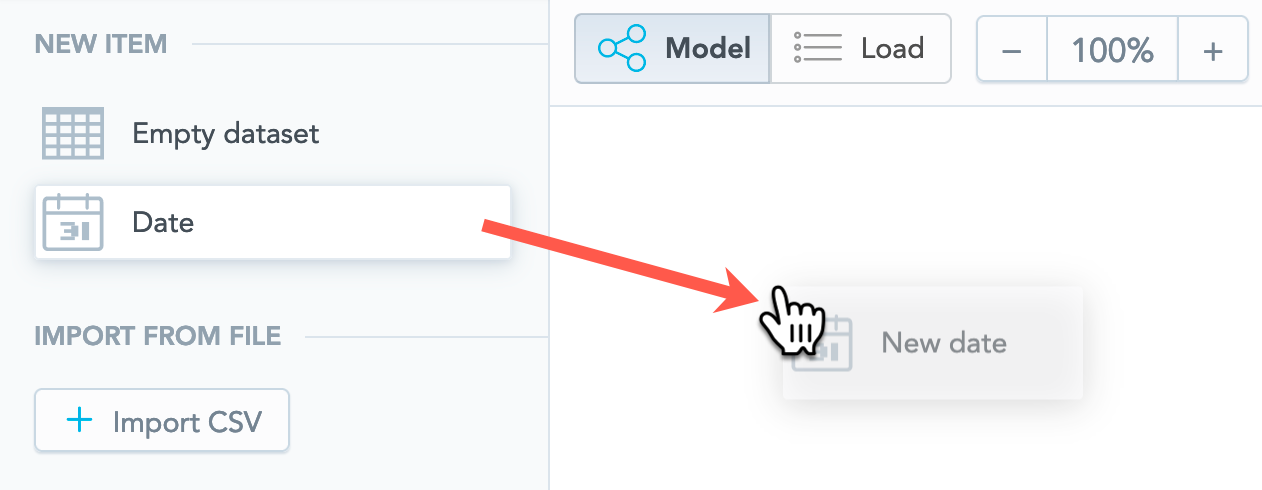
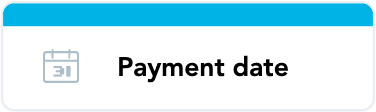
- Name the dataset.
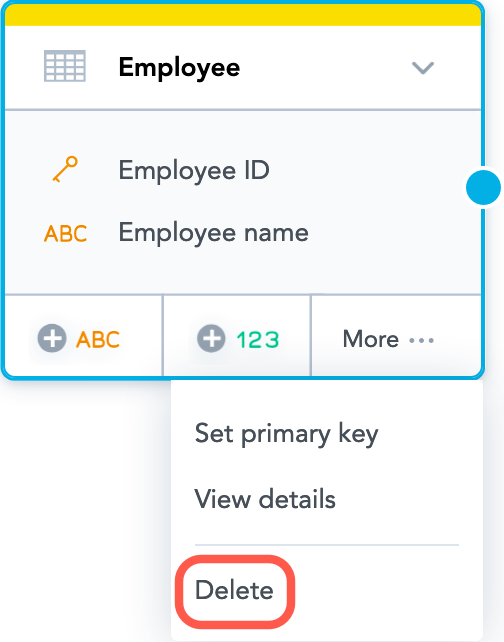
Delete a dataset
Select the dataset, click More… -> Delete, and confirm the deletion.
Deleting a dataset deletes all its relationships.
Add a relationship between datasets
To be able to have a relationship, datasets must not be empty: at least one dataset must have at least one attribute.
When adding a relationship between two datasets, you have to configure a few aspects of the relationship:
Set a primary key in the originating dataset, if this dataset does not have the primary key set yet. For more information about primary keys, see Connection Points in Logical Data Models.
If the dataset already as the primary key set, it will be automatically used in the relationship.
The primary key must contain only one attribute. You cannot create a relationship for a dataset with the primary key consisting of multiple attributes.
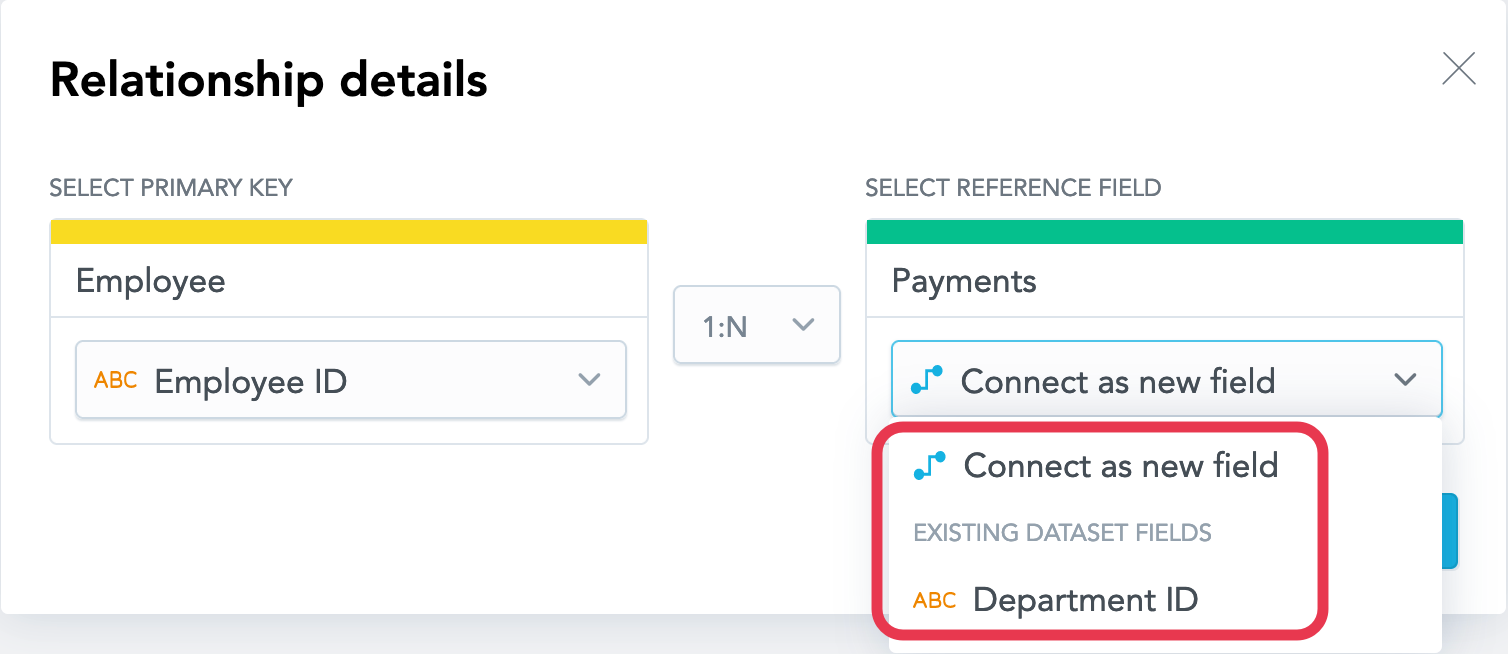
Choose how to set up a reference in the other dataset:
- Create a new attribute based on the primary key from the originating dataset. This new attribute in the dataset is populated by references to the primary key values from the originating dataset. Each value in the reference attribute must have a corresponding value of the primary key in the originating dataset.
- Reuse an existing attribute from the dataset. Once the relationship is created, the primary key from the originating dataset is merged with the attribute in the dataset that you made the reference.
Choose the type of the relationship:
- 1:N (one-to-many), which is a one-directional relationship between the datasets when the data from one dataset can be used to analyze the data from the other dataset, but not the other way round. This is the default and most common type of the relationship.
- M:N (many-to-many), which allows you to use the data from either dataset to analyze the data from the other dataset. For more information about them, see Many-to-Many in Logical Data Models.
When adding a relationship between a regular dataset and a Date dataset, you do not configure the relationship. It is automatically created as a 1:N relationship, and a reference to the Date dataset is added to the regular dataset as a new field.
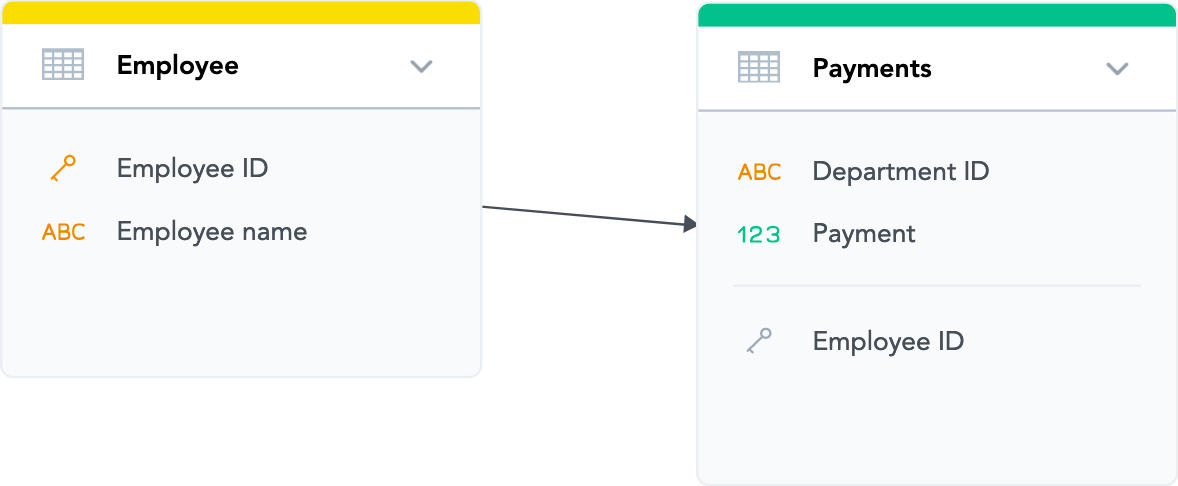
Steps:
Select the originating dataset (the dataset that you want to create the relationship from).
Click the blue dot on the right border of the dataset and drag the arrow that appears to connect the dataset to the other dataset.
The following dialog opens: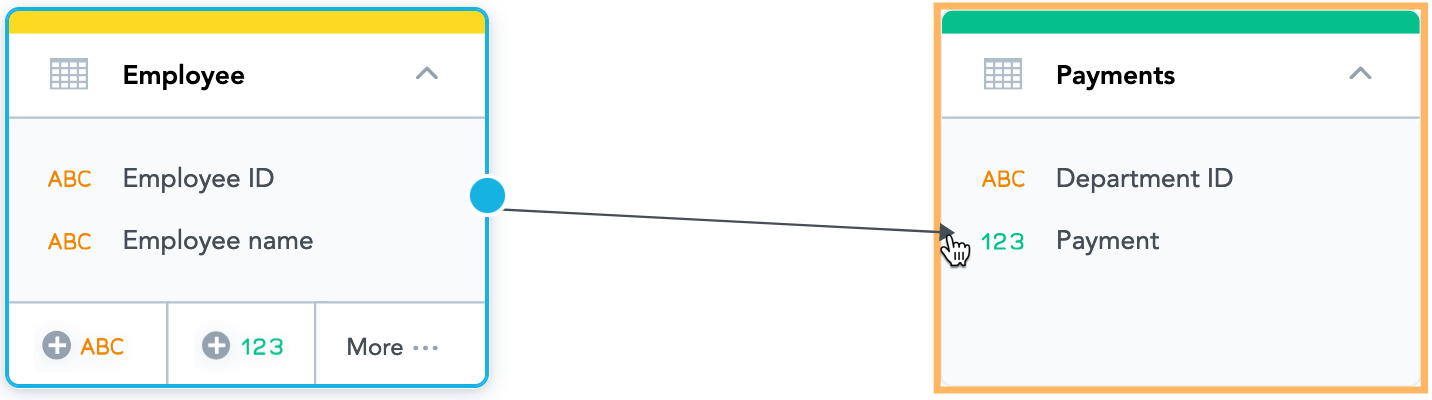
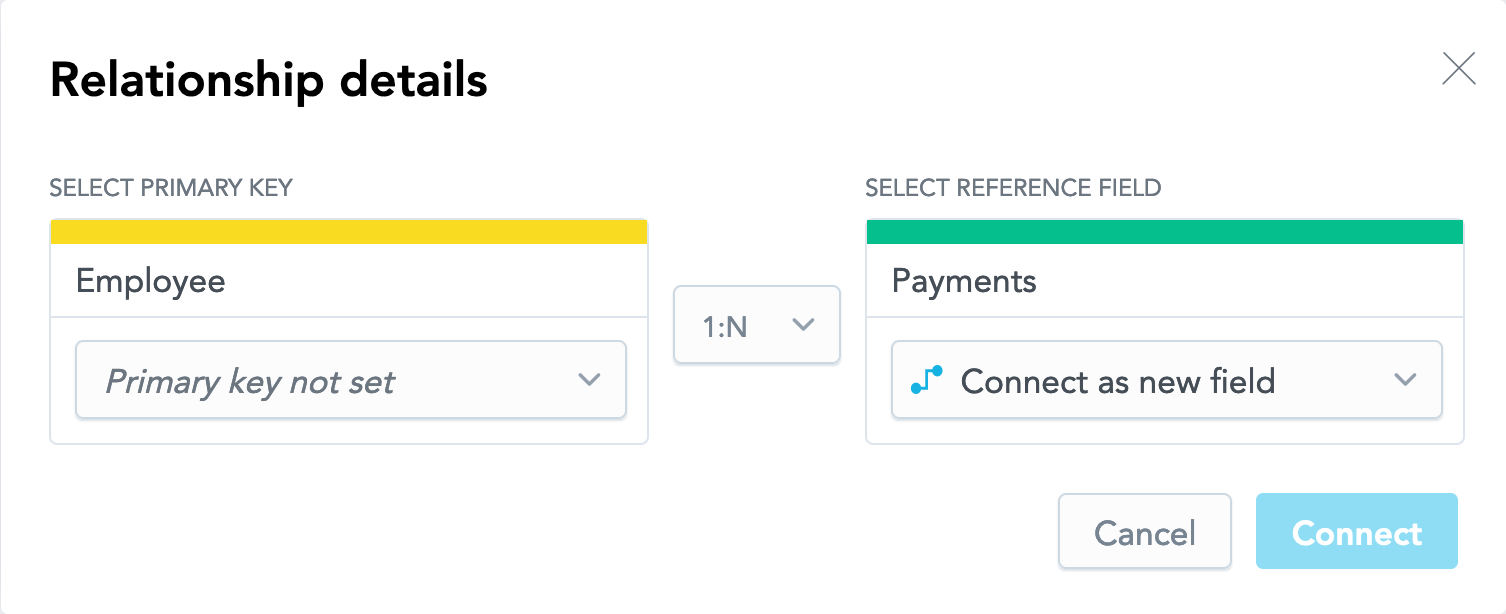 This dialog does not appear when you are creating a relationship between a regular dataset and a Date dataset. Such relationship is created right away as a 1:N relationship, and a reference to the Date dataset is added to the regular dataset as a new field.
On the left, click Primary key not set , and select the attribute that should become the primary key.
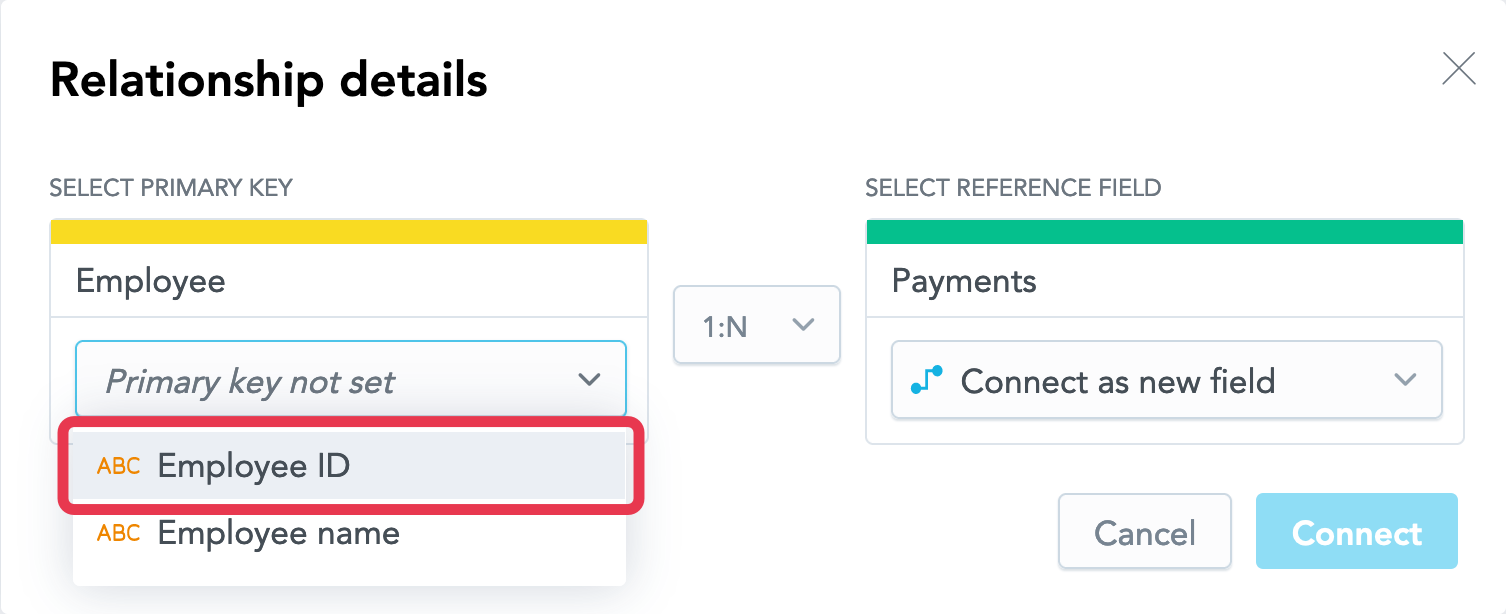 If the dataset already as the primary key set, it will be pre-selected in the dropdown. You cannot edit the primary key for the dataset in this dialog. To update the dataset, see Set or update the primary key in a dataset.
On the right, choose how to set up a reference in the other dataset, as a new field or as an existing attribute.
Select the type of the relationship.
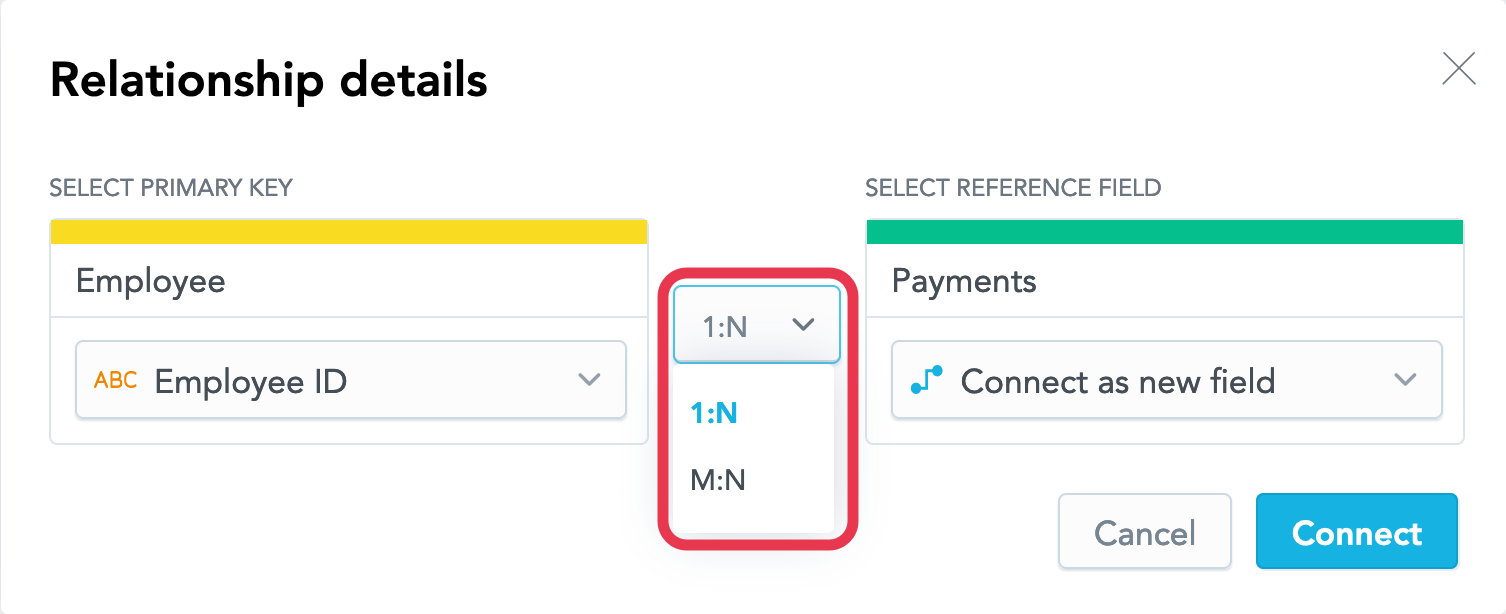
Click Connect. The relationship is created.
If the originating dataset has the primary key set and you want to set up a reference in the other dataset as a new attribute, use a shorter way of creating a relationship.
Hold Shift, click the blue dot on the right border of the dataset, and drag the arrow that appears to connect the dataset to the other dataset. The relationship details dialog does not appear, and the relationship is created right away.
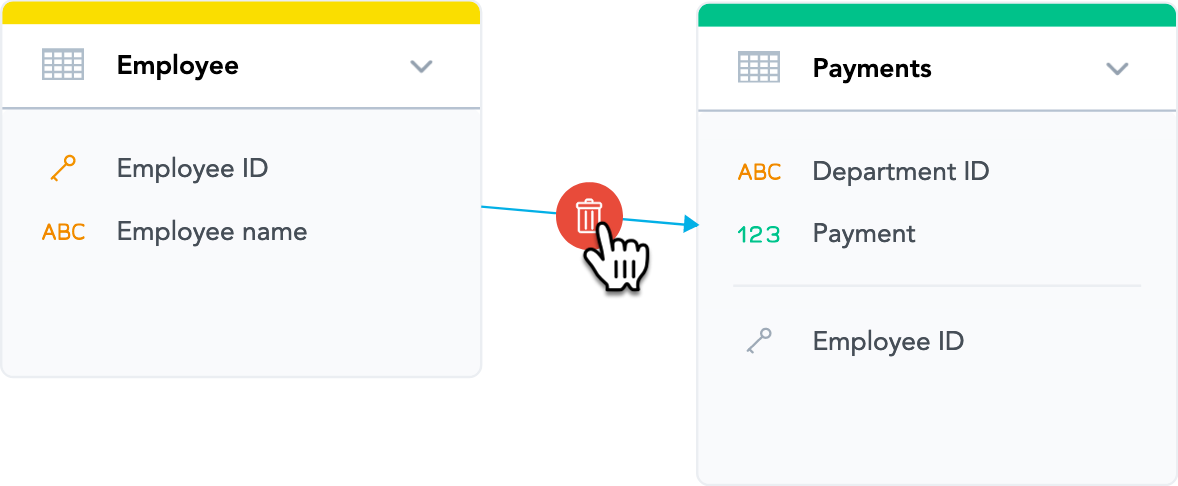
Delete a relationship
Select the relationship and click the bin icon that appears.
Publish the LDM
When you are done with updating the LDM, publish it to the workspace. To publish the LDM, follow the instructions from Publish a Logical Data Model.
Publishing Options
When publishing:
Use Preserve data to ensure that data loaded into the workspace is not deleted.
Force publish when updates to the LDM include deleting an object that has dependencies in the workspace such as dashboards, insights, or metrics.
Force publishing removes any metrics, attributes, or dashboards from the workspace that were dependent on the deleted LDM object. Force publishing cannot be undone.
Uploading Data from CSV Files
If you created a dataset from a CSV file or updated a dataset from a CSV file, the Upload data from imported CSV files checkbox is displayed. The checkbox is selected by default. This means that the actual data from the CSV file will be uploaded to the dataset that was created or updated based on this file.
- If you want to load the data from the CSV file, keep this checkbox selected. After the publishing is finished, you can immediately start analyzing the uploaded data. To do so, click Analyze on the top navigation bar. You are redirected to Analytical Designer, where you can create insights from your data. For more information, see Create Insights.
- If you do not want to load the data from the CSV file and want to only create the dataset or update its structure, de-select the checkbox.
Output Stage
If you are using the Output Stage, update it to synchronize it with the updated LDM after the LDM has been published (see Create the Output Stage based on Your Logical Data Model).