Schedule Automatic Emailing of Dashboards
All users can schedule automatic emailing of dashboards and/or insights that they can access. GoodData then regularly sends the data attached as:
- A PDF file for dashboards,
- A CSV or XLSX for individual insights on a dashboard.
For details about the file formats, see the Export file types section in Export Dashboards.
You can create any number of schedules.
Each schedule can contain both the dashboard in PDF and individual insights in CSV or XLSX files.
Schedule emailing of dashboards and insights
Steps:
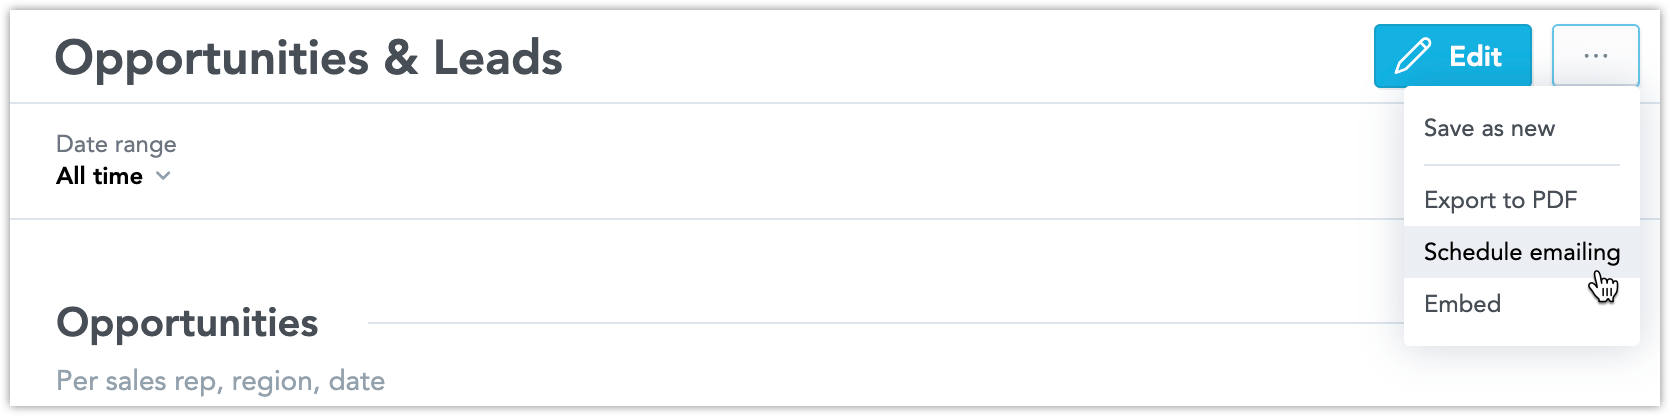
Open a Dashboard for which you want to schedule emailing.
Click the three dots icon in the top right corner.
Click Schedule emailing.
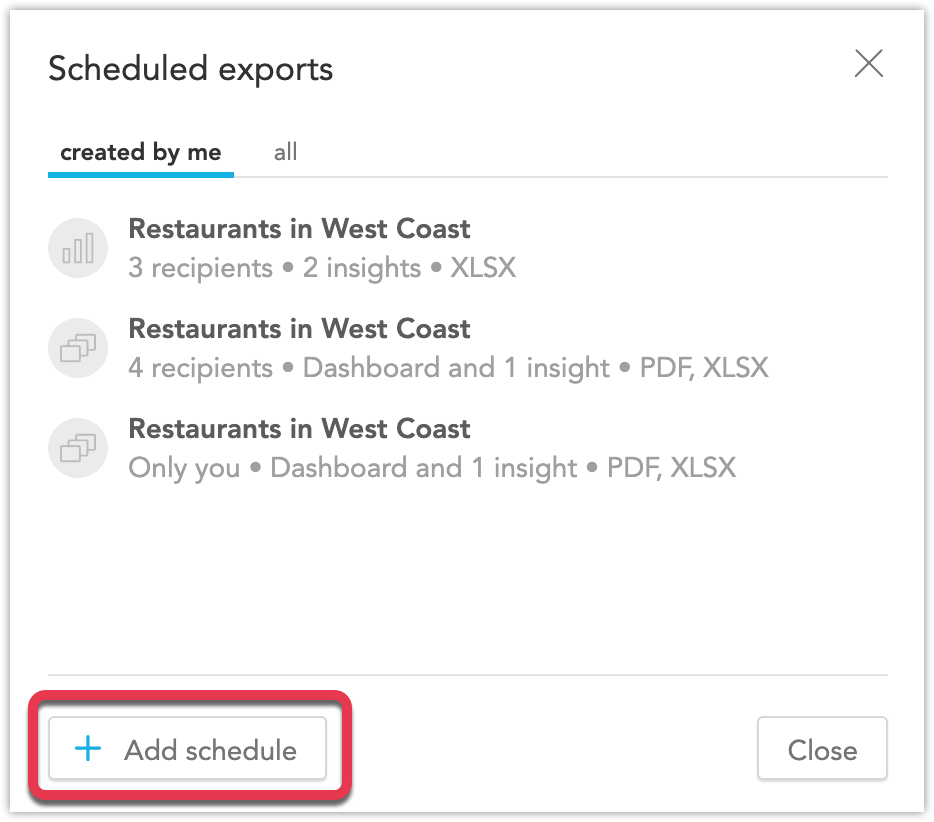
Click Add schedule.
In the To section, fill in the email addresses of recipients who will receive the regular messages. Your email address is always included. You can add recipients:
From the workspace - Their email addresses are suggested as you write. If users have any filters defined, these filters are applied to the dashboard as well.
Other recipients - Your Dashboards may contain sensitive data - make sure that the recipients are eligible to see them.
Please note that if the dashboard is private, users have to be both part of the workspace and have the dashboard shared with them to recieve a scheduled email.
To disable recipients outside of the workspace, set the
enableKPIDashboardScheduleRecipientsplatform setting tofalse. For details, see Configure Various Features via Platform Settings.

Customize the email Subject and Message. By default, the subject includes the name of the dashboard and the date it is sent.
In the Attachment section, select if you want to receive the whole dashboard and/or individual insights. By default, the whole dashboard is selected.
You cannot export individual Key Performance Indicators (KPIs).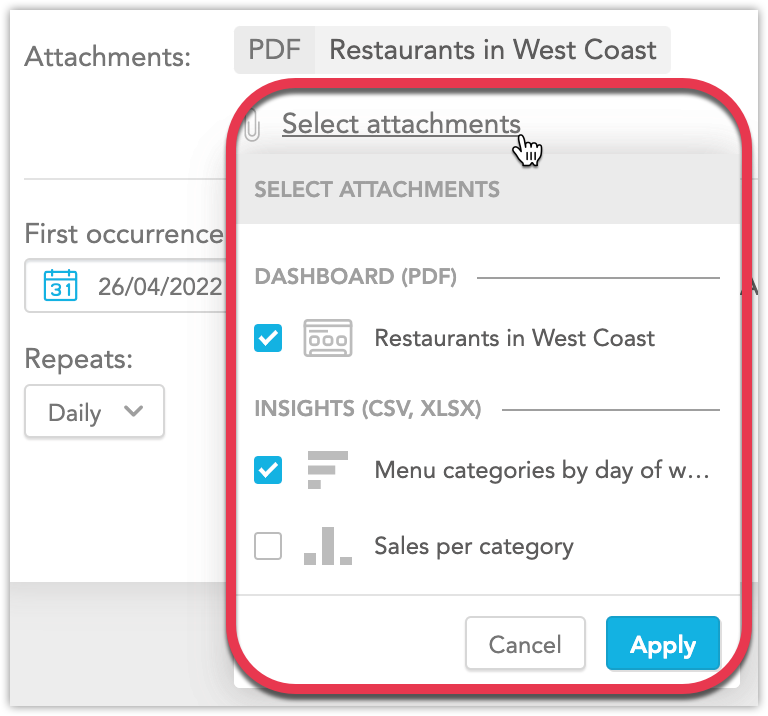
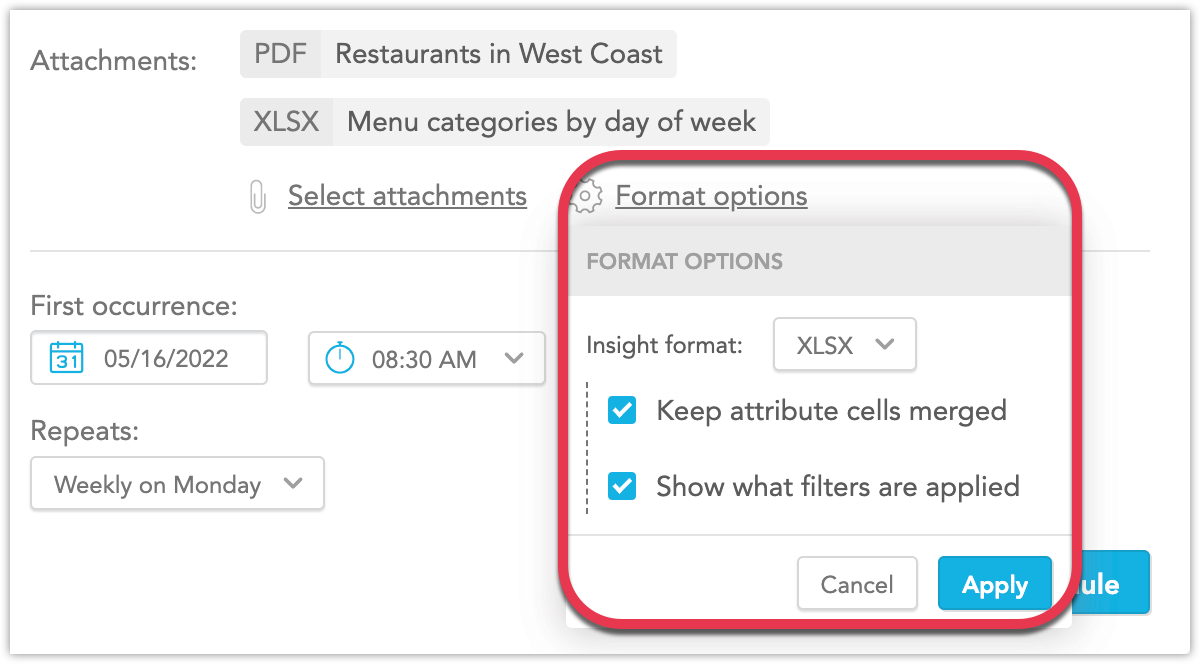
If you add any insights, click Format options and select the format for the insights. For details about file formats, see the Export file types section in Export Dashboards.
Configure the date and time of the first email.
Set the repetition scheme. GoodData can send the emails daily, weekly, monthly, or at a custom interval.
Click Schedule .
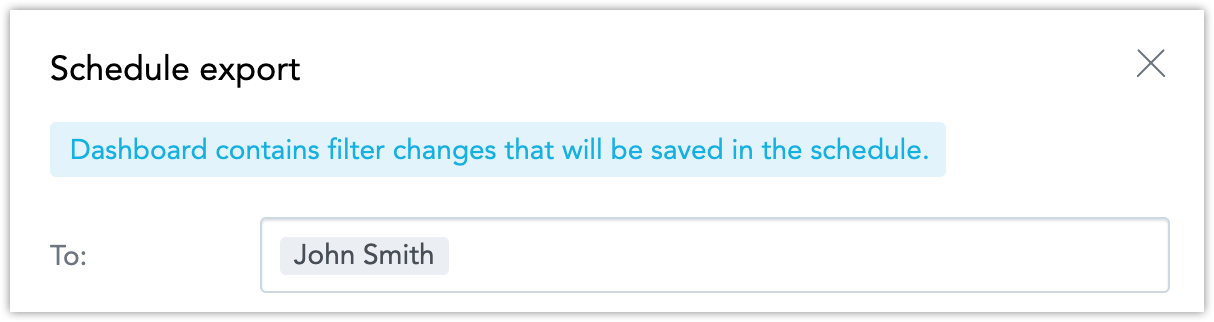
The dashboard will be exported with the filters that are set at the time of creating the schedule.
If the currently set filters are different from the filters saved on the dashboard, a message is displayed in the Schedule export dialog.
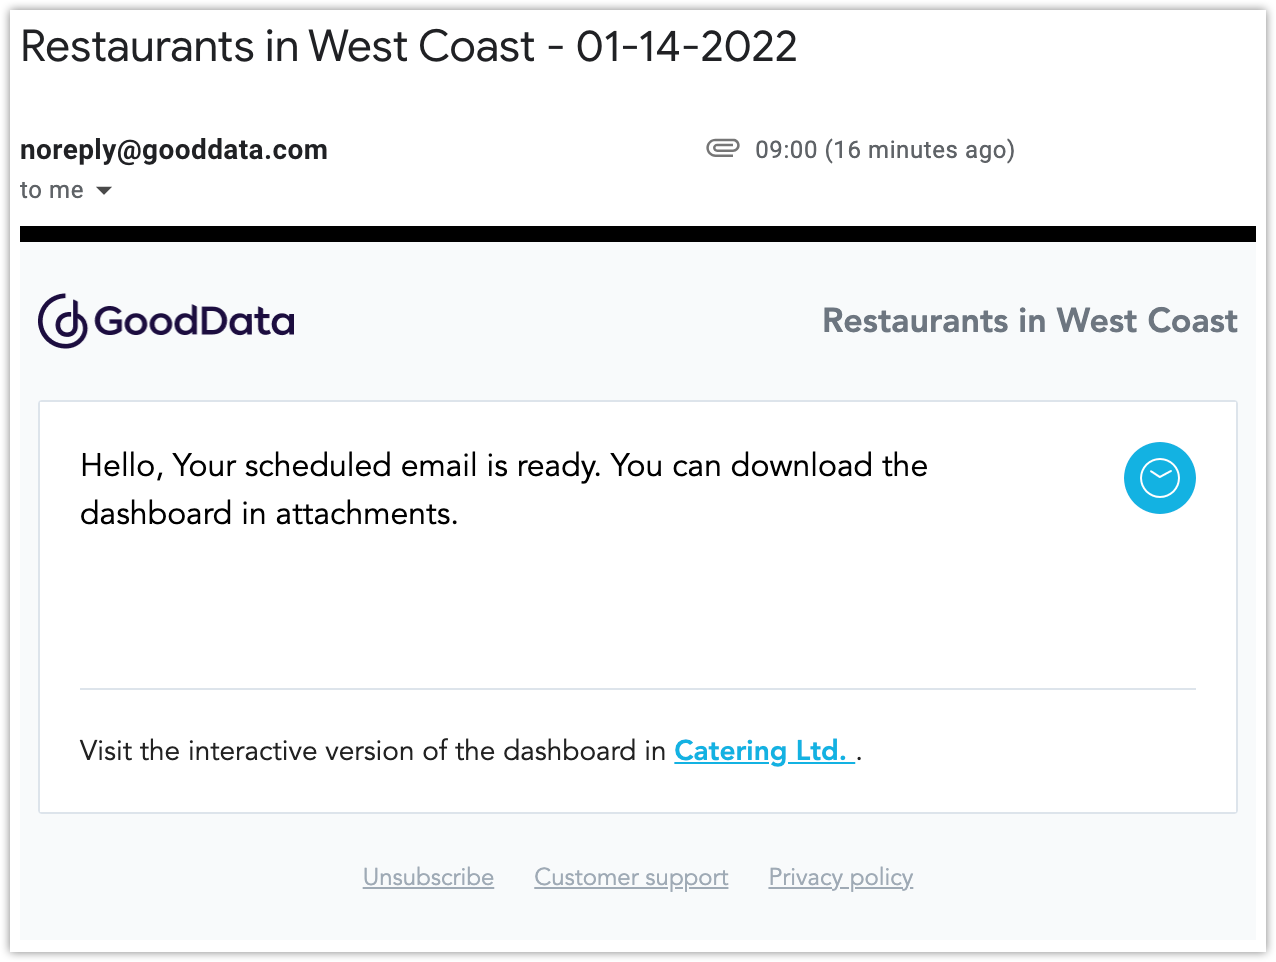
From now on, all recipients will receive regular emails that include:
A link to display the dashboard on the GoodData Portal. Recipients must log in to see the dashboard.
Only users that have access to the dashboard can display it online.
If you use white-labeling, the link is sent only if the
suppressProjectLinksparameter is enabled. For details about white-labeling, see White Label Your Domain.Attachments with files with the dashboard and/or insights. Recipients can download the files to their hard drive.
An Unsubscribe link. Recipients can click Unsubscribe to stop receiving the scheduled emails.
If you lose access to the dashboard for which you schedule emailing, the dashboard is not sent to any recipients.
Schedule emailing of individual insights
You can also schedule emailing of individual insights directly from the dashboard.
- Hover your mouse over an insight.
- Click the three dots.
- Click Schedule export.
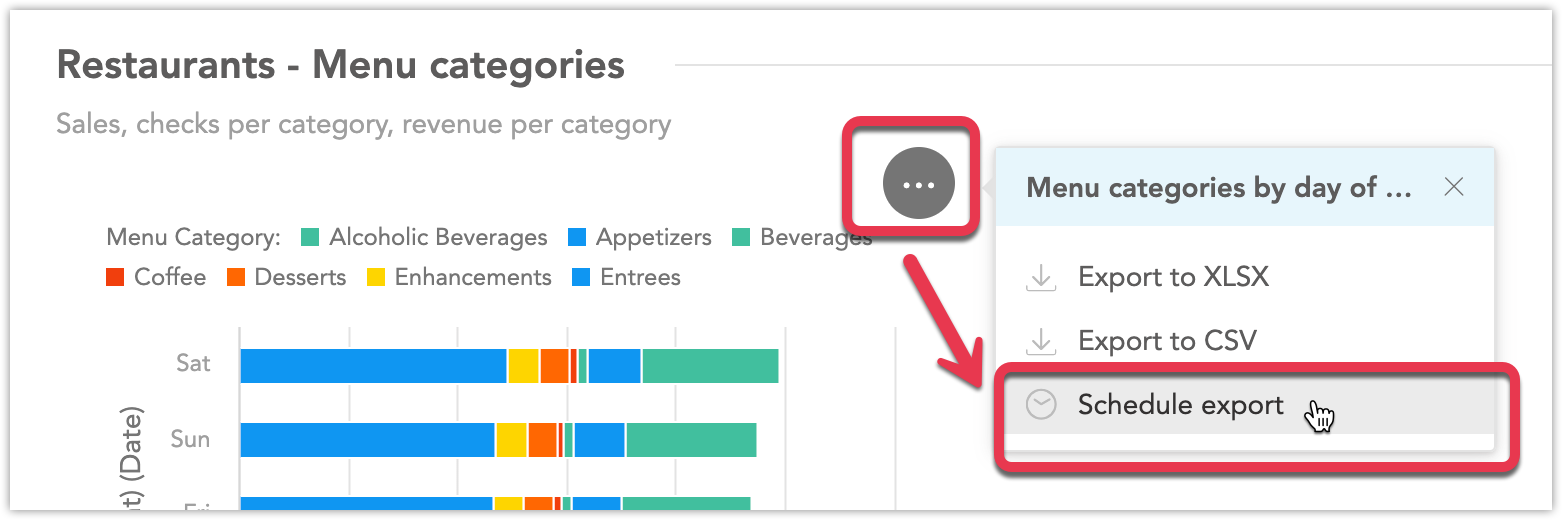
Now you can follow the same steps as for dashboards above from step 5.
Managing scheduled emails
To display all scheduled emails for any dashboard, open the dashboard, click the three dots icon in the top right corner, and select Schedule emailing.
On the created by me tab, you can see you own schedules. On the all tab, you can see schedules of all users.
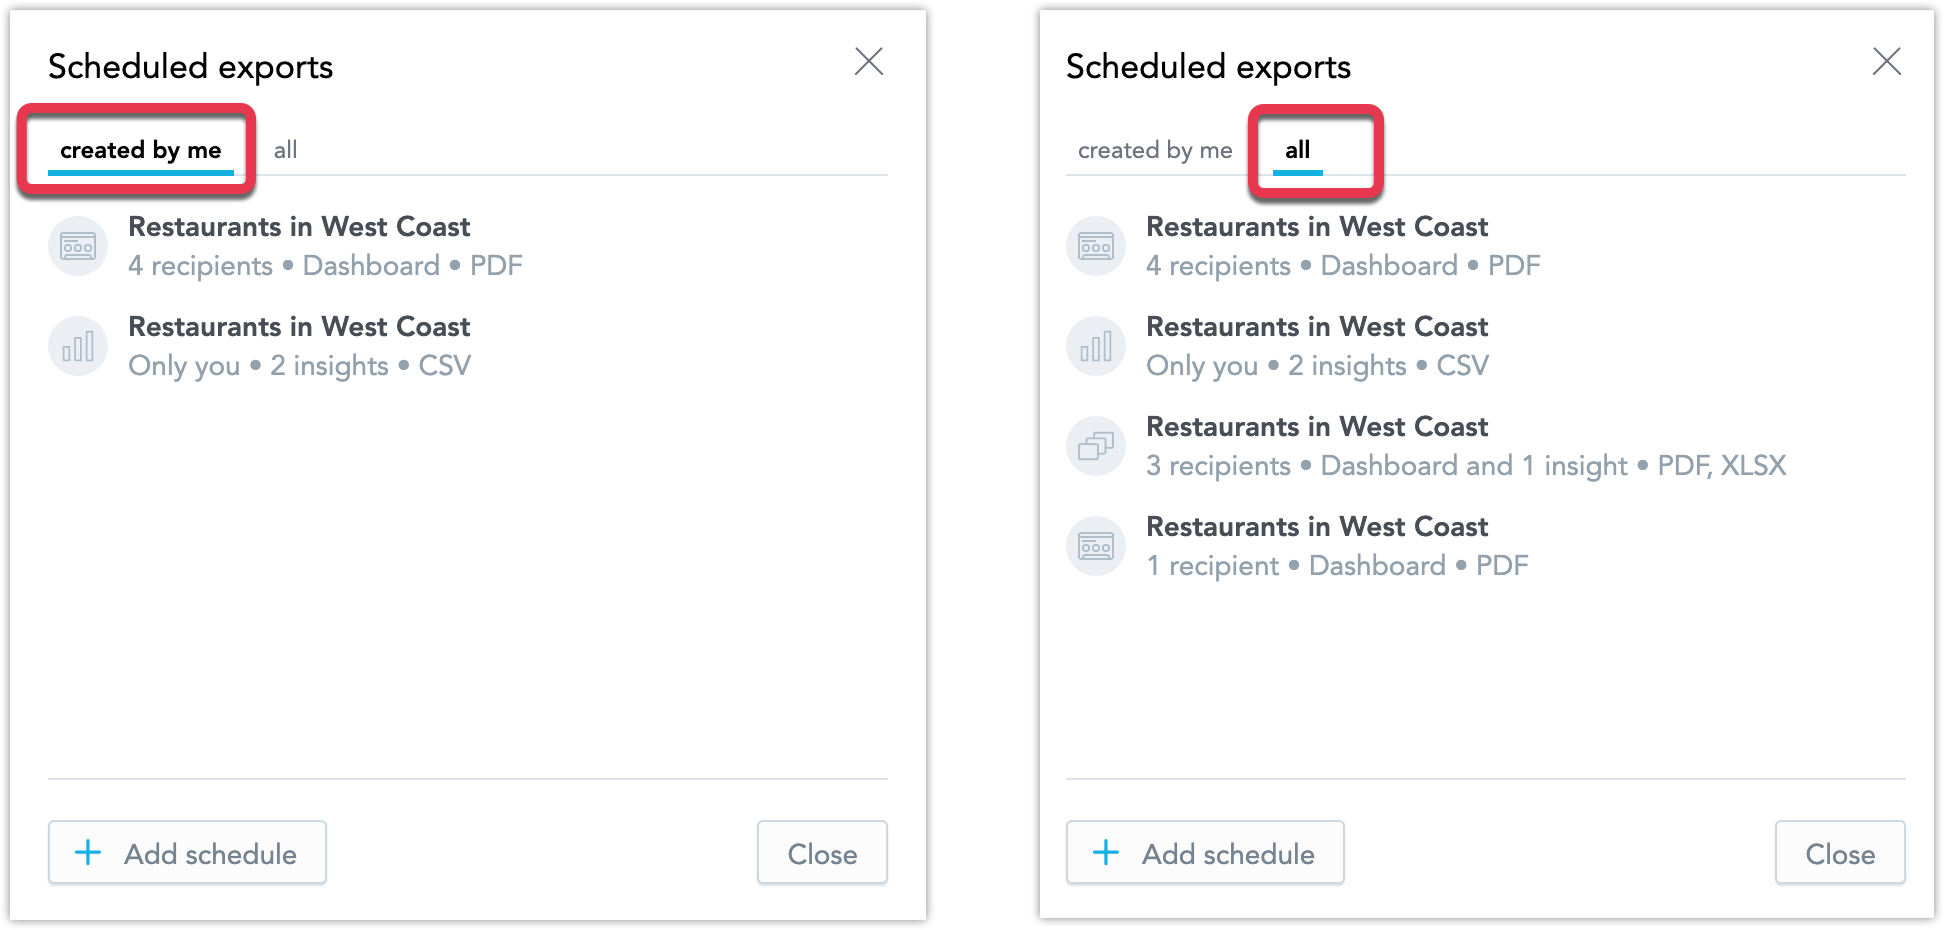
To edit a schedule, click the schedule name and edit it.
To delete a schedule, hover over the schedule name and click the bin on the right.

Users with the Viewer or Explorer role can only see schedules that they created. They cannot edit any existing schedules, only delete them. For details about user roles, see User Roles and User Roles Permissions.
Editing existing schedules does not affect filters. Exports will always include the filters set at the time of creating the schedule.