Schedule a Data Loading Process for a Group of Workspaces
If you have segments set up with multiple workspaces to load data to (see Set Up Automated Data Distribution v2 for Data Warehouses) and your source data is stored in a cloud data warehouse (for example, Snowflake or Redshift), you can load data to a particular set of workspaces within a segment, and you can define the order in which the data will be loaded from the data warehouse to those workspaces.
For example, if you have a segment with ten workspaces, you may want to load data to only five of them and also set the order in which the source data will be loaded to those five workspaces.
To implement this or similar scenario, do the following:
- Within the segment, organize the workspaces into groups. You can have as many groups as you need based on your business requirements. Each workspace can belong to only one group.
- In each group, assign priorities to the workspaces. The priorities must be positive integers (
1being the highest). In some groups, you can have the priorities set as1,2,3,4,5, … . However, in other groups, you may want to skip some priorities and have them set as2,3,5,7,9, … . - Deploy a process for Automated Data Distribution (ADD) v2 for the segment, and schedule it to load the data only to the workspaces that belong to one or more groups in this segment.
Once the process starts executing, the order of loading the data to the workspaces is defined based on the assigned priorities. If you load data to the workspaces in two or more groups, you may have several workspaces with the same priority (for example, three workspaces, each from a different group, with priority 1). The data for the workspaces with priority 1 will be loaded first, followed by the data for the workspaces with priority 2, and so on.
The prioritization defines the order in which the source data is retrieved from the data warehouse and then uploaded to the workspaces. However, performance of the updated workspaces during peak hours, network interruptions or similar issues may affect the pre-defined order in which the data is uploaded to the workspaces.
If you need to implement complex scenarios of loading data to multiple workspaces in a certain order, you can combine scheduling data loading processes for a group of workspaces with setting up schedule sequences (see Configure Schedule Sequences).
Steps:
Create a table in your data warehouse that organizes the workspaces into groups and assigns priorities to the workspaces within each group. Name the table
load_workspaces. Name the first column eitherx__client_id(if you identify the workspaces by the client IDs) orx__project_id(if you identify the workspaces by the workspace IDs). Name the two other columnsx__dataload_groupandx__priority. The table would look like the following when you identify the workspaces by the workspace IDs:x__project_id x__dataload_group x__priority workspace_id_1 group_1 1 workspace_id_2 group_1 2 workspace_id_3 group_2 2 workspace_id_4 group_2 1 workspace_id_5 group_1 3 The table would look like the following when you identify the workspaces by the client IDs:
x__client_id x__dataload_group x__priority client_id_best_foods group_1 1 client_id_zen_table group_1 2 client_id_acme group_2 2 client_id_supatabs group_2 1 client_id_robcorp group_1 3 If you do not want to or cannot create a table in the data warehouse, you can reuse data about the client IDs/workspace IDs, group names and priorities from an existing table in the data warehouse.Deploy a data loading process for ADD v2 as described in Deploy a Data Loading Process for Automated Data Distribution v2. When selecting the workspaces to load data to, select Segment (LCM) and then select the segment containing the workspaces where you want to load the data to.
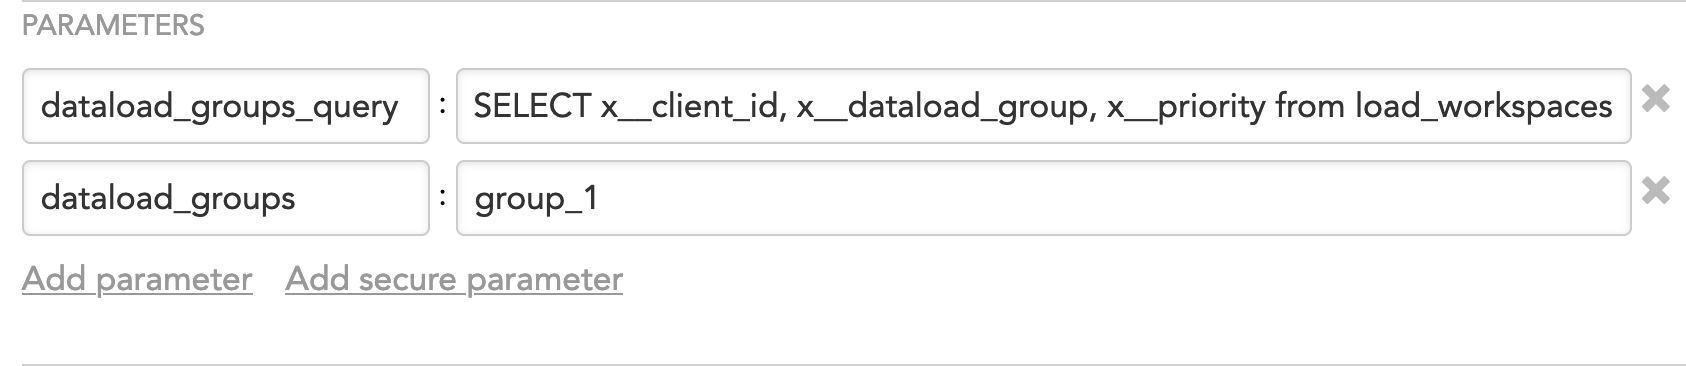
Start creating a schedule as described in Schedule a Data Load. When creating the schedule, add the
dataload_groups_queryparameter to the schedule and set it to the following statement:SELECT x__client_id, x__dataload_group, x__priority from load_workspacesAdding this parameter makes sure that the data will be loaded only to the workspaces that are specified in the
load_workspacestable.If you are reusing data about the client IDs/workspace IDs, group names and priorities from an existing table in the data warehouse, modify the statement accordingly, for example:
SELECT column_A as "x__client_id", column_B as "x_dataload_group", column_C as "x__priority" from table_1For general information about schedule parameters, see Configure Schedule Parameters.
(Optional) If you want to further narrow down the list of the workspaces and to load the data only to the workspaces that belong to a certain group (or several groups), add the
dataload_groupsparameter and set it to the names of the groups, for example:group_1or
group_1, group_2
(Optional) Specify a new schedule name. The alias will be automatically generated from the name. You can update it, if needed.
The alias is a reference to the schedule, unique within the workspace. The alias is used when exporting and importing the data pipeline (see Export and Import the Data Pipeline).Click Schedule. The schedule is saved and opens for your preview.
(Optional) Click Add retry delay to set up a retry delay period for your schedule. When a retry delay is specified, the platform automatically re-runs the process if it fails, after the period specified in the delay has elapsed. For more information, see Configure Automatic Retry of a Failed Data Loading Process.
If a schedule repeatedly fails, it is automatically disabled, and your workspace data is no longer refreshed until you fix the issue causing failure and re-enable the schedule. For more information on debugging failing schedules, see Schedule Issues.