Configure an Embedded Dashboard to Display a Specific Tab
You can configure an embedded dashboard to display a specific tab whenever a user opens it in the embedding web application.
You can also combine this technique with the Hide the Header of an Embedded Dashboard technique to restrict the dashboard view to a specified tab.
In this example, you are using another dashboard tab in your workspace as the target embedded dashboard, instead of embedding it in an outside application. However, the technique to apply this procedure to an outside application is very similar. This procedure alternates between two dashboards - source and target. It may be helpful to have both dashboards open in a single browser and to use a text editor for staging the code that you copy and paste.
Steps:
Open both dashboards in a single browser (recommended).
In the source dashboard, open the desired tab.
Copy the tab’s object identifier value. From the end of the URL, copy all the text following the pipe symbol (|) to the end of the URL. Paste it in the text editor for use later.
https://secure.gooddata.com/#s=/gdc/projects/8thc020r46ru5mej90dewtxsdmfdmn9w|projectDashboardPage|/gdc/md/8thc020r46ru5mej90dewtxsdmfdmn9w/obj/1018371|a424c3eaf1dfIn GoodData, terms workspace and project denote the same entity. For example, project ID is exactly the same as workspace ID. See Find Workspace ID.In the source dashboard, click the Gear icon, and then click Embed.
Select and copy the HTML code, and then click Close.
Paste the HTML code in the text editor for use later in this procedure.
Open the target dashboard page, click the Gear icon, click Edit, and then, click Web Content.
In the Add Web Content dialog box, paste the HTML code that you copied from the source dashboard.
Click Save.
Drag the embedded dashboard to the desired location.
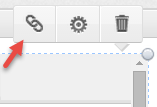
With the embedded dashboard selected, click the Link icon.
At the end of the HTML code, type &tab= followed by the tab’s object identifier that you copied from the source dashboard in step 3.
(Optional) Add one of the query parameters to the HTML code:
To hide the Powered by GoodData logo from the header of the embedded dashboard, type &showGDLogo=false at the end of the URL.
To hide the whole header of the embedded dashboard, type &nochrome=true at the end of the URL.
Hiding the header from a multi-tab dashboard saves place and removes all the tabs except the tab that you specify. This is an effective way to limit the information that users can see.
For more information on hiding the header, see Hide the Header of an Embedded Dashboard.
Click Save to close the Add Web Content dialog box.
Click Save in the upper right of the dashboard to exit edit mode.
Refresh the browser window.
