Get Started Using Agile Data Warehousing Service
CloudConnect is a legacy tool and will be discontinued. We recommend that to prepare your data you use the GoodData data pipeline as described in Data Preparation and Distribution. For data modeling, see Data Modeling in GoodData to learn how to work with Logical Data Modeler.
Use this simple, CloudConnect-based, tutorial to get started using the GoodData Agile Data Warehousing Service (Data Warehouse), a high-performance columnar datastore specifically designed to meet data loading and storage requirements for your GoodData workspaces (projects).
- This storage is fully managed by GoodData, on the top of Vertica database.
- Some users may be familiar with Data Warehouse under its previous name, “Data Storage Service.” Code-level references to “dss” have not been updated to the new name.
Prerequisites
- CloudConnect is installed.
- Download and import the example Data Warehouse project into CloudConnect. See ads-examples.zip.
- Create an empty GoodData Project using your project authorization token through CloudConnect. For more information about the authorization project, see Find the Workspace Authorization Token.
- To be allowed to access ADS.
Before you begin, you should have a basic understanding of how CloudConnect works.
Example Project
For this tutorial, we will use an example project in which you are storing some data about Sales opportunities.
To download the example project, see ads-examples.zip.
This project contains the following:
- data model, which you will publish.
- a minimal graph (
ADS_Minimal.grf), which you will use to manage the three-step process of creating your Data Warehouse storage table, uploading the data, and then uploading the data from Data Warehouse to your GoodData project. - Other example graphs are included in the project for more advanced use cases, which exceeds the scope of this tutorial.
- source data (
opportunities.csv), which you will load through the graph into Data Warehouse for publication into the data model. - Other example data files are included.
For your specific needs, you will need to create a Data Warehouse instance and a connection between CloudConnect and that instance. These steps are outlined later.
Creating a Data Warehouse instance
Let’s create a new Data Warehouse instance. Go to the following URL:
https://secure.gooddata.com/gdc/datawarehouse/instances
Complete the form to create new instance with the following information for it:
- Title
- Description
- Data Warehouse authorization token
You may also create a new instance using the Data Warehouse API documentation (see API Reference).
Publish the example data model
Now, jump into the CloudConnect and publish the data model. If you are not sure how, see Creating a Data Model.
Steps:
- Open the example project in CloudConnect.
- Open the Data model folder (
project-folder/model). - Publish it to the new project you created. If you have not done so already, create the project as part of this process.
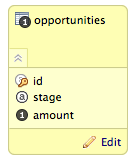
The model is really simple. It contains the following elements:
id- a connection point- This connection point contains an additional label. Click Edit to review.
amount- factstage- attribute
Connect to Data Warehouse from CloudConnect
The next step is connecting to the Data Warehouse from the CloudConnect using the JDBC connection.
Verify or install the JDBC driver
Recent versions of CloudConnect Designer include the JDBC driver. If your version of CloudConnect Designer does not include the JDBC driver, you should upgrade to the latest version of CloudConnect.
The driver is available at the Downloads page at https://secure.gooddata.com/downloads.html.
If you are a white-labeled customer, log in to the Downloads page from your white-labeled domain: https://my.domain.com/downloads.html.
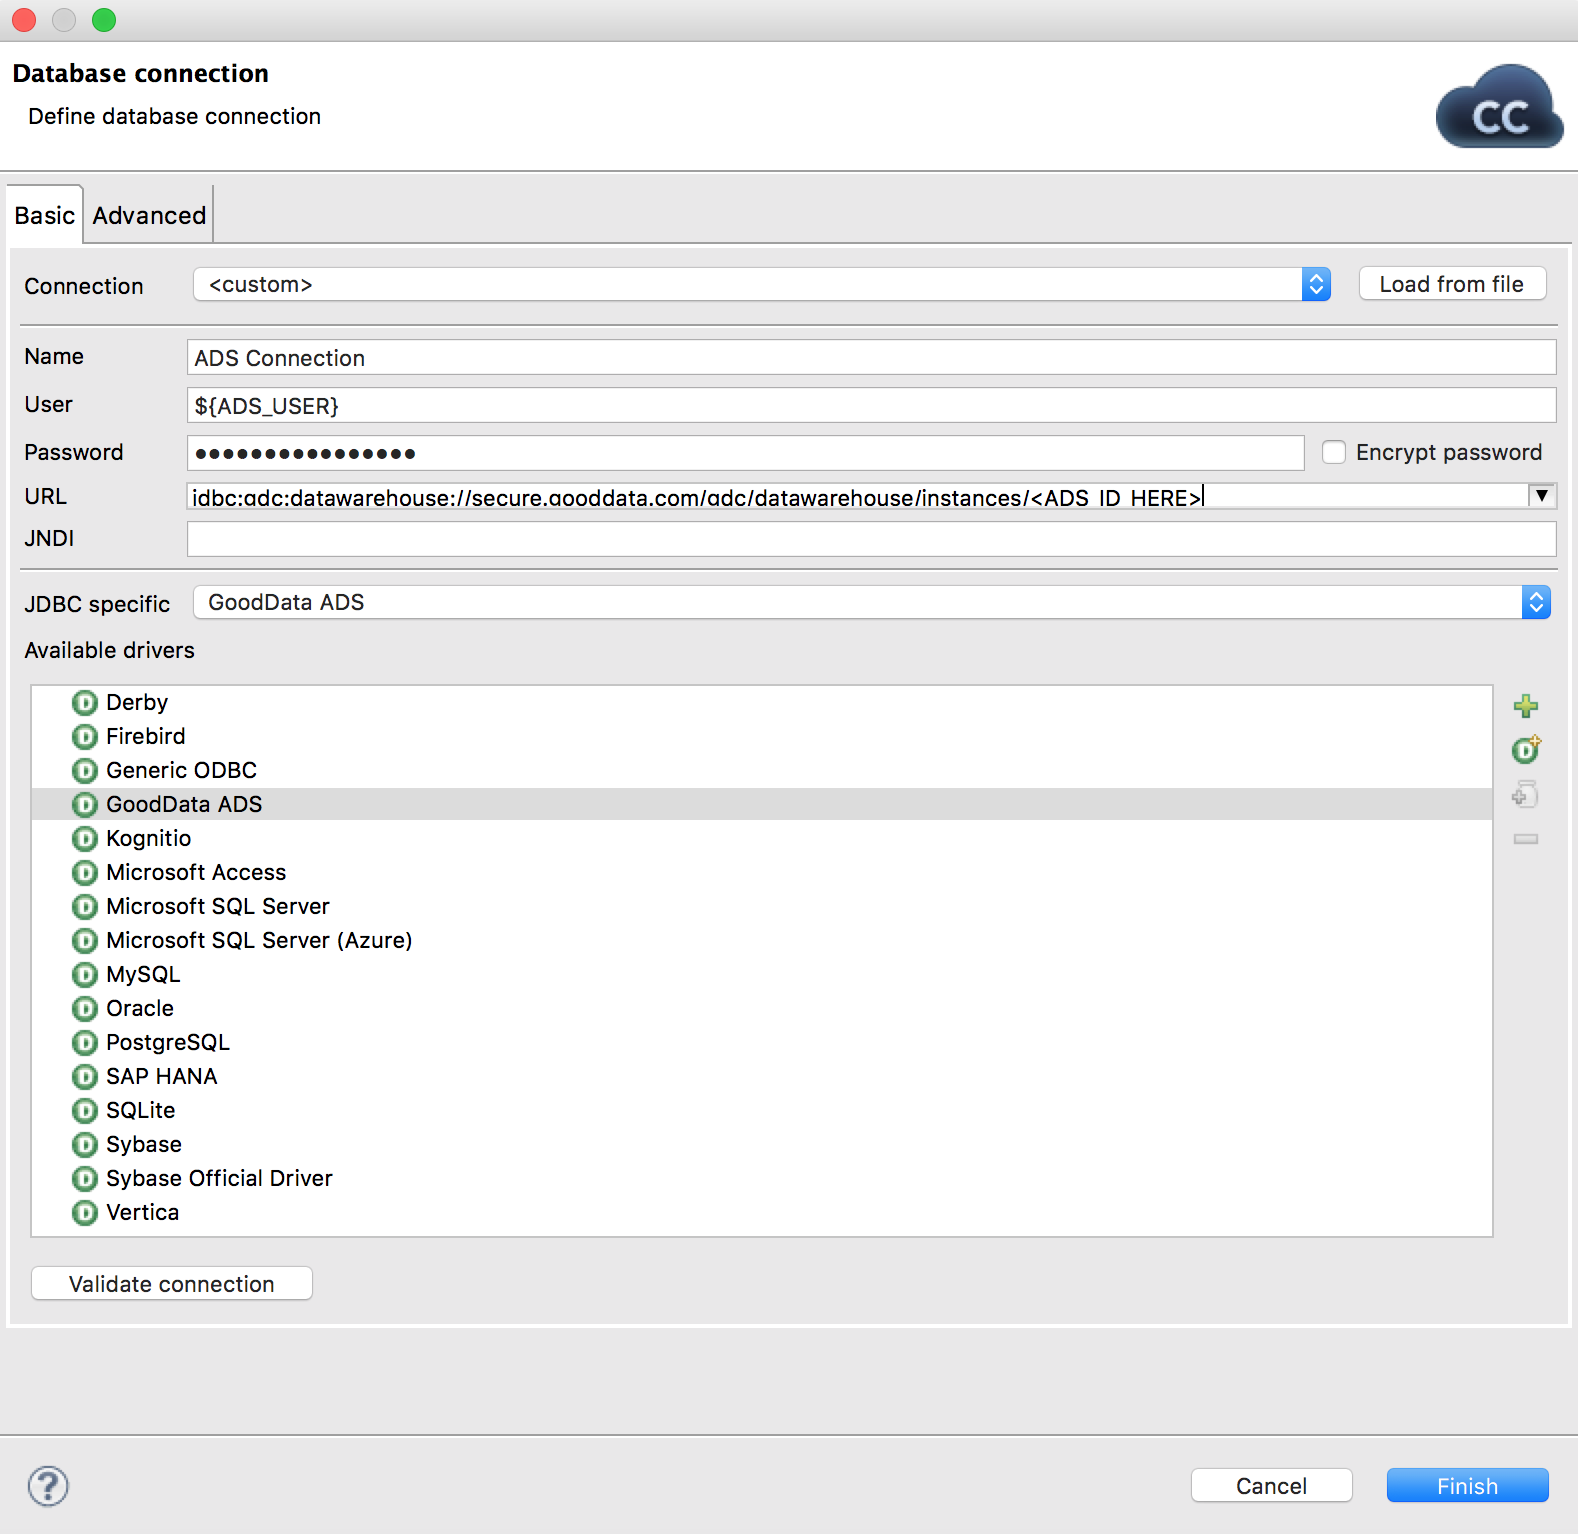
Create the CloudConnect connection
You must create a connection between CloudConnect and your instance.
By default, the example project contains a Data Warehouse connection, in which case you should just populate the appropriate fields in the Connection object.
Steps:
- Secondary-click Connections > Create DB Connection.
- Following information needs to be in place to create the CloudConnect connection to Data Warehouse. Remember that all information is in place in the example project.
- Name - Display name of the connection. Example:
GoodData Data Warehouse Connection - User - Your GoodData platform username (the same username you use to login to the GoodData Legacy)
- Password - Your GoodData platform password
- URL of the Data Warehouse instance you have already created
- Name - Display name of the connection. Example:
Overview of Data Loading Process
In production workflows, data is loaded from the source system into your instance, where the data is manipulated in staging tables. When the data is ready for use in the GoodData project, it is queried and then loaded into the target project.
- These steps can be managed from CloudConnect.
In this simple tutorial, data is loaded into the instance and then queried and loaded into the GoodData project from your CloudConnect project.
Steps:
- Open the example CloudConnect project.
- Configure the empty GoodData project as the working project for the example CloudConnect project. Secondary-click the project in the Server Explorer tab and select the appropriate menu item.
- In the graph folder, open the
ADS_Minimal.grffile. This simple example contains the following basic phases:- Phase 0: Create database table
- Phase 1: Copy data into the table
- Phase 2: Upload the data to the GoodData Project
- In each Phase is a DBExecute or DBInputTable component, which is used for executing the SQL statements provided in the sections below. You must populate each component with the appropriate SQL, customizing for any specifics of your local data or table definition.
- Configure the Run Configuration for the ETL process with your instance parameters.
- Run the graph.
See the details about the Minimal graph below.
Create new database table
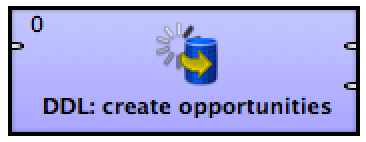
Phase 0 - DDL: create opportunities component
Using the DDL:create opportunities component, you must create a new database table to store sales opportunity data, using the simple create table statement.
This statement must be inserted in the SQL query field of the component:
CREATE TABLE IF NOT EXISTS in_opportunities (
  _oid IDENTITY PRIMARY KEY,
  id VARCHAR(32),
  name VARCHAR(255) NOT NULL,
  created TIMESTAMP NOT NULL,
  closed TIMESTAMP,
  stage VARCHAR(32) NOT NULL,
  is_closed BOOLEAN NOT NULL,
  is_won BOOLEAN NOT NULL,
  amount DECIMAL(20,2),
  last_modified TIMESTAMP
)
Load source data into the table

Phase 1 - COPY: load opportunities
In Phase 1 of the data loading process, you use the DBExecute component called COPY: load opportunities to load data from your local source CSV file into the table you just created.
To load the data into your instance, use the COPY LOCAL statement below.
Data is being loaded from the local CSV files, which are contained in the example project.
For a production system, you must download source content as CSV files to your local system. Through CloudConnect, you must use the COPY LOCAL command to uploading into your instance.
COPY in_opportunities
  (id, name, created, closed, stage, is_closed, is_won, amount, last_modified)
  FROM LOCAL '${DATA_SOURCE_DIR}/opportunities.csv' UNCOMPRESSED
  SKIP 1
  ABORT ON ERROR
Loading data from Data Warehouse to GoodData project

Phase 2 - Extract opportunities and load into the GoodData project
After all data has been loaded into the instance, you can apply the following SQL query in the EXTRACT Opportunities component to select the data:
SELECT id, name, created, closed, stage, is_closed, is_won, amount, last_modified
  FROM opportunities
After it is extracted, you perform a metadata mapping between the component and the GD Dataset Writer component to enable uploading it to the GoodData platform through CloudConnect.
If you have not done so already, you must configure a working project for your CloudConnect project. This project should be the empty project you created at the beginning of this tutorial.
Configure run configuration
To run this graph successfully, you must add three parameters to the Run Configuration in CloudConnect.
Steps:
- From the CloudConnect menu, select Run > Run Configurations….
- Select the graph you want to execute.
- Click the Arguments tab.
- Specify the following parameters:
- ADS_USER - Your Data Warehouse username
- ADS_PASSWORD - Your Data Warehouse password
- ADS_INSTANCE_ID - This is your Data Warehouse instance identifier
- Those parameters are used inside all ETL graphs. Click Apply to save your changes.
Run the ETL graph. When it completes successfully, verify that your data has been loaded into the target project.