Workspace Specific Data Storage
GoodData workspace-specific data storage lets you stage and deliver your data files to the workspace. You can stage valid row-based CSV files or well-formed XML (adding a schema is helpful).
You must be a workspace administrator (see User Roles) to be able to access the workspace-specific data storage.
Workspace-specific storage is not permanent storage. Files are automatically deleted after 7 days.
GoodData workspace-specific data storage is workspace-based and is not user-based (for more information about user-based data storage, see User Specific Data Storage). All users who have admin access to the workspace can access the data in the workspace-specific data storage.
Access Details
To access your workspace-specific data storage, you need to know the server URL and credentials to log in to this server.
Server URL
The server URL depends on the datacenter that your data is stored in.
Steps:
- Find out what datacenter holds your data (see Finding Out Your Data Colocation).
- Find the server URL under your datacenter (see Datacenter Properties).
For example, the URL may look like the following:
https://{your.domain.com}/gdc/projects/{workspace_id}/uploads
where {your.domain.com} is the domain URL that is used to log in to the GoodData platform.
If you do not know your workspace ID (also known as project ID), see Find the Workspace ID.
Credentials
Use your GoodData username and password to log in.
Connect to Your Workspace-Specific Data Storage
The following examples use the sample workspace ID e863ii0azrnng2zt4fuu81ifgqtyeoj21 and the sample hostname acmecorp.gooddata.com{.plain .plain}. Replace them with your workspace ID and hostname.
REST API
The following cURL command returns the link to the workspace-specific data storage:
curl -H 'Accept: application/json' -X GET https://acmecorp.gooddata.com/gdc/projects/e863ii0azrnng2zt4fuu81ifgqtyeoj21/uploads | jq '.project.links.uploads'
WebDAV
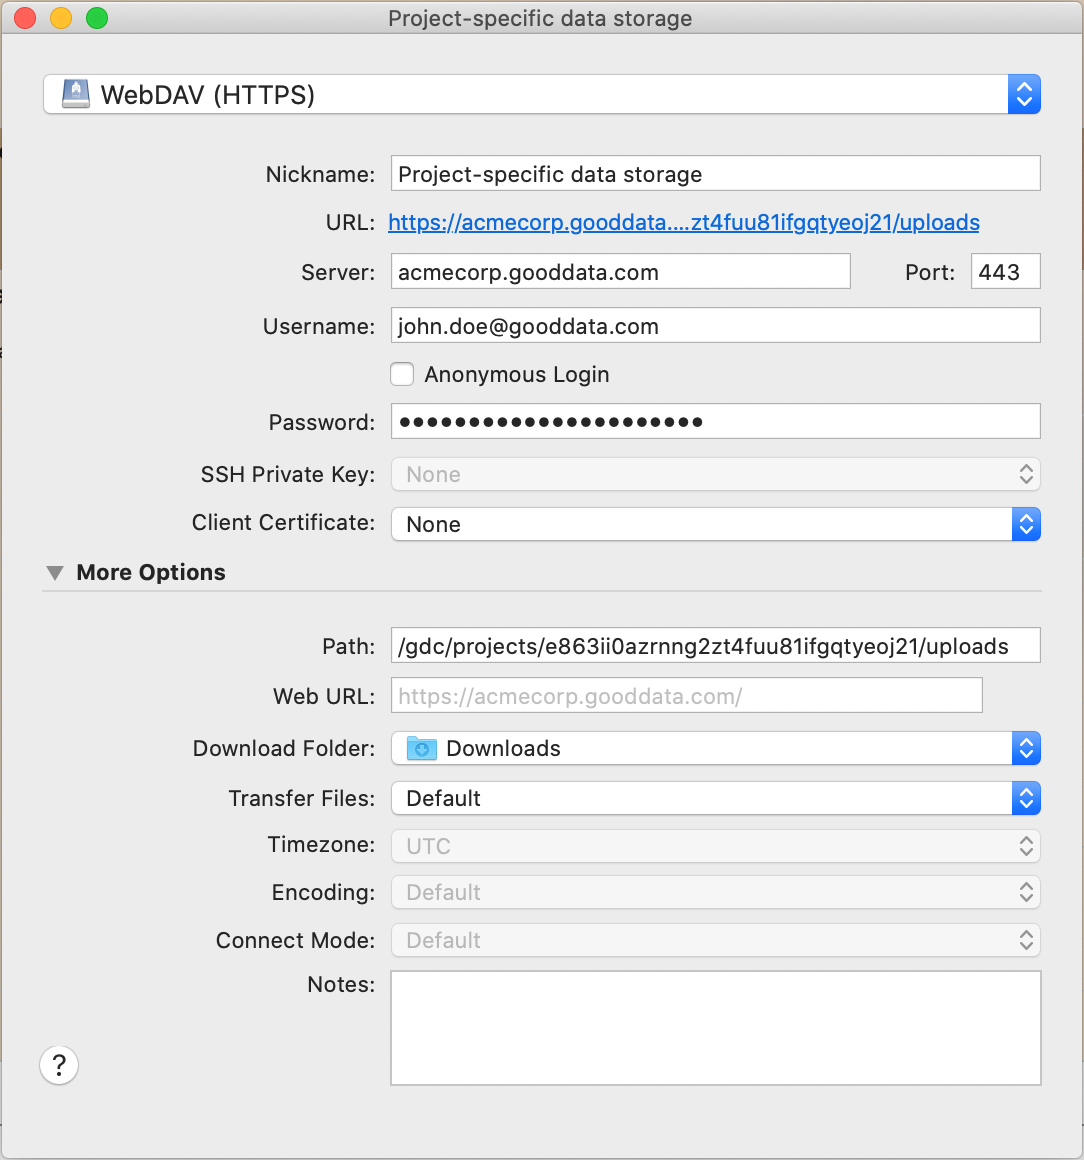
The following picture shows how you can connect to your workspace-specific data storage via WebDAV using Cyberduck:
Mac Finder
Steps:
- Open the Finder window.
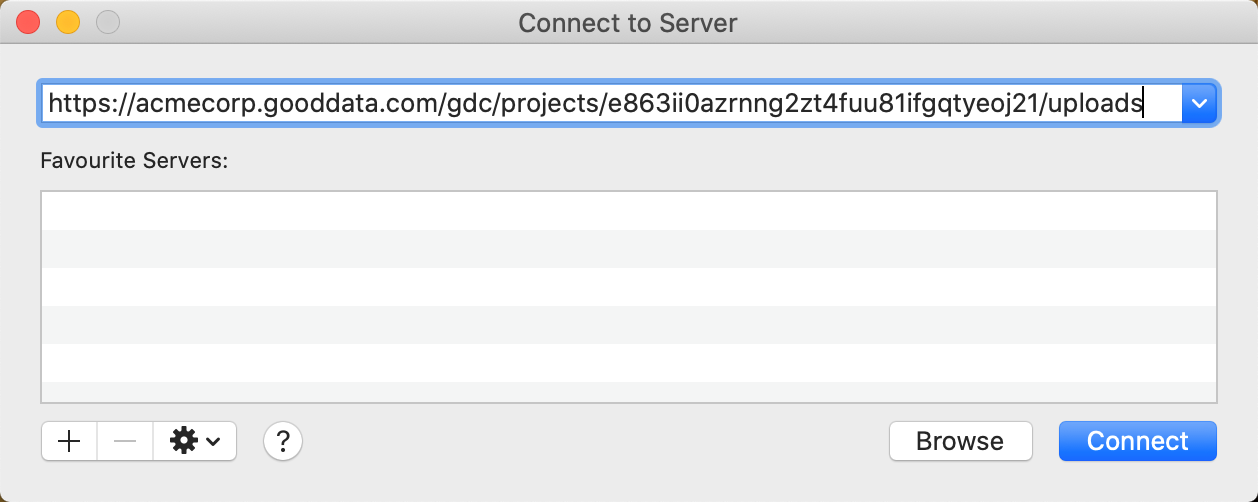
- From the top menu, select Go > Connect to Server… . The dialog for connecting to a server appears.
- Enter the server URL (see Access Details), and click Connect:
- When prompted, enter your GoodData credentials, and click Connect.
If you are accessing the workspace-specific data storage via a browser, be sure to include the final slash:
https://acmecorp.gooddata.com/gdc/projects/e863ii0azrnng2zt4fuu81ifgqtyeoj21/uploads/
Uploading a File to Workspace-Specific Data Storage Using Ruby
The following Ruby script uploads the file test.txt to the workspace-specific storage for the workspace with ID e863ii0azrnng2zt4fuu81ifgqtyeoj21:
require 'uri'
require 'net/http'

uri = URI.parse("https://acmecorp.gooddata.com/gdc/projects/e863ii0azrnng2zt4fuu81ifgqtyeoj21/uploads")
file = 'test.txt'
http = Net::HTTP.new(uri.host, uri.port)
http.use_ssl = true
request = Net::HTTP::Put.new("#{uri.request_uri}/test.txt")
request.basic_auth 'john.doe@gooddata.com', 'secretpassword'
request.body_stream = File.open(file)
request["Content-Type"] = "multipart/form-data"
request.add_field('Content-Length', File.size(file))
response = http.request(request)
We recommend that you zip your file before staging it to the workspace-specific data storage. This ensures file integrity and helps save time and bandwidth.

