Automating a Data Loading Process
This topic is part of the tutorial that is intended for developers who plan to work on data models and ETL using CloudConnect.
If you are interested in creating reports, dashboards, or metrics, start with Reporting and Dashboards.
CloudConnect is a legacy tool and will be discontinued. We recommend that to prepare your data you use the GoodData data pipeline as described in Data Preparation and Distribution. For data modeling, see Data Modeling in GoodData to learn how to work with Logical Data Modeler.
Periodically, you might need to update the data in your workspace with new data captured by the ETL graph that you have defined. Because this graph exists in two places, the CloudConnect project and the GoodData platform, you can integrate new data via CloudConnect or via the Data Integration Console.
Integrate New Data via CloudConnect
In CloudConnect Designer, you can run an ETL graph:
- Locally (see the Run Graphs Locally section in Preparing a Data Loading Process)
- Remotely in the GoodData platform
To run an ETL graph remotely in the GoodData platform:
- Click the Server Explorer tab.
- Select the project, and navigate to the graph that you want to publish.
- Right-click the graph file, and select Run….
- If prompted, accept the defaults, and click Run. The graph is run remotely.
Every time you run an ETL graph, you have to decide whether to execute incremental or full data loads. To configure the data load type, specify the Mode parameter in the GD Dataset Writer. By default, the Mode parameter is set to full load.
For the purpose of this tutorial, leave the Mode parameter set to full load.
Integrate New Data via Data Integration Console
If you have deployed an ETL graph to your GoodData workspace on the GoodData platform, you can automate the process of data loading via the Data Integration Console.
What Data Integration Console Is
The Data Integration Console is a UI component of the GoodData Portal that enables you to manage and track the data loading processes supplying data to their GoodData workspaces.
To access the Data Integration Console, log in to the GoodData Portal and use one of the following methods:
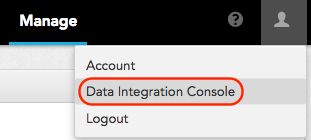
Click the menu that displays your name, and select Data Integration Console.

Go to the Manage page, and click Data Integration Console.

Access the following URL: https://secure.gooddata.com/admin/disc/
For more information on all features of the Data Integration Console, see Data Integration Console Reference.
Automating Data Loading Processes
Automating a data loading process consists of the following components:
Schedule is a repeated execution of an ETL graph. You can set the execution to occur at regular intervals as short as every 15 minutes. You can define schedule parameters to pass into the schedule, so that the selected ETL graph is processed for a specified workspace or other variable. For more information, see Schedule a Data Loading Process.
Notification is an email alert that informs you or other stakeholders of specific events occurring in the data loading process. For example, you can configure a notification to alert yourself or other stakeholders of a process failure. In this manner, workspace administrators and key users of the workspace can stay informed about ETL in their workspaces without having to log in to the Data Integration Console. For more information, see Create a Notification Rule for a Data Loading Process.
You can also define the both components via the API: schedule a data loading process and create a notification.
Using Cron Time
As an advanced option, you can set up the time of execution using a cron expression. To generate a valid cron time expression, use your favorite cron expression generator.
GoodData does not support the use of seconds in cron expressions. Use only 5-digit cron expressions.
Example cron expressions:
| Expression | Definition |
|---|---|
0 * * * * | Every day at the top of every hour |
*/15 * * * * | Every 15 minutes |
0 8-10 * * * | Every day at 8:00, 9:00 and 10:00 |
0/30 8-10 * * * | Every day at 8:00, 8:30, 9:00, 9:30 and 10:00 |
0 9-17 * * MON-FRI | The top of every working hour (from 9:00 till 17:00) on every working day (Monday to Friday) |
0 0 25 12 ? | Every Christmas Day at midnight |