Downloading a CloudConnect Process from the Platform
CloudConnect is a legacy tool and will be discontinued. We recommend that to prepare your data you use the GoodData data pipeline as described in Data Preparation and Distribution. For data modeling, see Data Modeling in GoodData to learn how to work with Logical Data Modeler.
This article describes how to download processes from the platform through CloudConnect. Through the Data Integration Console, you can download processes to your local system for importing into CloudConnect. For more information, see Data Integration Console.
After you publish a CloudConnect Designer project to a GoodData project in the platform, you may discover a need to retrieve that process from the server. Suppose you discover that the process you deployed into a project in the platform is not working on execution. You see errors in the Data Integration Console, yet you cannot locate the ETL graph in your local project.
Using this feature in CloudConnect, you can download the process from a GoodData project into a new CloudConnect project. This feature is useful in the following use cases, as well as others:
- You need to restore a deployed ETL transformation.
- You have lost some important project files and need to retrieve them from the GoodData project.
- You need to debug an ETL transformation that is failing on the server.
After you have downloaded the process into a new CloudConnect project, you may migrate pieces of it to other projects.
Download ETL Process
Before you begin, please make sure that you have the latest version of CloudConnect installed on your local machine. Check for updates to get the latest version.
Steps:
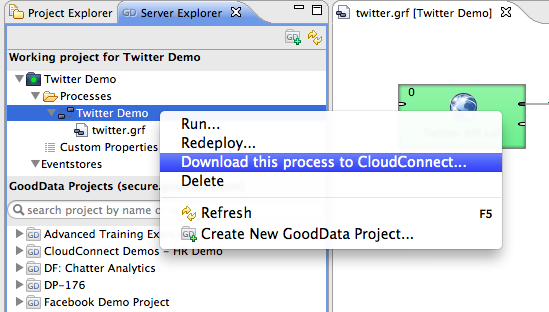
In CloudConnect Designer, open the Server Explorer, which contains all of your GoodData projects.
You may select projects through the Working Project or GoodData Projects panel. Open the project containing the process you wish to download.
Open the Processes folder.
Secondary-click the name of the process you wish to download. Then, select Download this process to CloudConnect….
Do not download individual files. Secondary-click the entire process.
Enter a name for the new project.
You cannot download the process into a pre-existing project in your local environment.To begin the download, click Download.
The process is downloaded and available in CloudConnect through the Project Explorer tab.
If desired, you must manually configure this project to be the working project for the server project.
Import into Other Projects
If you wish to use components of the downloaded process in other projects, you must do one of the following:
- Copy graphical objects from the downloaded project and paste them into target projects.
- Export the project from CloudConnect as a ZIP file. Then, import them into target projects. See below.
Importing single component of the process
In the steps below, you can review how to import a component of the CloudConnect process into an existing project.
Steps:
- If you have not done so already, export the CloudConnect project as a ZIP file. Unzip the project. In the unzipped folder, locate the file you wish to import.
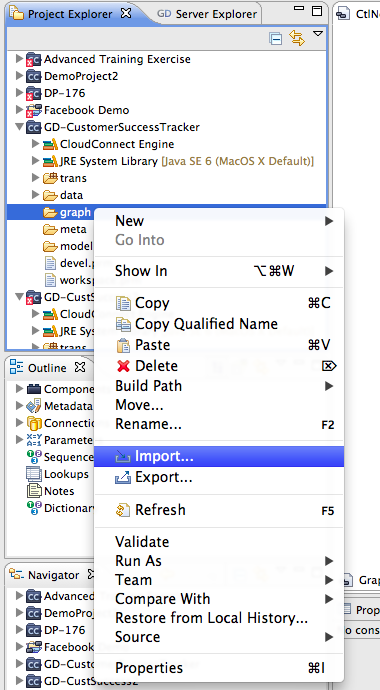
- To see your local CloudConnect projects, click the Project Explorer tab.
- In CloudConnect, open the project into which you’d like to import the file.
- Secondary-click the folder where you wish to import. Click Import….
- Select File System.
- Navigate your local environment to select the file to import.
- Import the file into your selected CloudConnect folder.
The file is imported.