Analyzing Data from Facebook Insights
CloudConnect is a legacy tool and will be discontinued. We recommend that to prepare your data you use the GoodData data pipeline as described in Data Preparation and Distribution. For data modeling, see Data Modeling in GoodData to learn how to work with Logical Data Modeler.
In this tutorial, you configure the provided CloudConnect project to connect to the Facebook Insights API to retrieve information from your Facebook account. This tutorial introduces the concept of connections, which are preconfigured methods for connecting to common web applications.
Pre-Requisites
CloudConnect Designer. To download it, see the Downloads page at https://secure.gooddata.com/downloads.html.
If you are a white-labeled customer, log in to the Downloads page from your white-labeled domain:https://my.domain.com/downloads.html.GoodData account. For more information, contact GoodData Support.
Google Analytics account & website with some data.
Facebook account, developer app, and access tokens.
Getting Started with the Project
To begin, download the package, which is stored as a ZIP file.
Open CloudConnect Designer. From the menu, select File > Import. Import the project from the archive (ZIP) file as a CloudConnect project.
The package contains the following:
- model: None. See below.
- graph: transform.grf
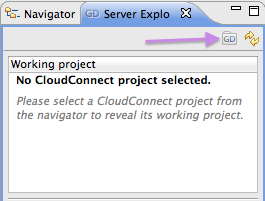
For each CloudConnect project, you must assign a GoodData working project. To assign, click the Server Explorer tab, and then click the GD logo:
The Create GoodData Project window is displayed. Enter a Project Name and provide a project authorization token. Then, click OK.
For more information about the authorization token, see Find the Workspace Authorization Token.
Project Overview
This project features the Facebook Reader, a custom CloudConnect component that can be used to download data from your Facebook account using the Facebook Query Language. Using this component is fairly straightforward.
This project is designed to write the results of your query to a local file. Since it is not writing to a GoodData project, it does not contain a logical data model. Part of this tutorial involves creating the very simple logical data model to support this project.
ETL Graph
The key part of this project is the ETL graph, which extracts data from Facebook and writes it to a local CSV file:
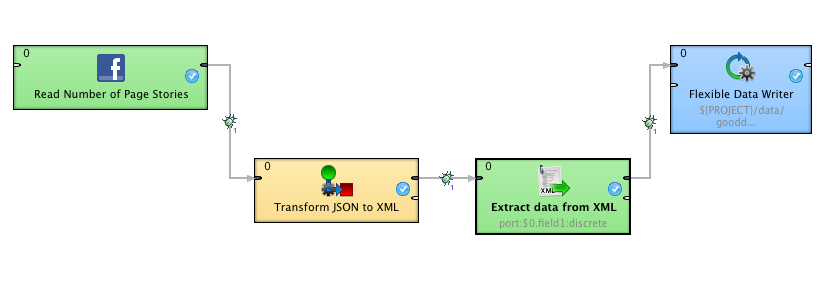
The data received from Facebook is in JSON format, which means it must be transformed into XML format. This format is then read using Xpaths to write the output data to a local CSV file.
Configure Connection
Before you begin, verify that you have acquired a Facebook API key and Facebook Page from which you can extract data.
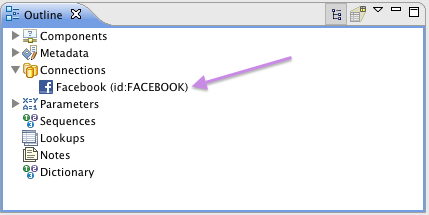
Before you begin using the ETL, you must create a new Facebook connection. In the Project Outline box, you can review the current connections. To create a connection, secondary-click the Connections folder and select New Facebook Connection. See below:
The Facebook connection window opens:
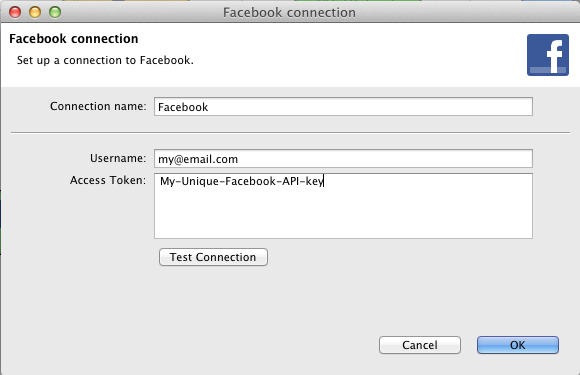
Paste your Facebook API key into the access token field. Click Test Connection. If the connection is valid, click OK.
Facebook Reader
After you have created the Facebook connection, you can configure the Facebook Reader to query your Facebook page. Double-click the first item in the ETL graph.
This component is simple to configure.
- Connection - Select the Facebook connection you just created.
- Facebook Query - For this value, you must enter the Facebook query to retrieve the content. See below.
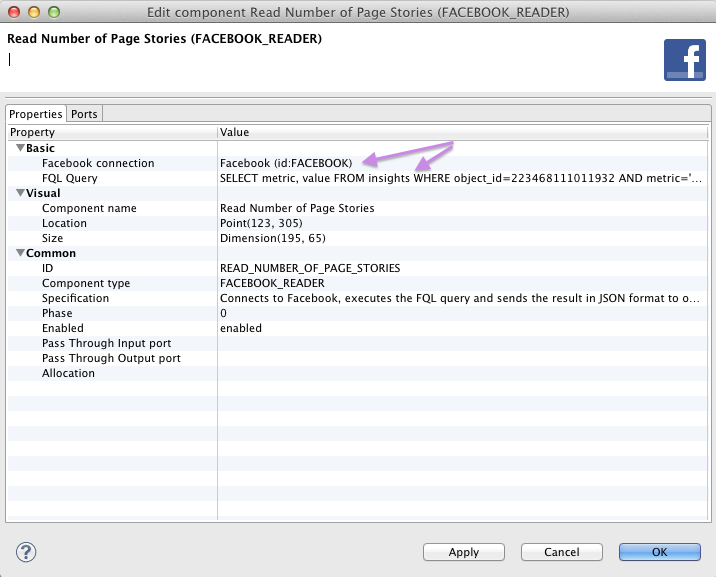
Due to the changes in the Facebook Platform API, we dropped the support of the FQL option in CloudConnect (the Facebook Reader). Only the Graph API option is available. Check your graphs in CloudConnect, and make sure that they are using Graph API.
Configuring your Facebook query
For this tutorial, you may use the following query, which reads the Number of Stories from your Facebook page for a specific week. This FQL query is the following:
SELECT metric, value FROM insights WHERE object_id={our-page-id} AND metric=’page_stories’ AND end_time=end_time_date(‘yyyy/MM/dd) AND period=period(‘week’)
When developing and testing Facebook queries, you can preview the results. For more information, see Facebook Explorer.
Transform JSON to XML
In the next step, the data is received in JSON format, and it must be transformed into XML.
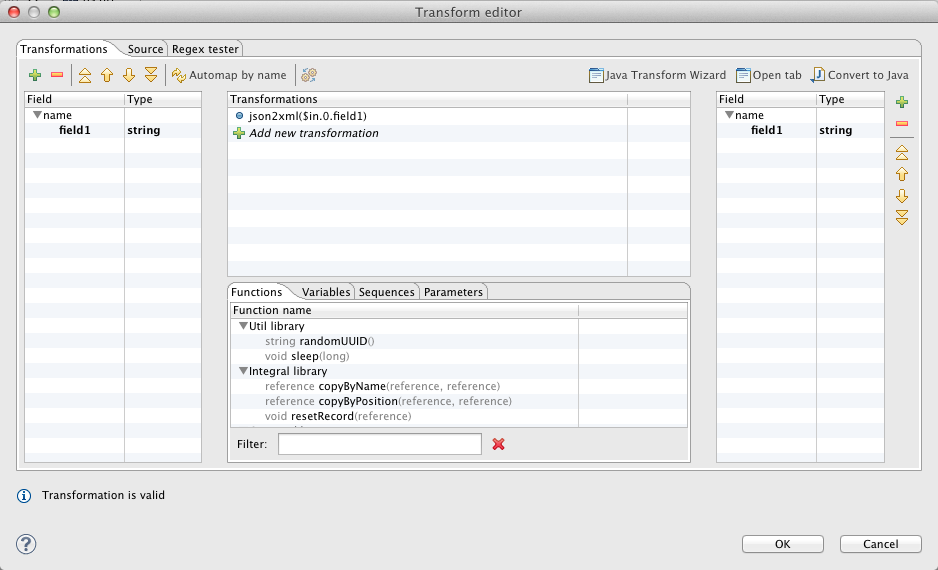
In the above transformation, the data is collected from the input port and is sent to the output port using the json2xml function. This function simply transforms the JSON input to the XML output.
XpathXMLReader
In the next step, the XpathXMLReader component assists in extracting the data from XML using Xpath references. In this example, the value element content is extracted and stored to the stories cloverfield, and the metric content is extracted to the name cloverfield. These fields are then mapped to the outgoing metadata for the component.
For more information, see CloudConnect - Working with metadata.
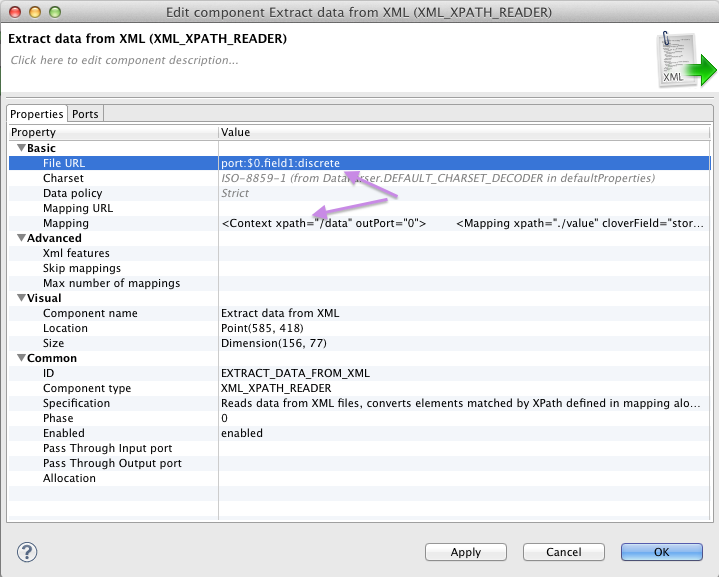
The two marked parameters in the above image need to be configured.
- File URL - specifies the XML file location. In this example, the XML file is coming from the incoming port.
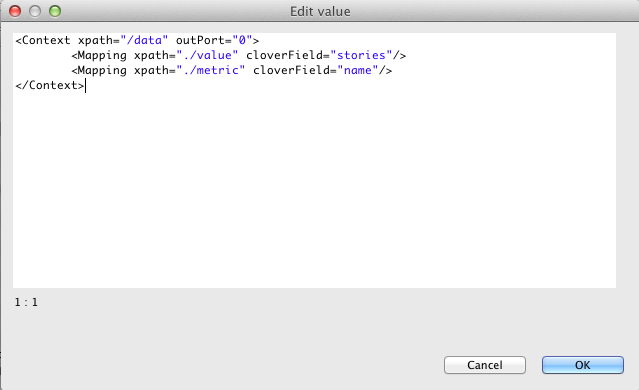
- The second parameter is Xpath mapping. Double-click the parameter to perform the configuration in the window displayed below:
Writing output data
The Final step is to write the data to a target. In this example, the data is written to a flat file, which we will be able to use to review the generated data.
In this case, you may use the Flexible Data writer to finalize the transformation. To check the results, secondary-click the white space in the graph area and select Run As… > 1 Graph (Locally). Check the results, which are generated in the /data/gooddata/page_stories.csv file.
name, stories
“page_stories”,”998.0”
Summary
This tutorial stepped through the process of configuring an example Facebook project to retrieve the count of stories from your specified Facebook account. The data is written to a local file.
In the next tutorial, you learn how to change the ETL graph so that it writes to a project in the GoodData platform. This step requires redirecting the output of the graph to point to a GoodData project and to build a logical data model, which is used in the platform to store the ETL data into the project.
For more information, see Building an LDM for Facebook Example Project.