Creating the Department Dataset
CloudConnect is a legacy tool and will be discontinued. We recommend that to prepare your data you use the GoodData data pipeline as described in Data Preparation and Distribution. For data modeling, see Data Modeling in GoodData to learn how to work with Logical Data Modeler.
Now, you can repeat this process to extract the Department and Department ID fields from the Payments dataset. Extracting these fields creates the 1:many relationship between department and employee.
One employee cannot be paid between multiple departments in this model.
This process is identical to the one that was done for the Employees dataset, except for the following:
- The name of the new dataset is Departments.
- Move the Department ID attribute from the Payments dataset to the Departments dataset. The Department label is automatically moved for you.
- Build a relation between the Departments dataset to the Employees dataset.
- For this dataset, Department ID needs to be configured to be the connection point.
Steps:
In the Model Editor pane, deselect any selected objects.
In the Details sidebar, click Add Dataset.
For the title of the dataset, enter Departments.
Click the down arrows in the Departments dataset.
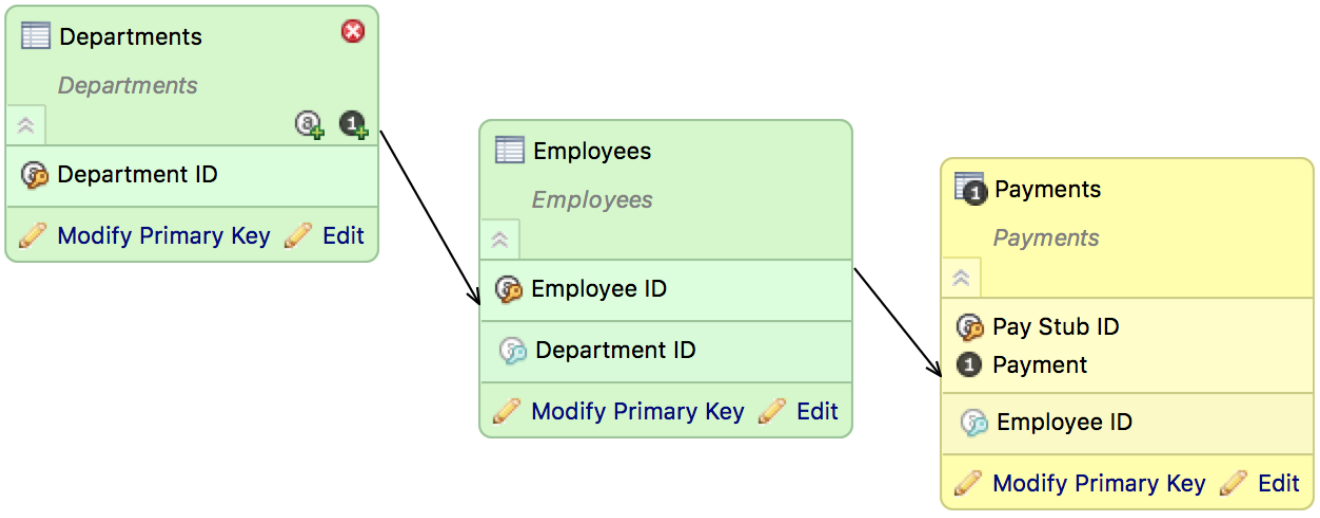
From the Departments dataset, click and drag the Department ID attribute to a location between the two horizontal bars in the Departments dataset. The Department ID attribute is moved, as well as the underlying Department label. The Departments dataset should look like the following.
 By dragging the attribute, you preserve the relationships to any metrics or reports that already reference it. If you delete it and then recreate it, those relationships are lost, and the project objects are removed. See Moving Attributes in CloudConnect Modeler.
Add a relation between the Departments dataset and the Employees dataset. With nothing selected in the Model Editor pane, hover the mouse over the Departments dataset. Click and drag the arrow that appears to connect the dataset to the Employees dataset. The relation is created.
In the Departments dataset, click Edit. In the Attributes and Facts window, change the Department ID type to be a connection point. Leave the default values for Display by and Sort by fields. The logical data model should now look like the following:
Save your model (but do not publish it to the server yet).