Defining Custom Sorting Order for an Attribute
CloudConnect is a legacy tool and will be discontinued. We recommend that to prepare your data you use the GoodData data pipeline as described in Data Preparation and Distribution. For data modeling, see Data Modeling in GoodData to learn how to work with Logical Data Modeler.
You can define custom sort orders on an attribute through changes to the logical data model.
Sorting data by alphabet or numeric value is not always the most effective way, particularly when data has an inherent order that is understood by users. For example, suppose your CRM system or support ticket system contains the following workflow stages:
- New
- Open
- Pending
- Closed
These items have an inherent, obvious order, which is not alphabetical. By default, GoodData sorts them as shown in the following example:

In the following example data.csv file, the status values are bucketed according to age in days, creating an implicit ordering if you sort by the Age fact value:
Status,Age
New,140
Open,182
Pending,198
Closed,270
The intuitive way to manage this kind of sorting is to drag rows in the report to sort the data Excel-style. However, this method is not a recommended practice in an analytical system; data can change, new statuses can emerge, and other changes can cause you to revisit all of your manual sorting.
Instead, the appropriate place to solve this sorting issue is in the data layer. In this case, you can insert another column in the dataset called Status Ordering. The data.csv should look like the following:
Status,Status Ordering,Age
New,1,140
Open,2,182
Pending,3,198
Closed,4,270
In CloudConnect, this low-impact change can be performed by completing the following steps:
Steps:
Open the CloudConnect project containing the data model that you want to modify.
Open the
*.ldmfile in the project.In the dataset, select Edit.
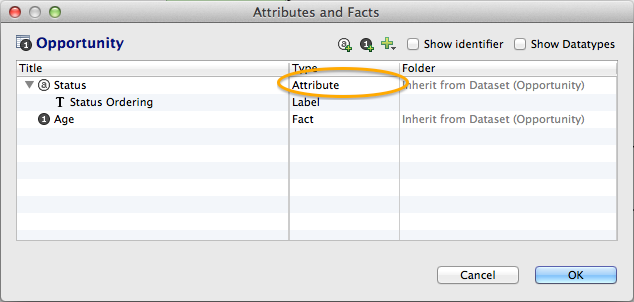
In the Attributes and Facts window, click the Show Datatypes checkbox.
To add the Status Ordering field, click the Plus (+) icon at the top of the window. Select Add Label For > Status. Label this new fact
Status Ordering.For the Status Ordering label, click the Datatype column. Click the Browse… button.
In the Select Datatype window, click the Integer (INT) radio button.
To set up correct sorting, you must specify the INT datatype for the label. Otherwise, sorting is based on alphabetical principles, so the value12is sorted before2, for example.
Verify that Sorting Order has been set to be an Integer (INT) value. Your dataset should look like the following example:

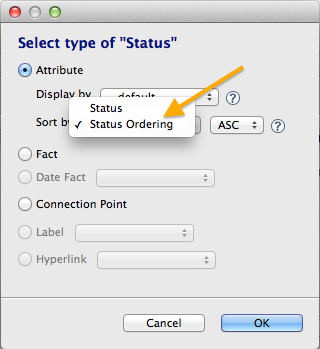
Click on the Status attribute detail:
Select the sorting Label to Status Ordering:
Save the file.
In the Server Explorer tab, verify that the working project is the appropriate GoodData project.
To publish the updated logical data model to the current working GoodData project, click Publish model to server.
This change should be a low-impact change.
At this point, the Status attribute sorts naturally as expected with GoodData sorting all rows according to the Status Ordering column in your source data:
