Drilling In
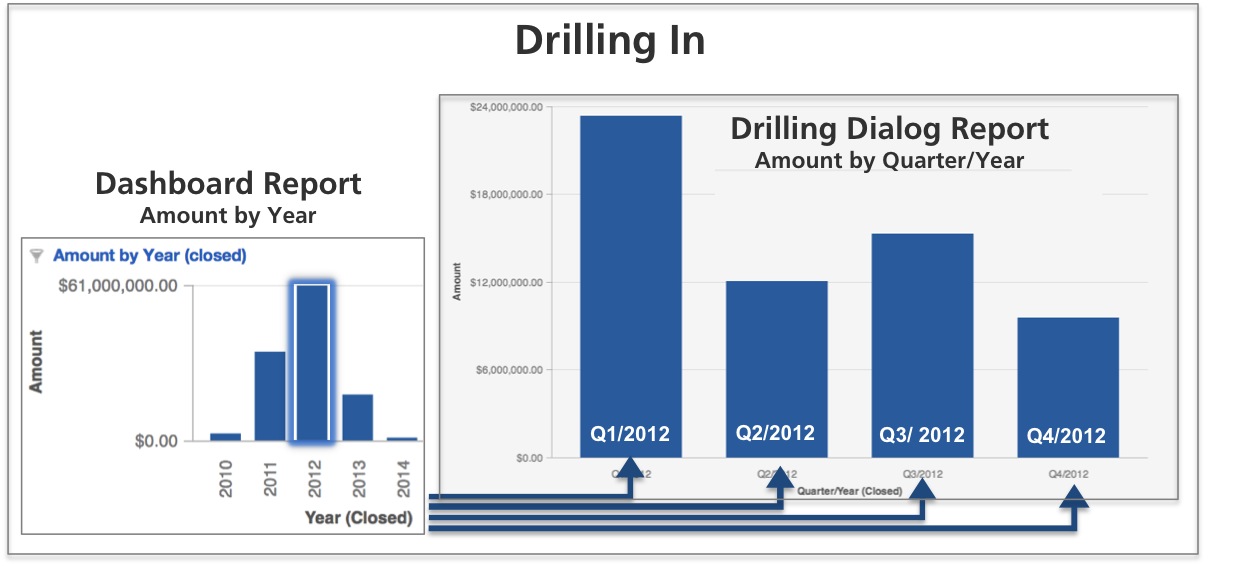
Similar to Drilling Down, drilling in is triggered when a user selects a metric value, instead of an attribute value. This selection can include selecting a bar on a bar chart, a plotted point on a line chart, or a numerical value within a table.
The Drill In example below is identical to the Drilling Down example. Note that the drill in is initiated by selecting a metric value.
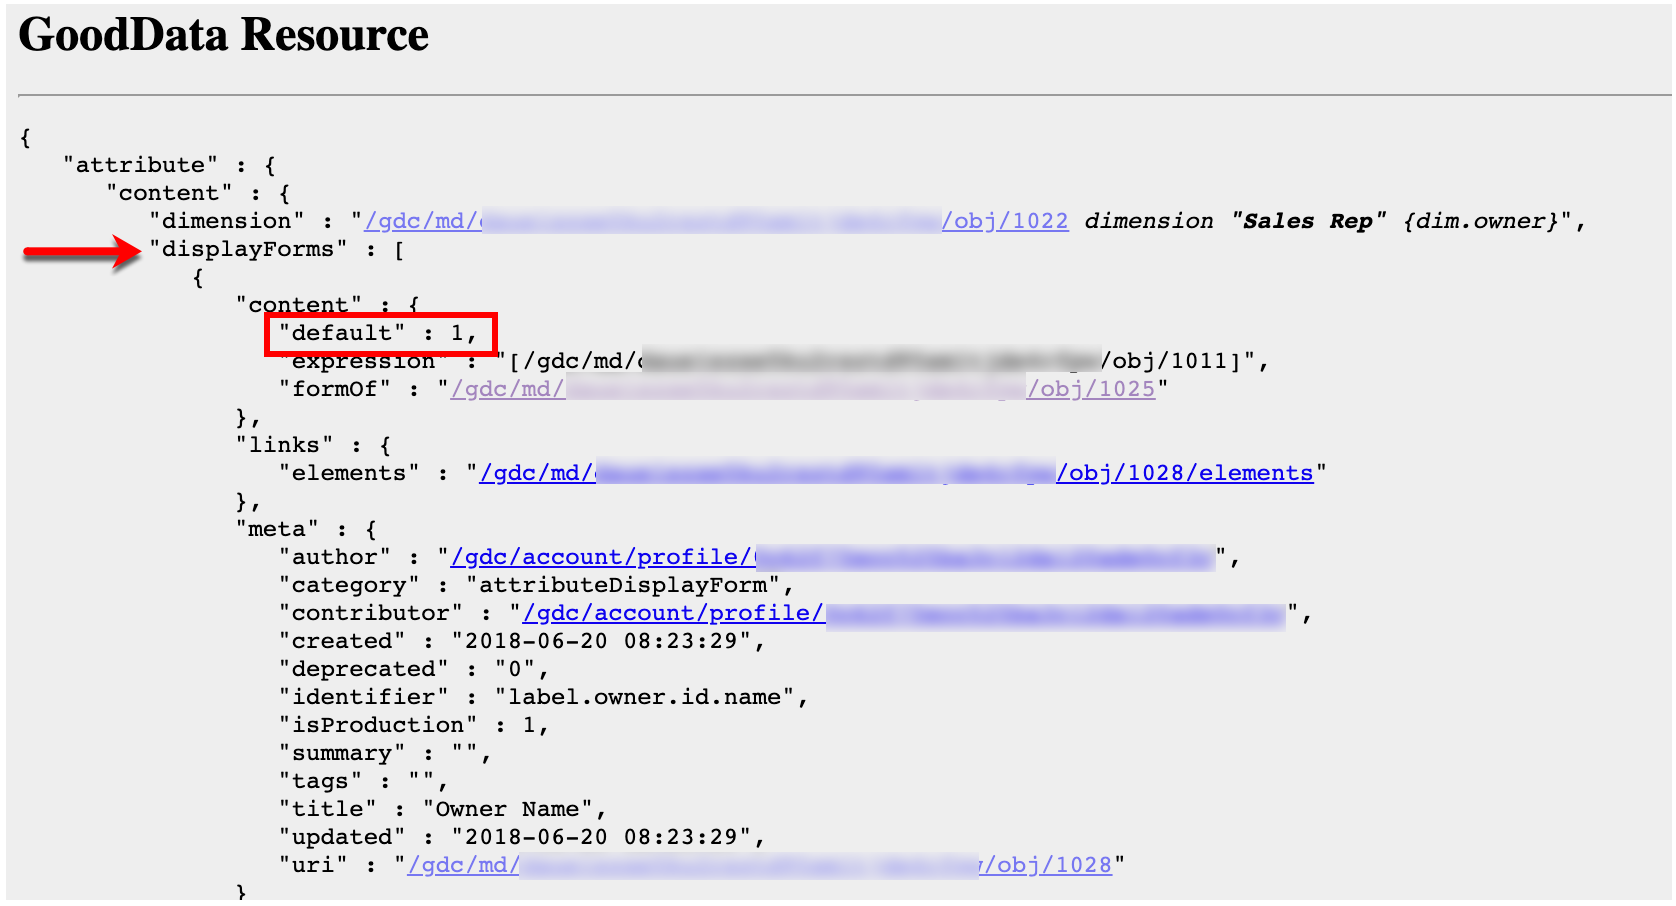
If the attribute has multiple labels defined, the target report always displays the default label.
To verify the labels defined, click the attribute name in Manage → Attributes.
To see which label is default:
- Go to the Gray Pages (see Access the Gray Pages for a Workspace).
- Click metadata → query → attributes. You can access the query page also via GoodData Extension Tool for Chrome.
- Click the desired attribute name.
- In the displayForms section, find the label with
defaultset to1.
Defining Local Drill in Paths
Like drilling down, you can define drilling in locally for a given dashboard report. And while you cannot define drill-in paths globally for a given metric, you can add them to a report’s definition so that they are available wherever that report may be used in a given workspace.
Steps:
- While on your dashboard in edit mode, select a dashboard report, and click the Gear icon.
- From the Drilling tab, click + Add Drilling or Add more… to add a new drill path.
- Under When I click on, click the drop-down, and select the metric of interest. Click Select. Values of the selected metric will be the links that allow dashboard viewers to initiate your drill-in path.
- Under Show me, click the drop-down.
- From the Attributes tab, select which new attribute will be used to break down the original report’s metric. Click Select.
- After checking your new drill-in settings, click Apply. The dialog closes. The drill path is added.
- Click Save. The dashboard is saved.
Defining Drill in Paths at the Report Level
While you cannot define drill-in paths globally for a given metric, you can add them to a report’s definition so that they are available wherever that report may be used in a given workspace.
Steps:
- Click Reports on the toolbar. The report page opens.
- Select the report from the Reports directory. The report opens.
- Click Show Configuration. The configuration pane opens.
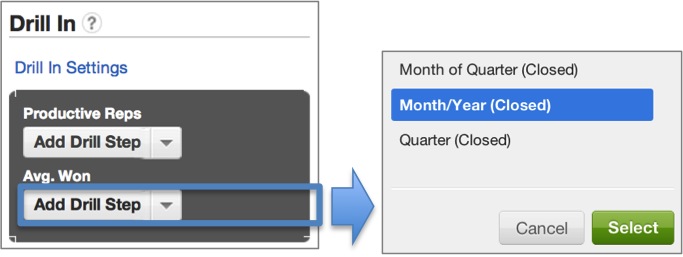
- Under Drill In, click Drill In Settings.
- Locate the metric of interest. From its drop-down, select the attribute to break down the metric.
- Click Select. The drill-in settings are applied.
- Click Save. The report is saved.
VIDEO - How to Set Drill-in Paths to Your Report Metrics
Defining a Global Drill In
Define drill-in paths in a report’s definition, available wherever that report may be used in a given workspace.
Steps:
- Click Reports on the toolbar. The report page opens.
- Select the report from the Reports directory. The report opens.
- Click Show Configuration. The configuration pane opens.
- Under Drill In, click Drill In Settings.
- Locate the metric of interest. From its drop-down, select the attribute to break down the metric.
- Click Select. The drill-in settings are applied.
- Click Save. The report is saved.


