What Pane - Adding Metrics to Reports
The What pane displays all of your workspace’s metrics that you can use in your report (for details, see Creating New Reports in the Report Editor).
By default, metrics are organized by folder, but you can also use the View by drop-down to organize your metrics by tag.
In some cases, metrics are displayed in two categories:
- Global Metrics
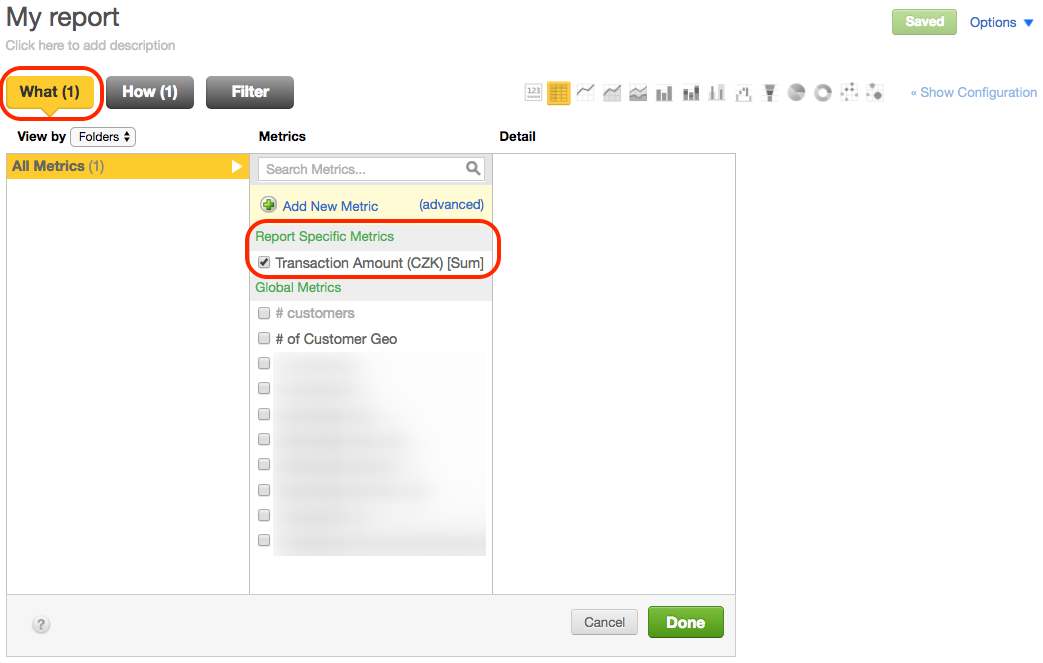
- Report Specific Metrics

Editing a report-specific metric within another metric does not propagate all changes and can lead to unexpected behavior. We recommend that you do not use report-specific metrics within other metrics.
Global metrics are available for all of the workspace’s reports, while report-specific metrics can only be used for the current report. The decision to keep a metric report-specific belongs to the metric author, who can always opt to globalize a local metric.
After a metric has been added to the global metrics, it can be edited only through the Manage page.
In the case where a user deletes a global metric that is being used in one or more report, the metric is removed from the list of global metrics but remains as a local metric within the reports in which it already appears.
Metric Details
The details of a selected metric appear in the right-most column. Details include the metric description (determined by the metric author), the MAQL definition that is used to select data relevant to the metric you have selected, and the current metric number format.
The View Detail button at the bottom of the details pane links to the Manage Page, where you can make global changes to the metric – affecting its settings wherever it appears in the workspace.
Simple Metric Editor - Adding New Metrics
You can create new metrics from the metrics column in the What pane. Click Add New Metric to access the Simple Metric Editor, or click (advanced) to access the Metric Editor dialog and create a metric using MAQL - Analytical Query Language.
 leads to the Custom Metric Editor")
When you create or save a copy of a metric, report, or dashboard, it is unlocked for editing and visible only to you at first. When it is ready to share with other users in the workspace, you must publish the object.
Clicking Add New Metric in the metrics column opens a Simple Metric Editor in the right-most column of the What pane.
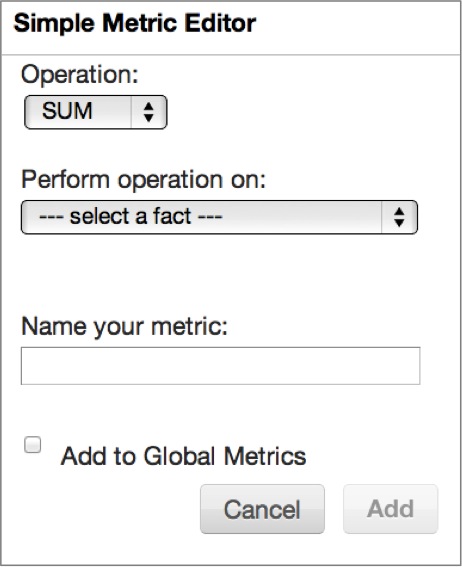
Begin by selecting which operation will aggregate data facts to form your new metric:
- SUM – the sum total of all of a fact’s values
- MAX – the single largest fact value among a fact’s set of values
- MIN – the single smallest fact value among a fact’s set of values
- AVG – the mean of all of a fact’s values
- COUNT – number of unique values of a specified attribute
- RUNSUM – running (cumulative) sum of report values
- RUNMIN – running (cumulative) minimum of report values
- RUNMAX – running (cumulative) maximum of report values
- RUNAVG – running (cumulative) mean of report values
- MEDIAN – the middle value of a set of values
Running total operations like RUNSUM, RUNMAX, RUNMIN, and RUNAVG are useful for creating metrics that, when broken down by one or more attributes in a report, display values that represent the cumulative total of the current and all prior metric values in the report. An example of a running sum is shown in the figure below.
, broken down by the month/year attribute")
Perform operation on: Choose a fact to aggregate.
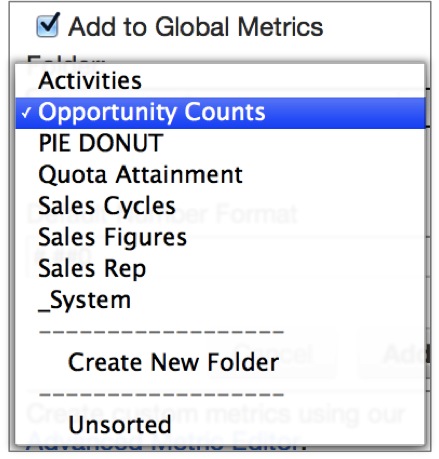
Add to Global Metrics: If you’d like your metric to be available for use in other reports within your workspace, select Add to Global Metrics. Once you select to make a metric global, you can use the dropdown that appears to add the metric to a metric folder of your choice, or create a new metric folder.
Administrators can also reorganize metrics into folders from the Manage Page.
After a metric has been added to the global metrics, it can be edited only through the Manage page.
If you choose to keep your metric local it will only be available for use on the current report. For more information, see Get Started with Using MAQL to Write Metrics.
Once you have added your new metric, the What button is updated to reflect the total number of metrics in your report.

Metric Wizards and Custom Metric Editor
Advanced Metric Editor features three Metric Wizards and the Custom Metric Editor.
Metric Wizards allow you to quickly create metrics that involve performing an operation on a preexisting metric. Each wizard can be accessed from the Advanced Metric Editor dialog:
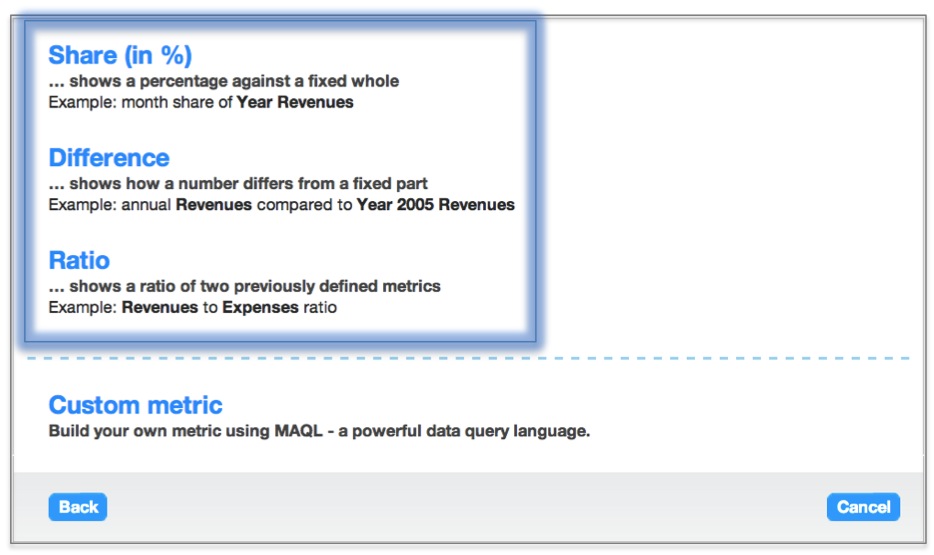
Percentage Share Metric Wizard
The Percentage Share Metric Wizard allows you to create a new metric that uses a percentage to show the relationship of some part to a whole.
A share metric requires the following definitions:
- A metric (such as Sales) to serve as the “part”
- An attribute (such as Year) by which to aggregate this metric, to serve as the “whole”
Difference Metric Wizard
Use the Difference Metric Wizard to create a new metric that calculates the difference between an aggregated value and a fixed number. For example, you can create a metric that calculates the difference between year-to-date sales and a metric that represents the sales quota.
A difference metric requires the following definitions:
- A metric (such as Year-to-date Sales) to serve as the value that will be subtracted
- An attribute by which this metric will be aggregated (such as 2005) to serve as the fixed value that the above metric will be subtracted from
Ratio Metric Wizard
You can relate two metrics to one another with the Ratio Metric Wizard. For example, you can create a metric that calculates a Revenue to Expense ratio.
A ratio metric requires the following definitions:
- The first metric to be used in your ratio (for example, Revenues)
- The second metric to be used in your ratio (for example, Expenses)
Custom Metric Editor
The Custom Metric Editor provides a graphical user interface that guides you through creating your own metrics in MAQL - Analytical Query Language .
Report-Specific Metrics vs Global Metrics
When metrics are created as part of creating a report, you can define the metric to be local to the report or available globally.
Report-specific metrics can only be used in the report in which they were created.
Global metrics are available to all Editors and Administrators in the workspace where they were created.
When you are creating a new metric, you should first create it as a local metric. You can test it extensively without impacting users. When you are satisfied, you can promote it to a global metric through the the Report Editor (see further in this topic).
However, after you promote a metric to be a global metric, you cannot move it back to being a local metric. Instead, create a copy of the local metric and work with that new one. You can also try reviewing the affected reports through the Metrics page.
Promote a Report-Specific Metric to be a Global Metric
Steps:
Click Reports on the toolbar, and open the report where the report-specific metric is used.
Click What. The metric is listed in the middle column under Report Specific Metrics.
Click the metric to open its details in the right column, and click Edit. The Metric Editor opens displaying the metric details.
Select the Add to Global Metrics check box, set the folder to store the metric in, and click Save.
The metric is now listed under Global Metrics.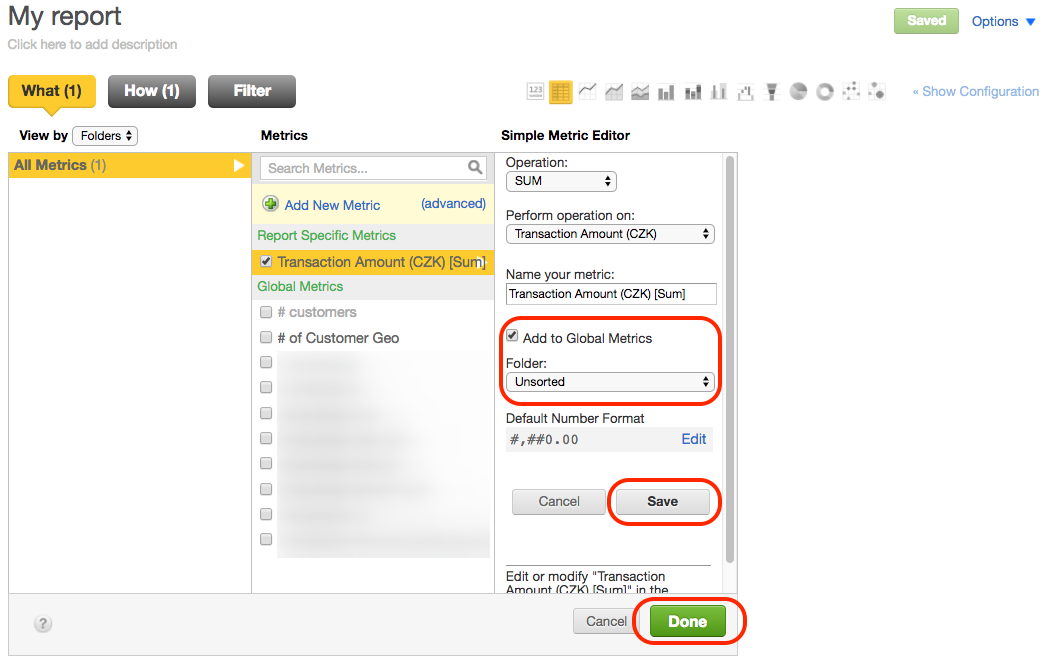
Click Done to close the report editor.
Click Save to save the report and the changes that you have made in the metric. The metric is now global, and you can see it in the list of metrics under Manage. You can use this metric in other reports.