You are viewing our older product's guide. Click here for the documentation of GoodData Cloud, our latest and most advanced product.
Filter for Dates
Date filters allow users to filter for a continuous time period of interest. While end users are able to modify the default time period established by an editor, they are not able to alter the fundamental time granularity (for example, day, week, month, quarter, year).
By default, the calendar in a date filter displays Sunday as the first day of the week. You can change it to Monday. See Set First Day of Week in Date Filters to Monday.
Date filters only support continuous, floating time periods, which are defined in relation to the present time. To allow users to select discrete time periods, see Filter for Attributes.
Steps:
- While on your dashboard in edit mode, click the Filter menu on the top, and click Date.
- Search for a date dimension, and select its name from the list beneath the search bar.
- Click Next. The dialog for configuring the filter opens.
- Choose the date granularity that will serve as the filter’s unit of measure: Day, Week, Month, Quarter, or Year.
- Determine a default time period, or use the Advanced configurations for greater flexibility.
- Click Apply. The filter is added to the dashboard.
- To configure the filter further, click the Gear icon that appears above the filter. The filter’s configuration opens.
- (Optional) Under Selection, determine how you want the date picker to be shown in this filter for the dashboard users. By default, the filter lets you either select the date using the calendar icon, or manually enter the dates in the “From” and “To” fields.
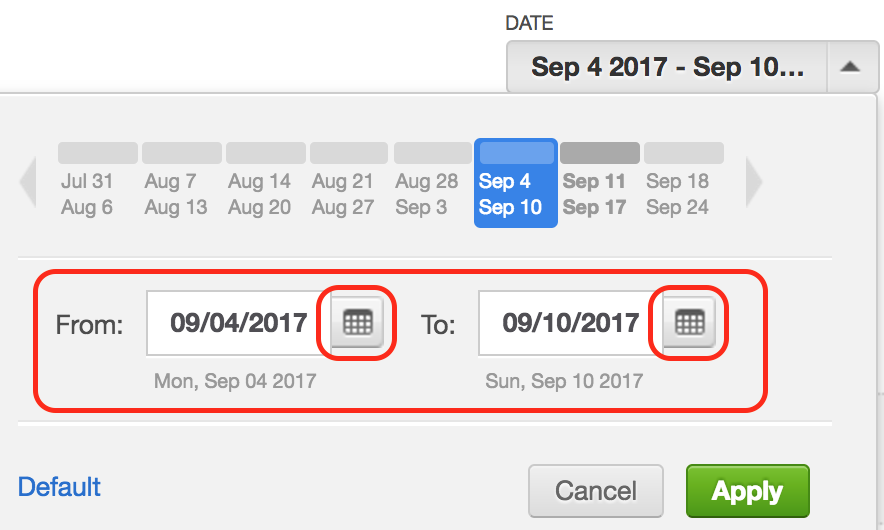
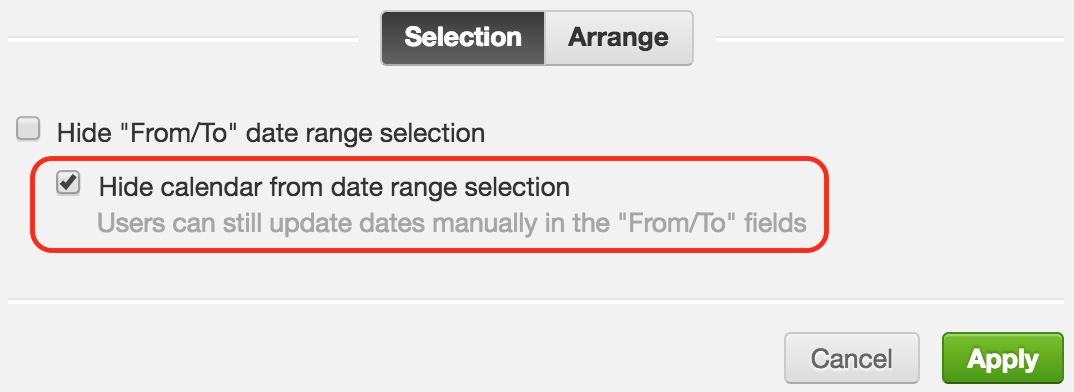
- To hide only the calendar icon, select the option Hide calendar from date range selection. The users can enter the dates in the “From” and “To” fields manually.==>

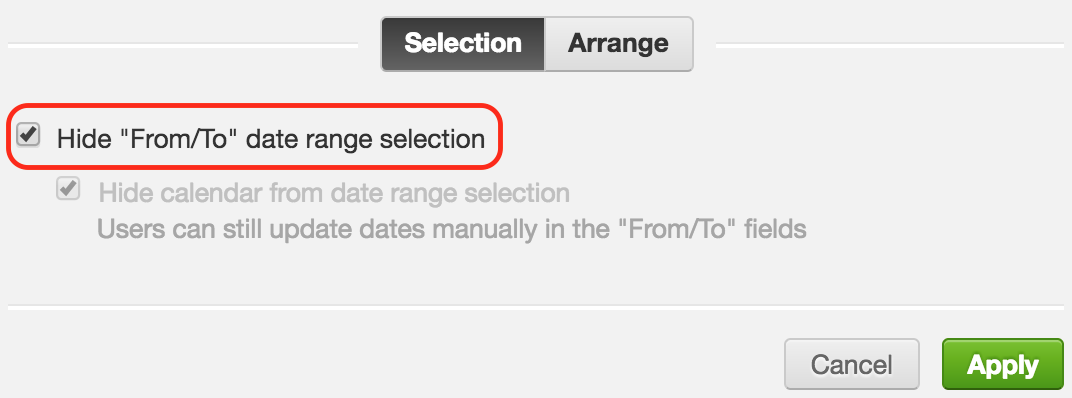
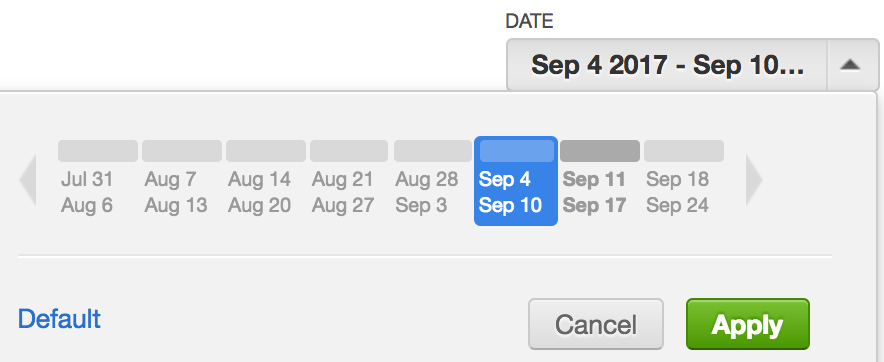
- To hide the whole date range selection, select the option Hide “From/To” date range selection. Users can select the range only from the scrolling timeline. ==>
- To hide only the calendar icon, select the option Hide calendar from date range selection. The users can enter the dates in the “From” and “To” fields manually.
- (Optional) Click Arrange, and rearrange the filter with respect to other dashboard objects it may be overlapping.
- Click Apply. The filter is saved.
- Click Save. The dashboard is saved.