Dashboard Filters
Dashboard filters allow you to narrow the scope of one or more of the reports on the active dashboard tab. By selecting values in the filter, you can change the values displayed in the report without changing the report definitions.
If your dashboard includes the same type of attribute filter in more than one tab, the values that you select in the filter in one tab are also automatically selected in the filter in other tabs. For example, if both Tab A and Tab B have a filter for City, the cities that you select in Tab A are also selected in Tab B, and vice versa. This is true for all attribute filters, including Date filters.
You can select the attribute values or time ranges that you want to display in reports to which the filter is assigned.
Dashboard filters can affect many dashboard reports at once. Use the drop-down icon beside a report’s title to open the report’s info panel, where you can verify which dashboard filters are currently affecting the selected report. See Report Info Panel.
Editors and Administrators can edit a dashboard to manually select the filters that they want to apply to a given report.
Editors and Administrators can enable dashboard users to save their current settings as a Saved View. Saved Views are enabled on a per-dashboard basis, and all users of the dashboard can created Saved Views.
Date Filters
Date filters let you select a single date or a range of dates. Your selections recompute the data that appears in any report in the dashboard that is associated with the date filter. You can configure date filters to display data ranging from a single day, to weeks, months, quarters, or years.
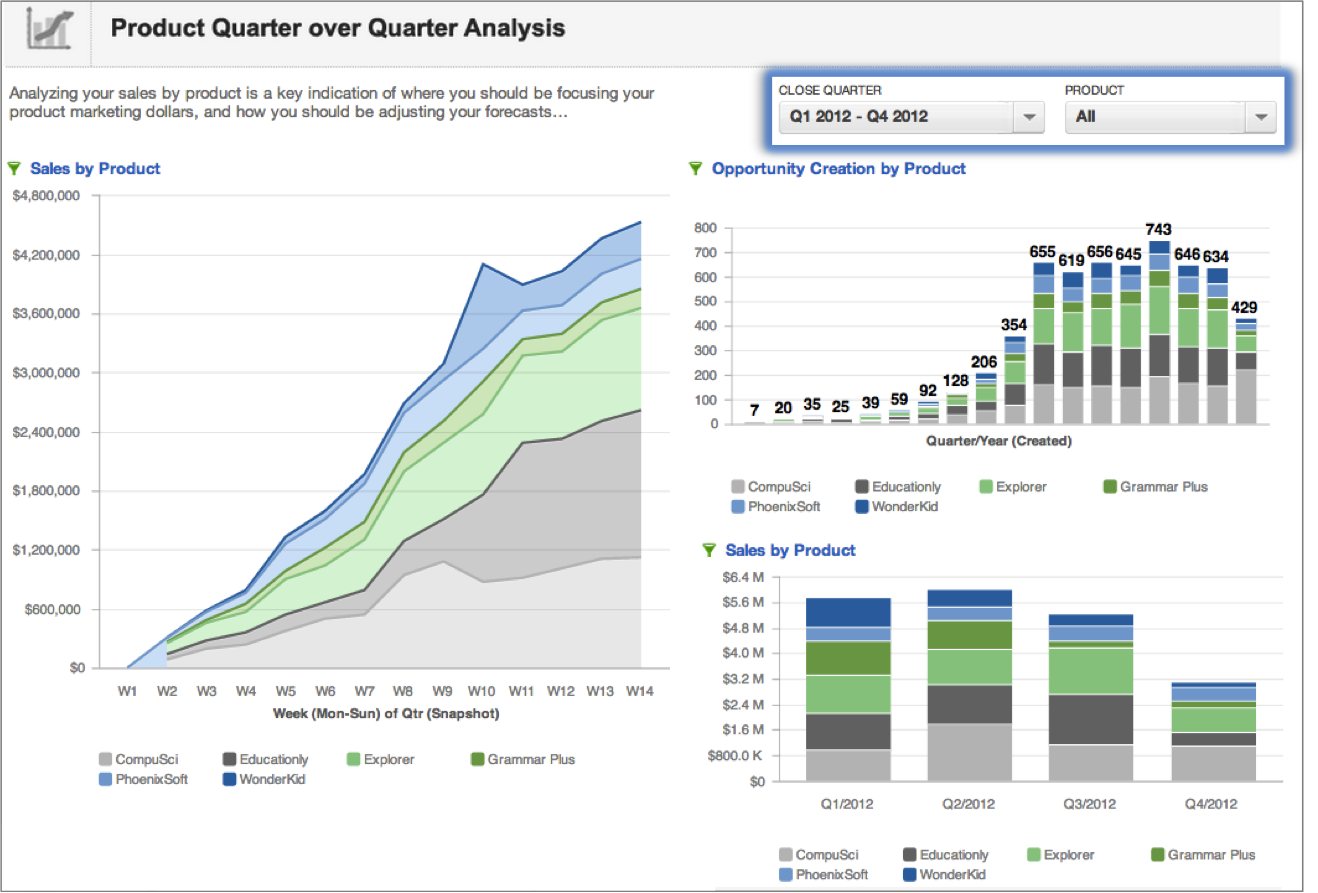
In the following example, the current settings of the CLOSE QUARTER date filter ensure that all of the dashboard’s reports show only close dates between Q1 2012 and Q4 2012, inclusive. All data associated with close dates outside of this range is excluded.
- Single-day date filter
- Date range filter
Select a single date filter
You can select a single date in either a single-date or a multiple-date filter.
- To select a date in a single-day date filter, set the date, and then click Apply.
- Though a multiple-day date filter is typically used to select a range of dates, you can still select a single date in this type of filter by specifying the same date in both the From and To fields. Then click Apply.
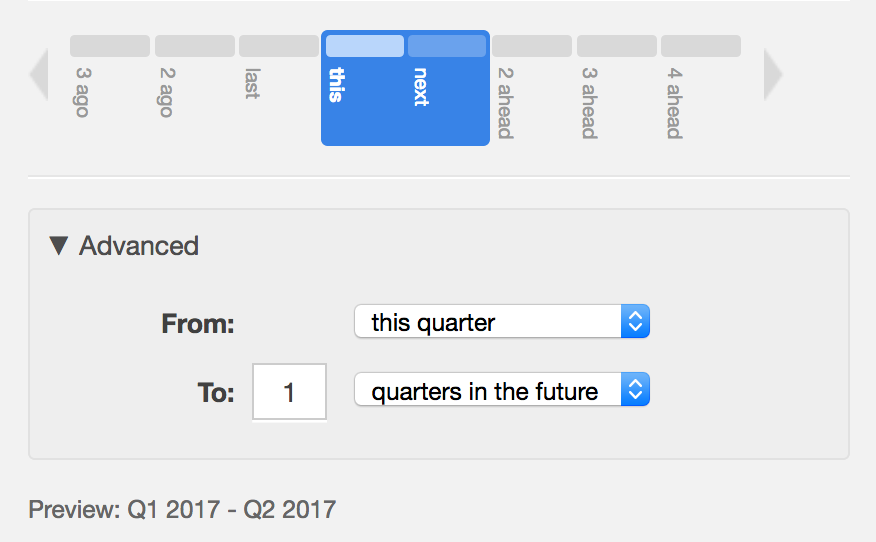
Select a range of dates
Use the scrolling timeline to select a single date block or a range of date blocks on which to filter dashboard data.
- To select a single date block, click it and then click Apply.
- Use the arrows to scroll forward and backward.
- To select a continuous date range, do any of the following:
- Click the start of the date range, and then drag to the end of the date range.
- Click the start of the date range, and then SHIFT + click the end of the date range.
- Click the start of the date range, and then drag across the timeline until your cursor is hovering over the forward or back arrow.
The date range in the From and To date fields changes dynamically as you select a date range on the timeline.
Entering dates directly in the date fields may cause problems with custom calendars. This method is not recommended. Use the scrolling timeline instead.
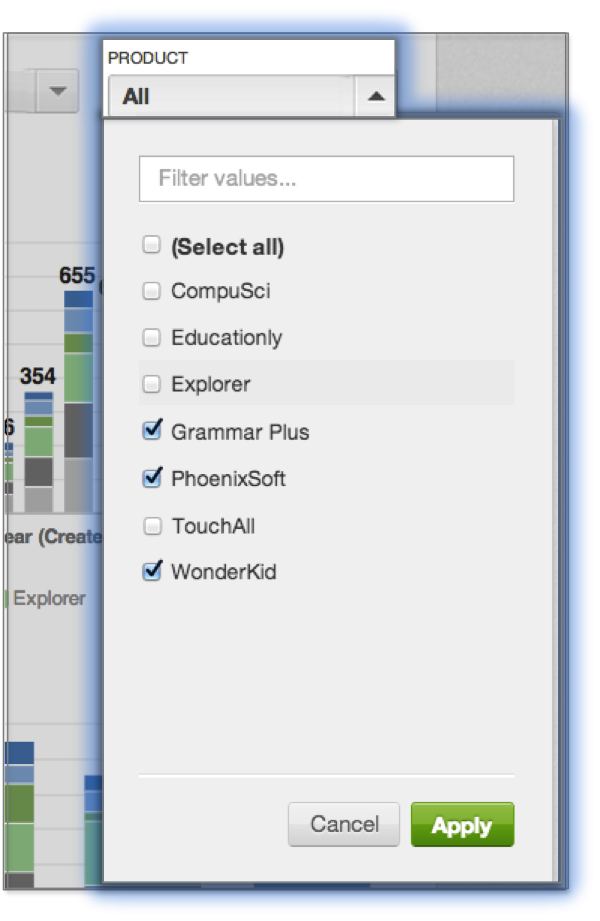
Value Filters
Value filters let you filter the data in the associated reports based on the value or values selected in the report. In Edit mode, you can specify filters for either attribute or variable values. In the previous example, you could use the PRODUCT filter to narrow the displayed data to one or more products of interest.
After you apply a filter, only data associated with the selected products is displayed.
Cascading Filters
- When United States is selected in a Country parent filter, only U.S. states appear in the State/Province child filter. States/provinces in other countries are no longer visible.
- When New York is selected in the State/Province filter, only cities in New York appear as filterable values in the City filter menu. All cities outside of New York are excluded.
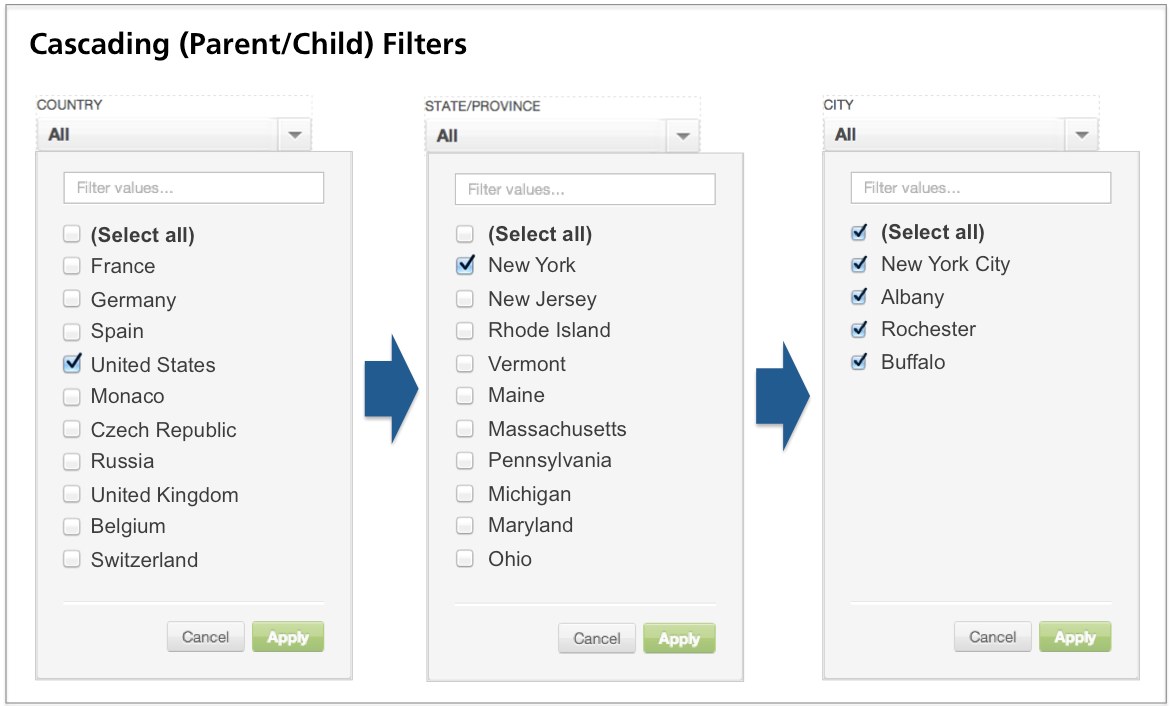
By default, child filter drop-down menus contain only the values that are available based on the parent filter. To remove the cascade, click Show All. Now all possible values are displayed in the child filter.
Also in this section: